Send Automated Emails from Google Sheets with Gmail
The following guide will walk you through how to send personalized emails from a Google Sheet using your Gmail account. You can also send automated email merges through Amazon SES, Sparkpost, Resend or SendGrid services.
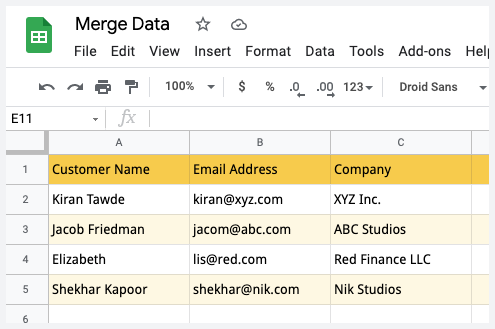
For this example, we have a simple Google Sheet with our customer's name, email address, and company name. We will use this data in Google Sheets to send a personalized email to each customer.
The email message will greet the customer by their first name, it will have a QR code that points to your company website and a PDF brochure that will be attached from Google Drive.
Connect Google Sheets to Gmail
Install Document Studio and open your Google Sheet to launch the add-on. You may either open an existing Google Sheet or create a new sheet and add data manually.
Inside the Document Studio app, give your workflow a name, like Mail merge and select the specific worksheet in your Google Spreadsheet that contains the customer data. Click on Continue to move to the conditions page.
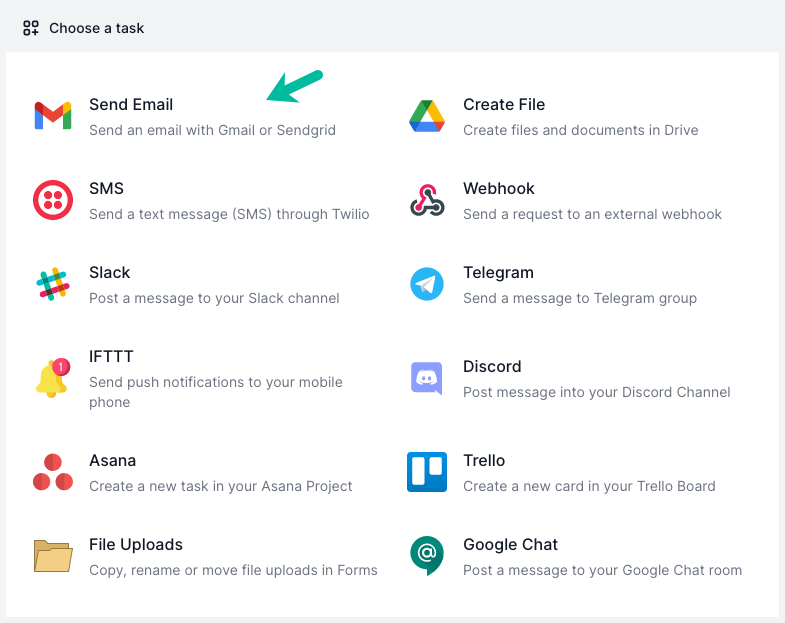
On the Conditions pane, specify if you want the email workflow to run only if the row data satisfies certain conditions. Click Continue and, on the next screen, choose Send Email from the list of available tasks.
Configure Email Message
Choose Gmail from the list of available email sending services. Next, choose the email address that you want to send the email from.
Since the email addresses are different for each row, you can choose the email column name from the Send Email to dropdown. You may also specify a list of TO, CC and BCC recipients in the respective input boxes.
Provide a subject and body for the email. You can use {{variables}} in the subject and body for personalized emails.
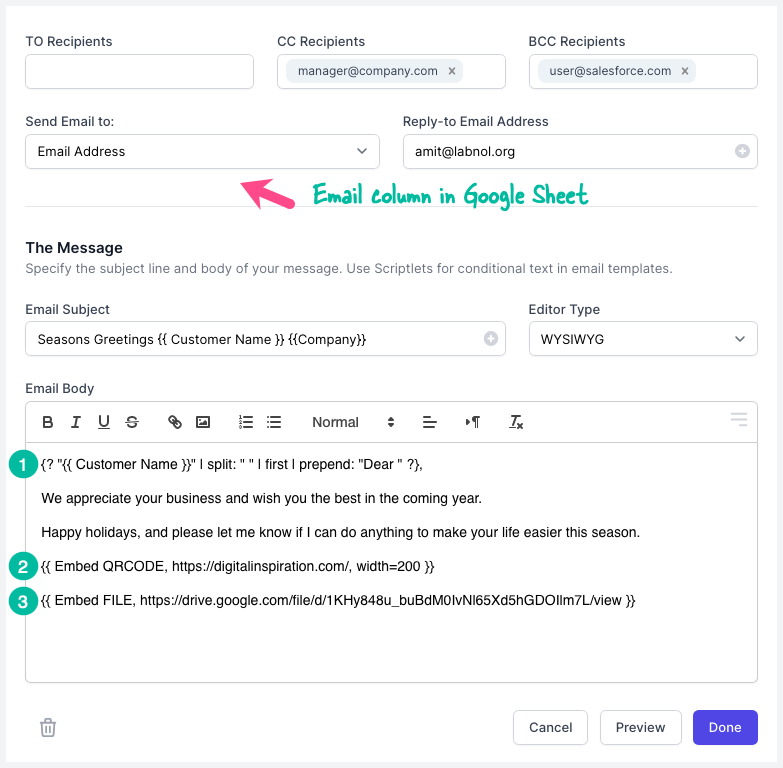
In the email body, we have:
- Scriptlets to greet a person by their first name.
- Include an inline QR Code image in the email body.
- Add a file attachment from Google Drive using the Embed File syntax.
The Script takes the variable customer name, splits the value by spaces and returns the first item of the array which is the first name. It then prepends the text Dear and appends the text , to the first name.
{? {{ Customer Name }} | split: " " | first | prepend: "Dear " ?}
Preview and Save
Click the Preview button and you should see a sample email sent through Gmail to your own email address. Document Studio will take the data from the second row of the selected Google Sheet and use it to personalize the email message.
Important: If you don't find the email in your inbox, switch to the Sent Mail folder in your Gmail account.
Click Done to locally apply your changes. On the next screen, turn on the Run workflow every hour option and the workflow will run in the background. Click the Save button and the workflow will now appear in the workflow dashboard where you can edit, delete or manually run the workflow.