How to Mail Merge with Gmail and Google Docs
With Document Studio, you can send personalized emails from a Google Sheet to multiple recipients. Your can write your message template in a Google Docs document and add mail merge fields that are individualized for each email recipient. The app will automatically fill in the variable fields with data from Google Sheets and sends the emails as if each message was sent individually.
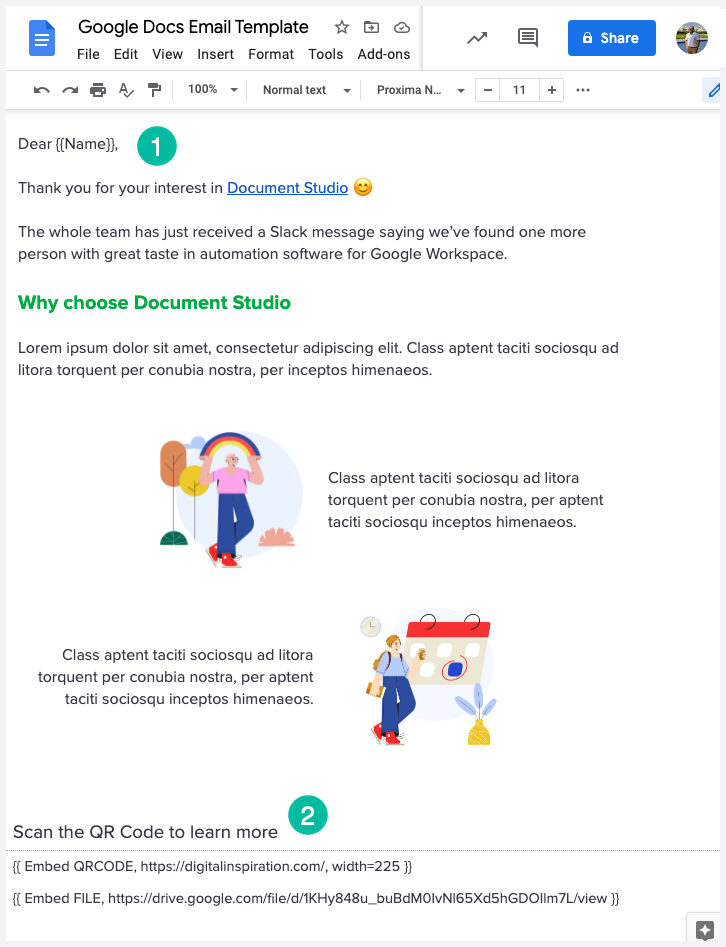
For this example, we have a Google Sheet that stores the name and email address of our mailing list and we have a Google Docs document that contains the message template.
Create Document Template in Google Docs
The document template includes merge field for the recipient's name, an embed tag to insert a QR code and another embed tag to attach a file from Google Drive in the email.

If you would like to create a professional email template inside Google Docs, it is recommended that you create a table and add images, headings and other elements inside the table. The border of the table should be set to white (transparent) and the page margins should be set to 0.
Prepare Merge Data in Google Sheets
Install Document Studio and open your Google Sheet to launch the add-on. You may either open an existing sheet or create a new sheet and add data manually to the sheet.
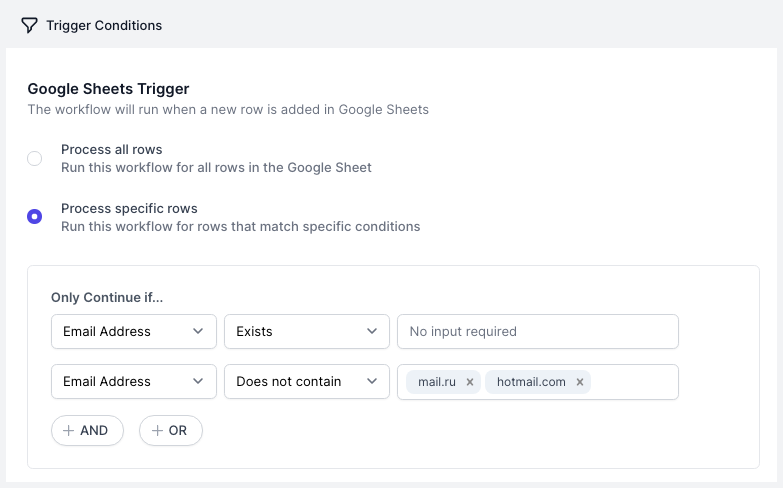
Create a new workflow, give a descriptive name and then click on Continue to move to the conditions page. Next, we add certain conditions as the mail merge should run only if an email addresses exists for a row and that it doesn't lead to any spam domains.

Configure Mail Merge
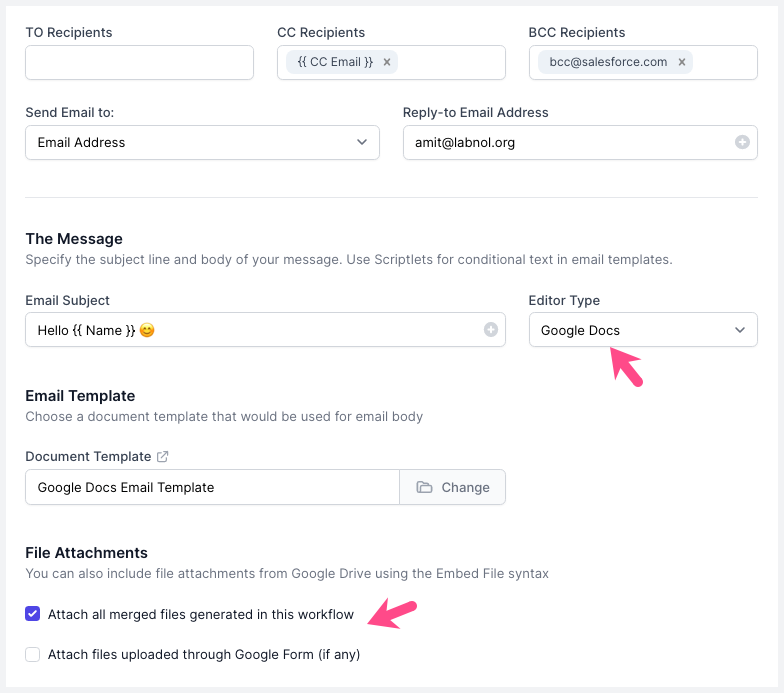
Choose Send Email from the list of available tasks and select Gmail as the email sending service. Choose Google Docs as the editor type and select the document from Google Drive that will be used as the email template.
If you have multi-step workflow that generates documents as well, you may configure mail merge to automatically attached the merged files in the email as attachments.

Click on the Preview button send a test email to yourself. Document Studio will take the data from the second row of the selected Google Sheet and send you an email message. Click Done to locally apply your changes.
Click on Continue to proceed to the triggers screen. If you want the workflow to be automatically triggered every hour, so that any new rows added in that duration are processed automatically, you can choose the option Run workflow every hour and then click on the Save button.
The workflow will also appear in the workflow dashboard where you can edit, delete or manually run the workflow.
Email Message from Google Docs
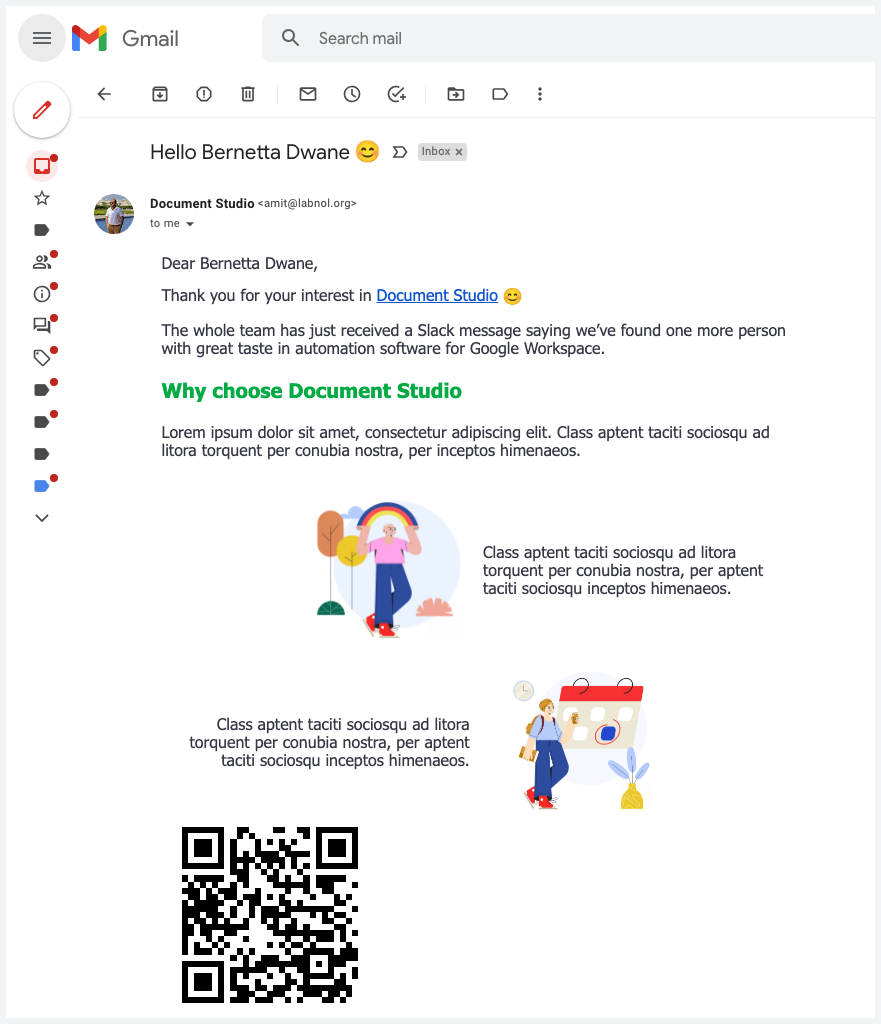
Here's a sample email message generated from the Google Docs template with the QR Code.
