Auto-Generate Social Media Images from Data in Google Sheets
You can use Document Studio to create dynamic social media images that are unique and display data from Google Sheets. You can generate multiple Facebook covers, personalized Twitter graphics and Instagram posts for your employees, WhatsApp updates, Google Classroom banners for class students, and more with Document Studio.

Create Google Slides Template
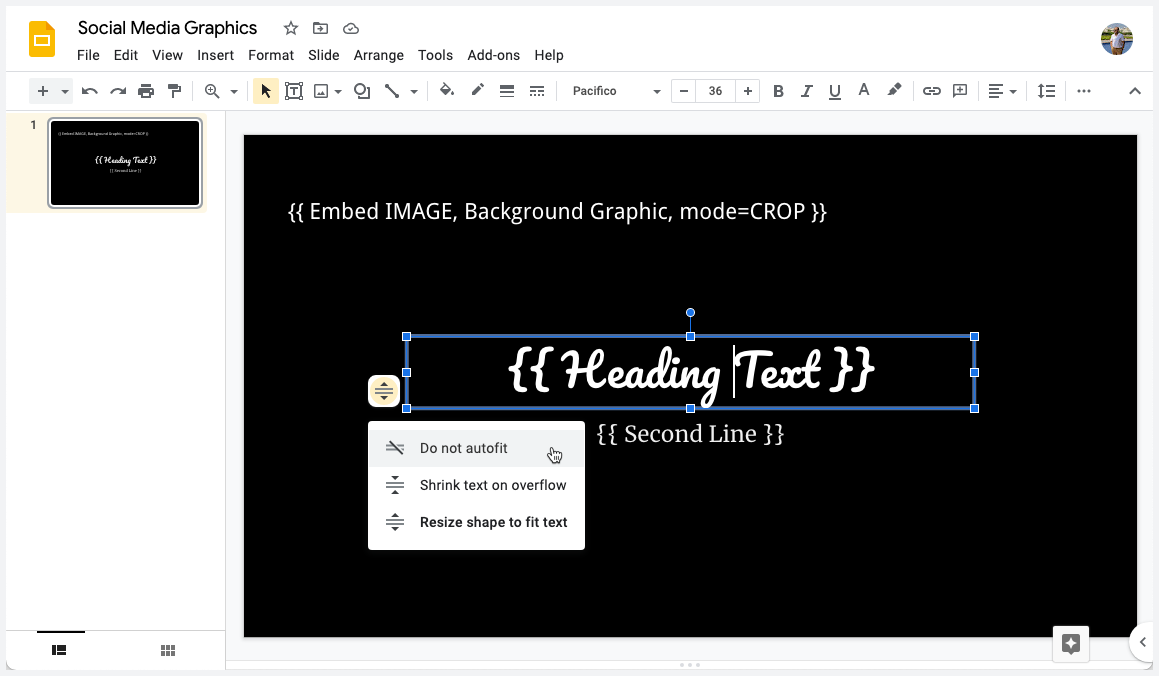
As a first step, create a new presentation slides in Google Slides. The merge fields are enclosed in double curly braces and they are used to display the data from the Google Sheet into the presentation.
Each merge field should be placed in a separate text with the Do not autofit option checked. You can use the Embed Image syntax with mode=CROP to add background graphic images that are resized to to completely fit the background.

Configure Document Studio
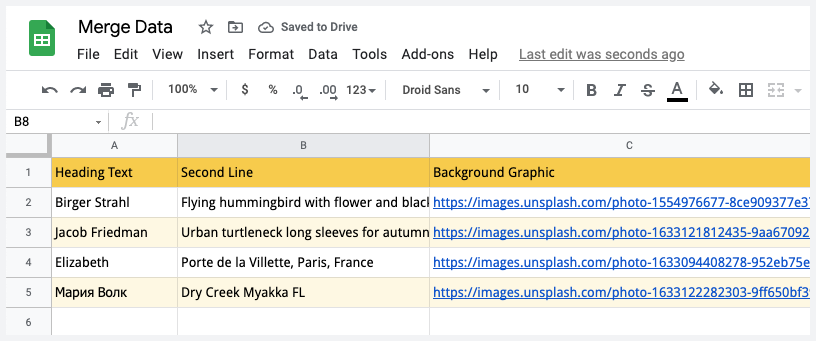
For this example, we have created a Google Sheet that contains the heading title, tagline and background graphics for each image sourced from Unsplash, the best site for free images. The Document Studio add-on will help you auto-generate images from the data in the Google Sheet, one per row, and the generated images files will be stored in your Google Drive.
Install Document Studio and open your Google Sheet to launch the add-on. You may either open an existing sheet or create a new sheet and add data manually to the sheet.
Create a new workflow, give a descriptive name and then click on Continue to move to the conditions page. On the Conditions pane, specify if you want your workflow to run only if the Google Sheet row satisfies certain conditions. By default, the workflow will run for all rows in the Google Sheet.

Configure Image Generation
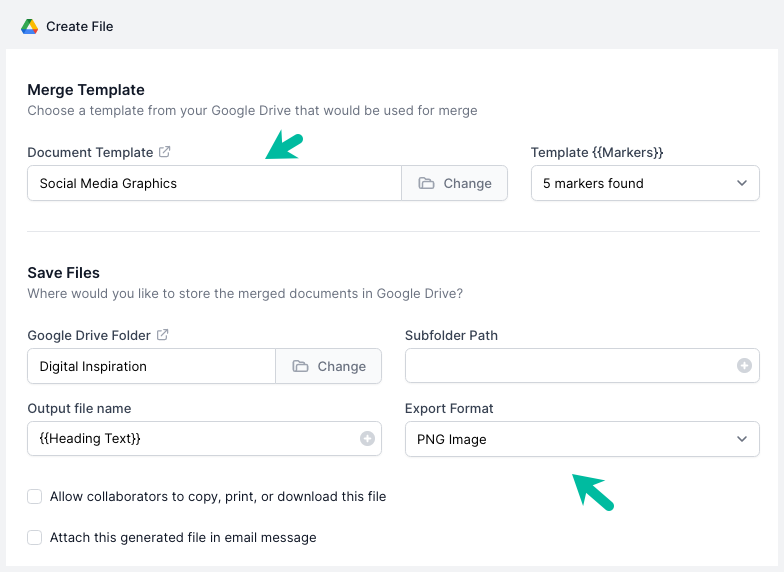
Choose Create File from the list of available tasks. Next:
- Choose the spreadsheet template that you've created in the previous step
- Specify the Google Drive folder where the generated images would be saved
- Specify the name of the image file using dynamic placeholders
- Choose the export format as Image PNG.

Click on the Preview button to see the generated image file. Document Studio will take the data from the second row of the selected Google Sheet and create a new dynamic image file in Google Drive. Click Done to locally apply your changes.
Click on Continue to proceed to the triggers screen. If you want the workflow to be automatically triggered every hour, so that any new rows added in that duration are processed automatically, you can choose the option Run workflow every hour and then click on the Save button.
The workflow will also appear in the workflow dashboard where you can edit, delete or manually run the workflow.
Here's a screenshot of sample images generated with this workflow.
