Create Invoices in Stripe from Google Sheets
Document Studio enables you to automatically send invoices and collect payments with Stripe from data in Google Sheets. You can store customer information with list of items that they have ordered and automatically send invoices to the customer. The invoice is hosted on Stripe and the customer can securely pay with credit cards, debit cards, Apple Pay or other payment methods.
Charge Attendees to join a Webinar
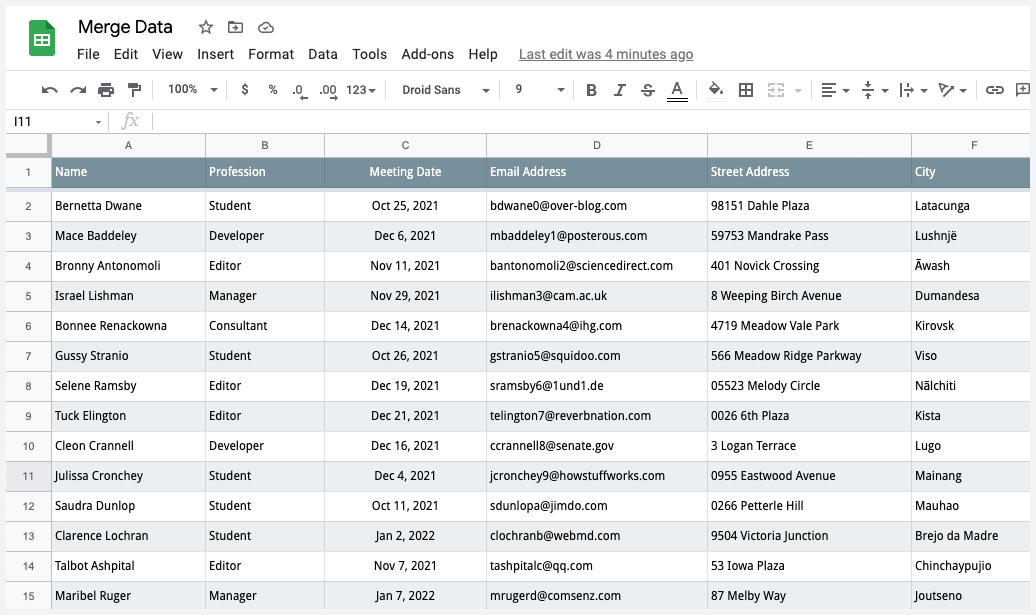
For this example, we have a Google Sheet that stores the list of attendees who have registered to attend an online webinar that will be hosted on meeting platforms like Google Meet, Microsoft Teams or Zoom Meetings.
The Google Sheet has the customer's name, billing address, and their profession.
Generate the Stripe API key
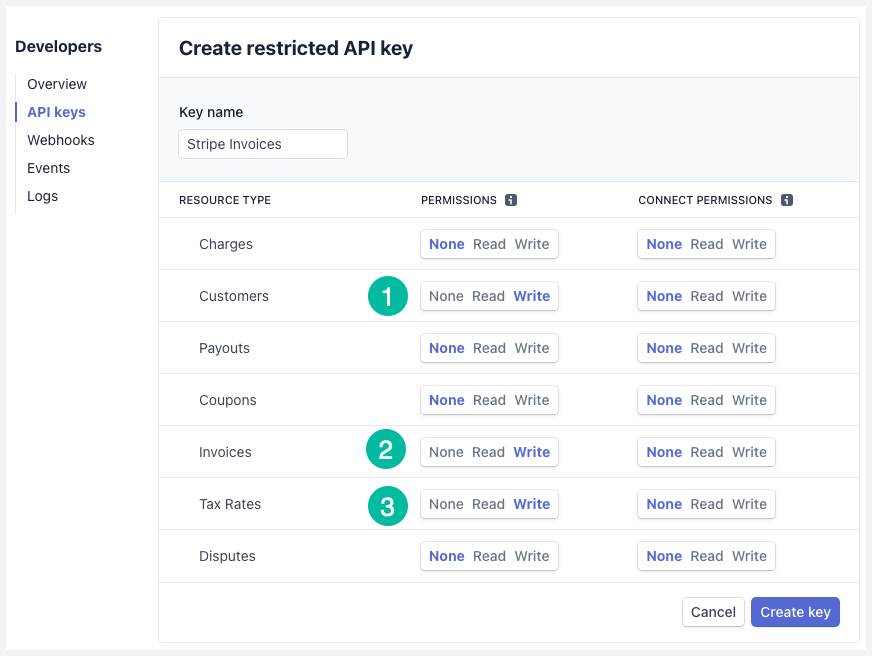
Go to your Stripe Dashboard, click on the Developer menu and then API Keys. Click the Create Restricted Key button. Give your API key a descriptive name and turn on the Write permission for the Customers, Invoices and Tax Rates scope. Click the Create button to generate your secret API key and copy it to the clipboard.
Connect Stripe to Google Sheets
Install Document Studio and open the Google Sheet containing the webinar attendee list to launch the add-on. Create a new workflow, provide a descriptive name for your workflow like Send Stripe Invoices with Google Sheets and click on Continue to move to the Conditions page.
Since we want to send invoices to all attendees in the sheet, choose Process all rows and continue to the tasks section.
Configure Stripe Customer
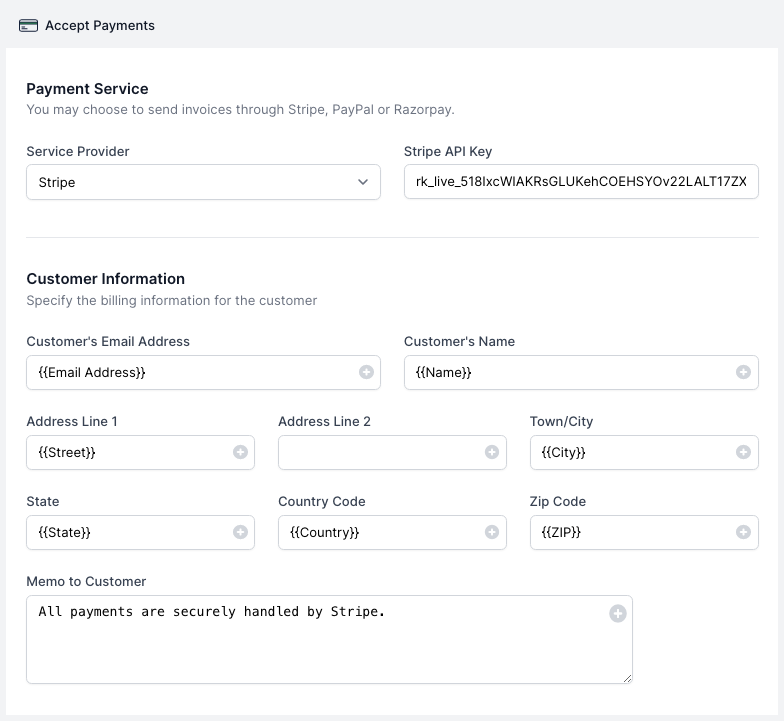
Choose Accept Payments from the list of available tasks. Select Stripe from the list of available payment providers. Paste your Stripe API key that you copied earlier into the API Key field.
Next fill in the fields for the Customer Information section and data in these fields can be pulled in from Google Sheets.
Calculate Registration Fee
The customer memo, price and other text fields support Scriptlets to add conditional or calculated text.
The registration fee for the webinar is $49.99 but if the attendee has mentioned Student in the profession field, the discounted webinar fee is $24.99. You can use the following scriptlet in the price field of the first item to calculate the registration fee:
{% assign profession = "{{ Profession }}" | upcase %}
{% if profession == "STUDENT" %}
 24.99
{% else %}
 49.99
{% endif %}
Configure Stripe Invoice
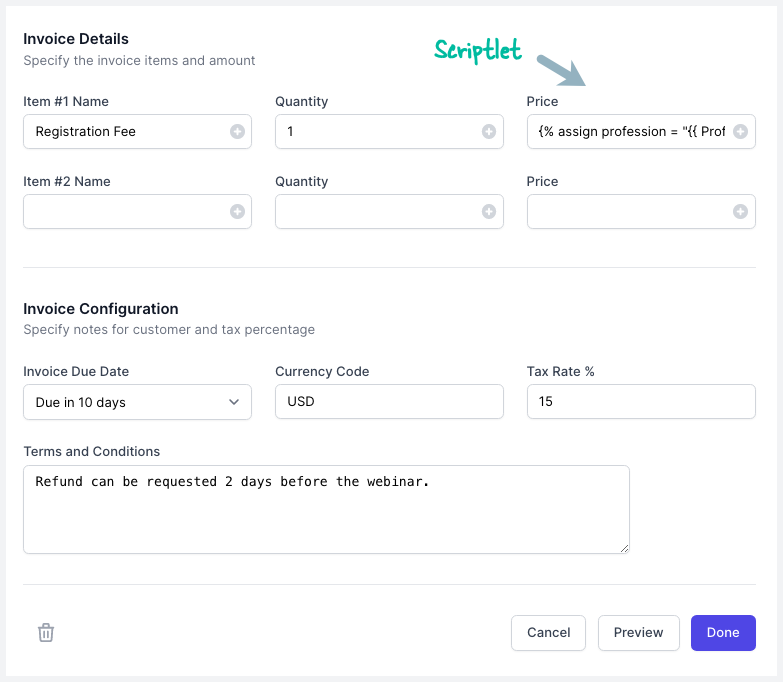
For the invoice section, specify the items name and paste the script in the price field to dynamically calculate the registration fee based on the attendee's profession. You also need to provide the 3-letter currency code for the invoice and the tax rate (optional).
The invoice due date is the number of days from when the invoice is created until it is due. It is, by default, set to the day when the invoice is sent but you can change this date to any date you want.
Preview and Save
Click the Preview button and a test invoice is generated. Document Studio will take the data from the second row of the Google Sheet and create a Stripe invoice. Click Done to locally apply your changes.
Click on Continue to proceed to the triggers screen. If you want the workflow to be automatically triggered every hour, so that any new rows added in that duration are processed automatically, you can choose the option Run workflow every hour and then click on the Save button.
The workflow will now appear in the workflow dashboard where you can edit, delete or manually run the workflow.
Sample Stripe Invoice
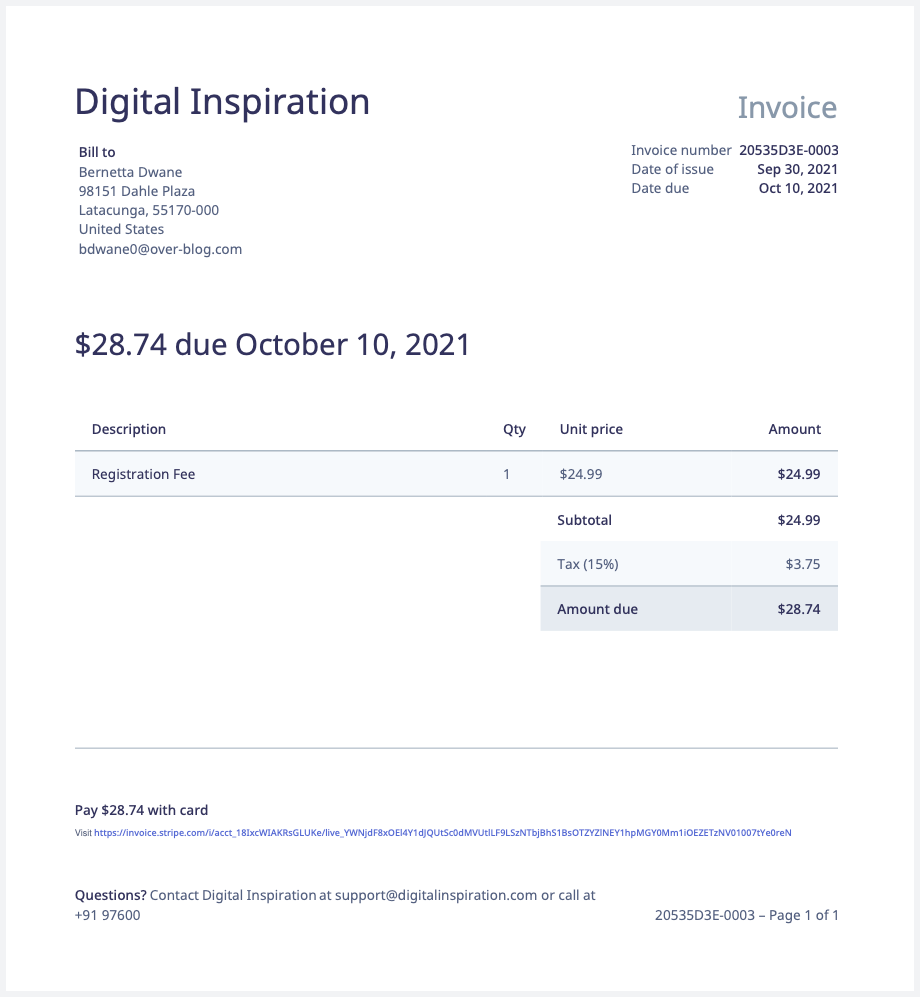
Here's a copy of the sample Stripe invoice generated from the Google Sheets for meeting registrants:
