Trigger Webhook Requests when New Rows are Created in Google Sheets
With Document Studio, you can send data from Google Sheets to any REST API based web service, including Zapier, Integromat, IFTTT and Microsoft Power Automate, using HTTP Webhooks. This is a great way to send data to other services when an event (new row added) occurs in Google Sheets.
Create Webhooks in Google Sheets
Install Document Studio and open your Google Sheet to launch the add-on. You may either open an existing sheet or create a new sheet and add data manually to the sheet.
Create a new workflow, give a descriptive name and then click on Continue to move to the conditions page. On the Conditions pane, specify if you want your workflow to run only if the Google Sheet row satisfies certain conditions. By default, the workflow will run for all rows in the Google Sheet.
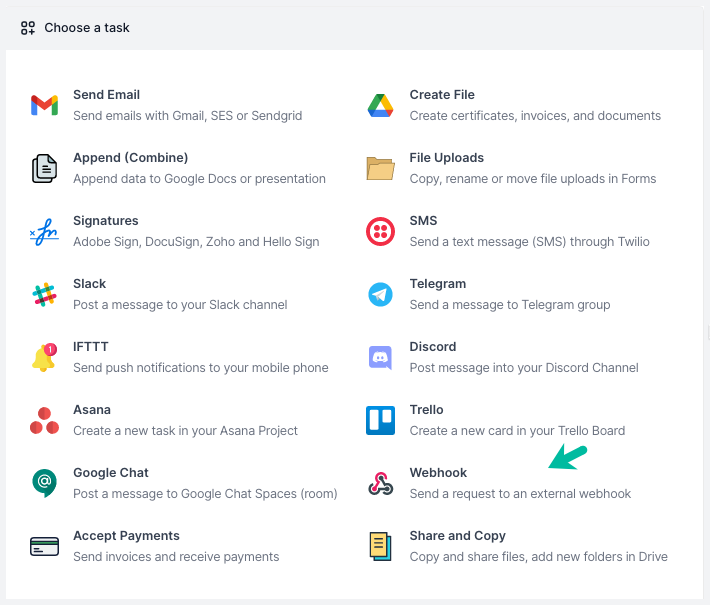
Next, choose Webhooks from the list of available tasks.
Configure Webhook
To get started, choose an HTTP request method and provide the webhook URL (endpoint) to send the data to. You can trigger HTTP requests using the GET, POST, DELETE, PUT, or PATCH method.
You may use the website webhook.site or requestbin.com to test your webhooks in the browser.
The row data of Google Sheets can be be sent in the query string or included in the request body as JSON, HTML, XML or Form URL encoded format. You may also include custom headers in your webhook endpoint(s). The keys of the header can be either strings or numbers and may not include spaces or other invalid characters.

The webhook supports different authentication methods.
- Use Header Auth - Include the API keys or an access token with the authentication headers
- Use Basic Auth - Include the username and password in the request
The payload can attached to the request body in different formats including JSON, Form data, XML or plain text.
Test your Webhook
After you have configured the webhook, click the Preview button to send an actual HTTP request to the endpoint. Click Done to locally apply your changes. If you would like to send webhooks to multiple endpoints, you can add more webhook tasks in the same workflow.
Activate workflow
On the next screen, turn on the Run workflow every hour option and the workflow will run in the background, once per hour. You also have the option to run the workflow manually on-demand from the dashboard.
Click the Save button and the workflow will now appear in the workflow dashboard where you can edit, delete or manually run the workflow.