Copy Google Sheets Rows to Microsoft Excel
With Document Studio, you can copy rows from Google Sheets to a new or existing Microsoft Excel worksheet automatically, whenever new rows are added to the Google Sheet. You can also use the add-on to copy rows in bulk from an existing Google Sheet to an MS Excel spreadsheet.
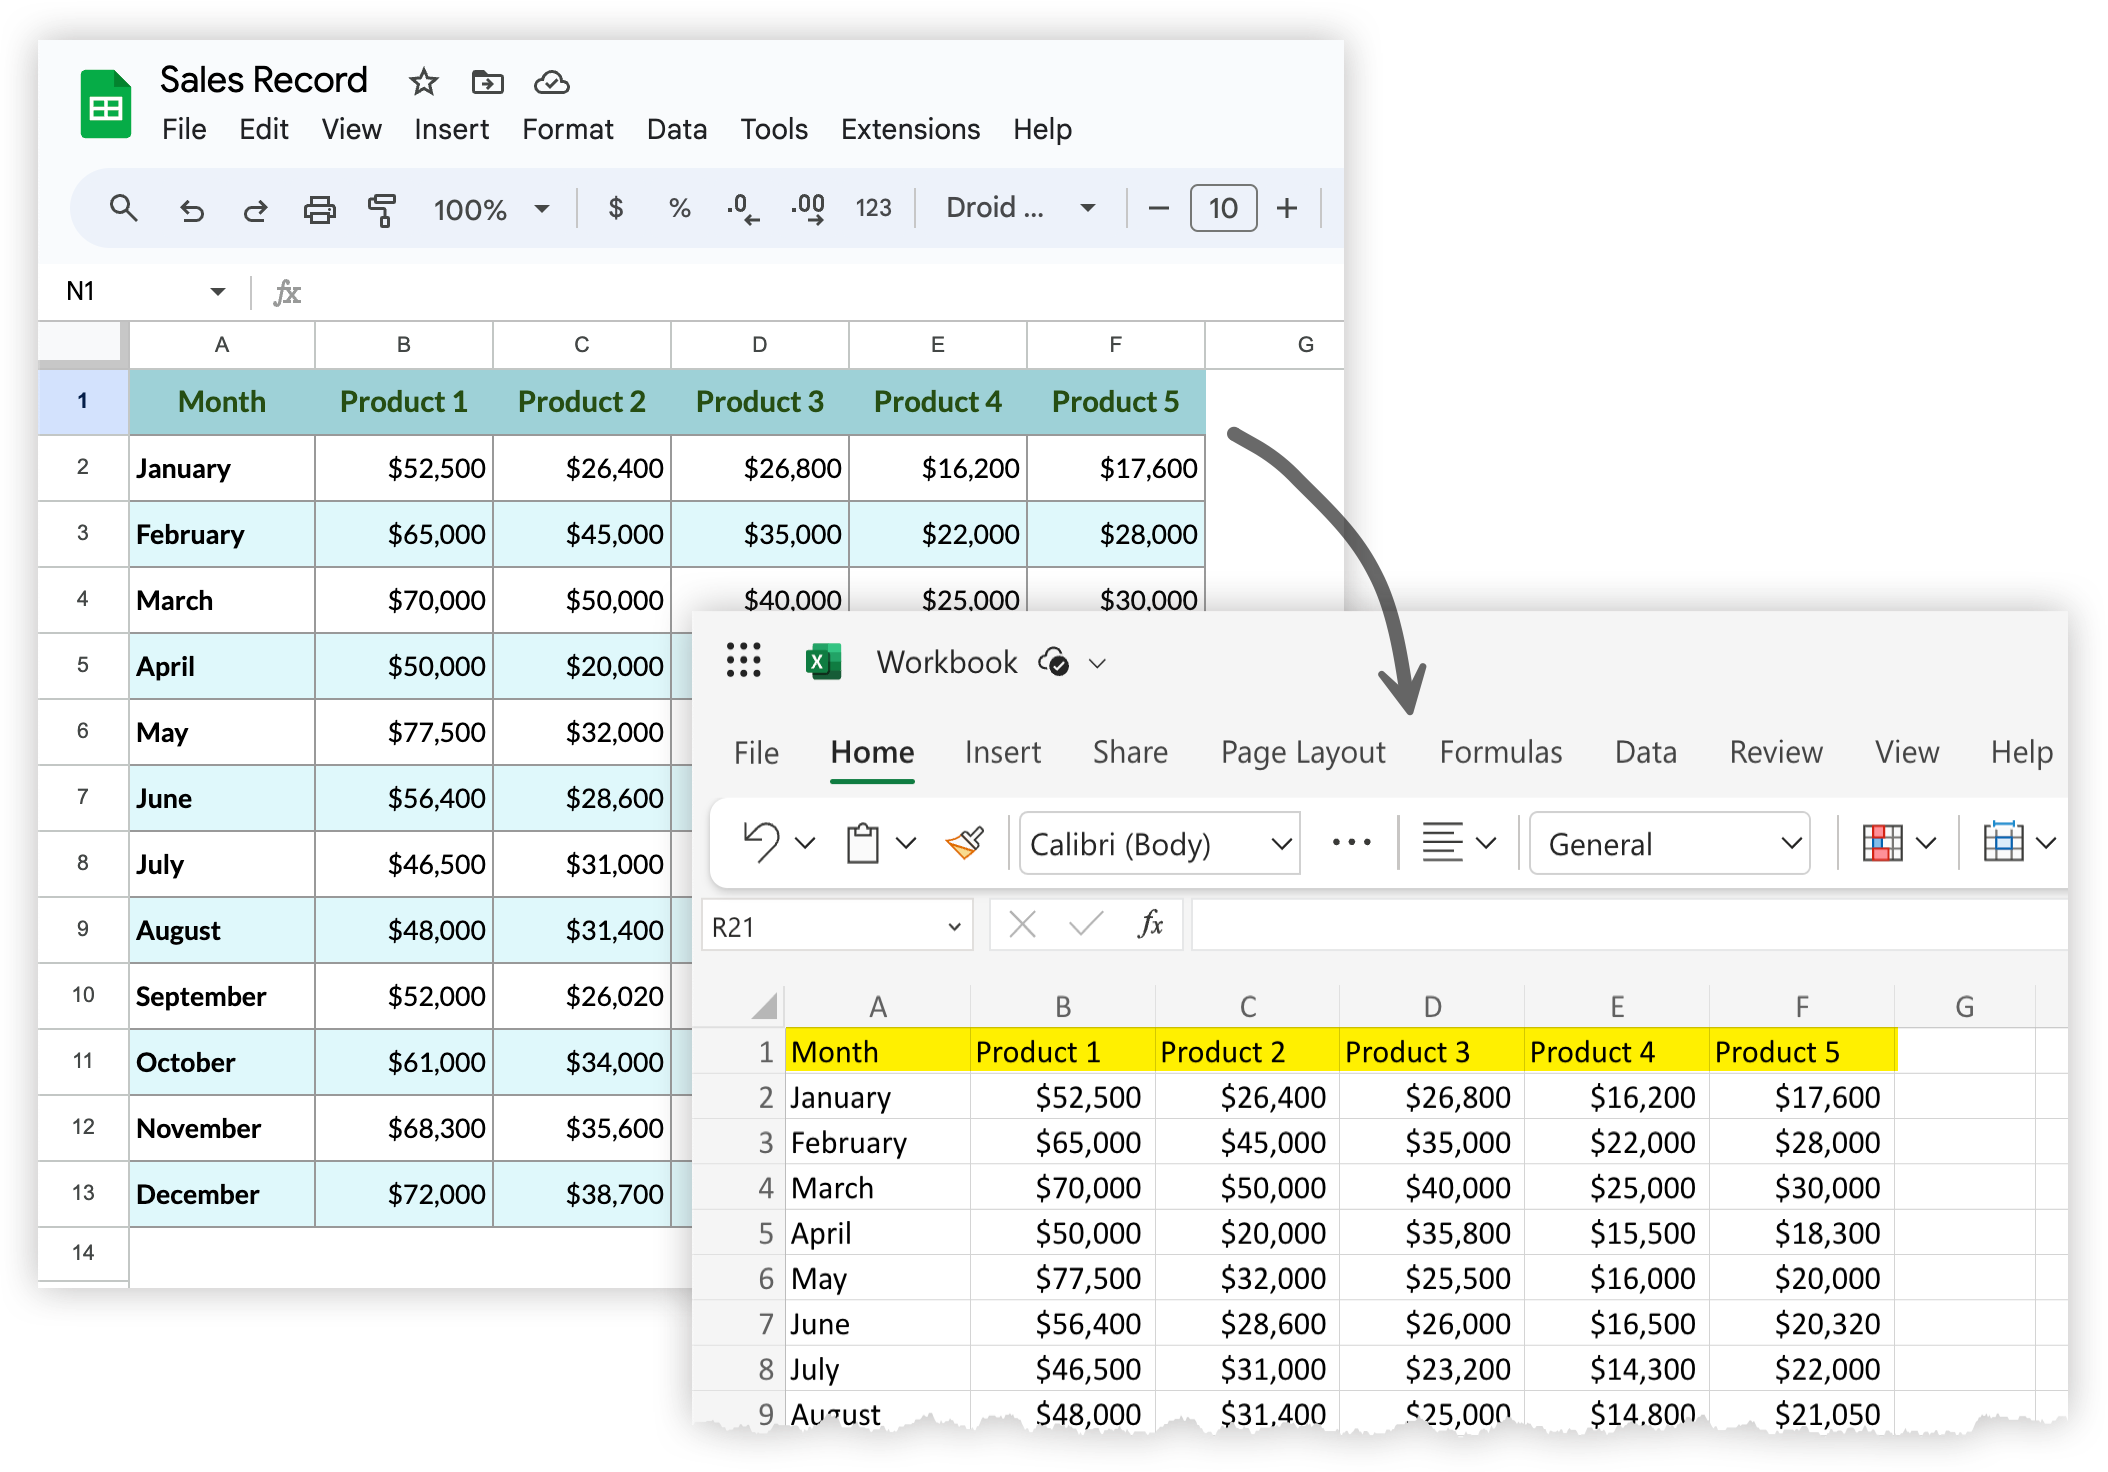
For this example, we have a Google Sheet recording the sales data of a store, that we’ll be copying into an Excel spreadsheet using Document Studio.
Create Workflow
Install Document Studio and open your Google Sheet to launch the add-on. Create a new workflow, give a descriptive name, and click Continue to move to the conditions page.
On the Conditions pane, specify if you want your workflow to run only if the Google Sheet row satisfies certain conditions. For instance, if the source spreadsheet has sales data for all regions and you would like to copy data specific to North America in an Excel sheet, you can put that condition here. By default, the workflow will run for all rows in the Google Sheet.
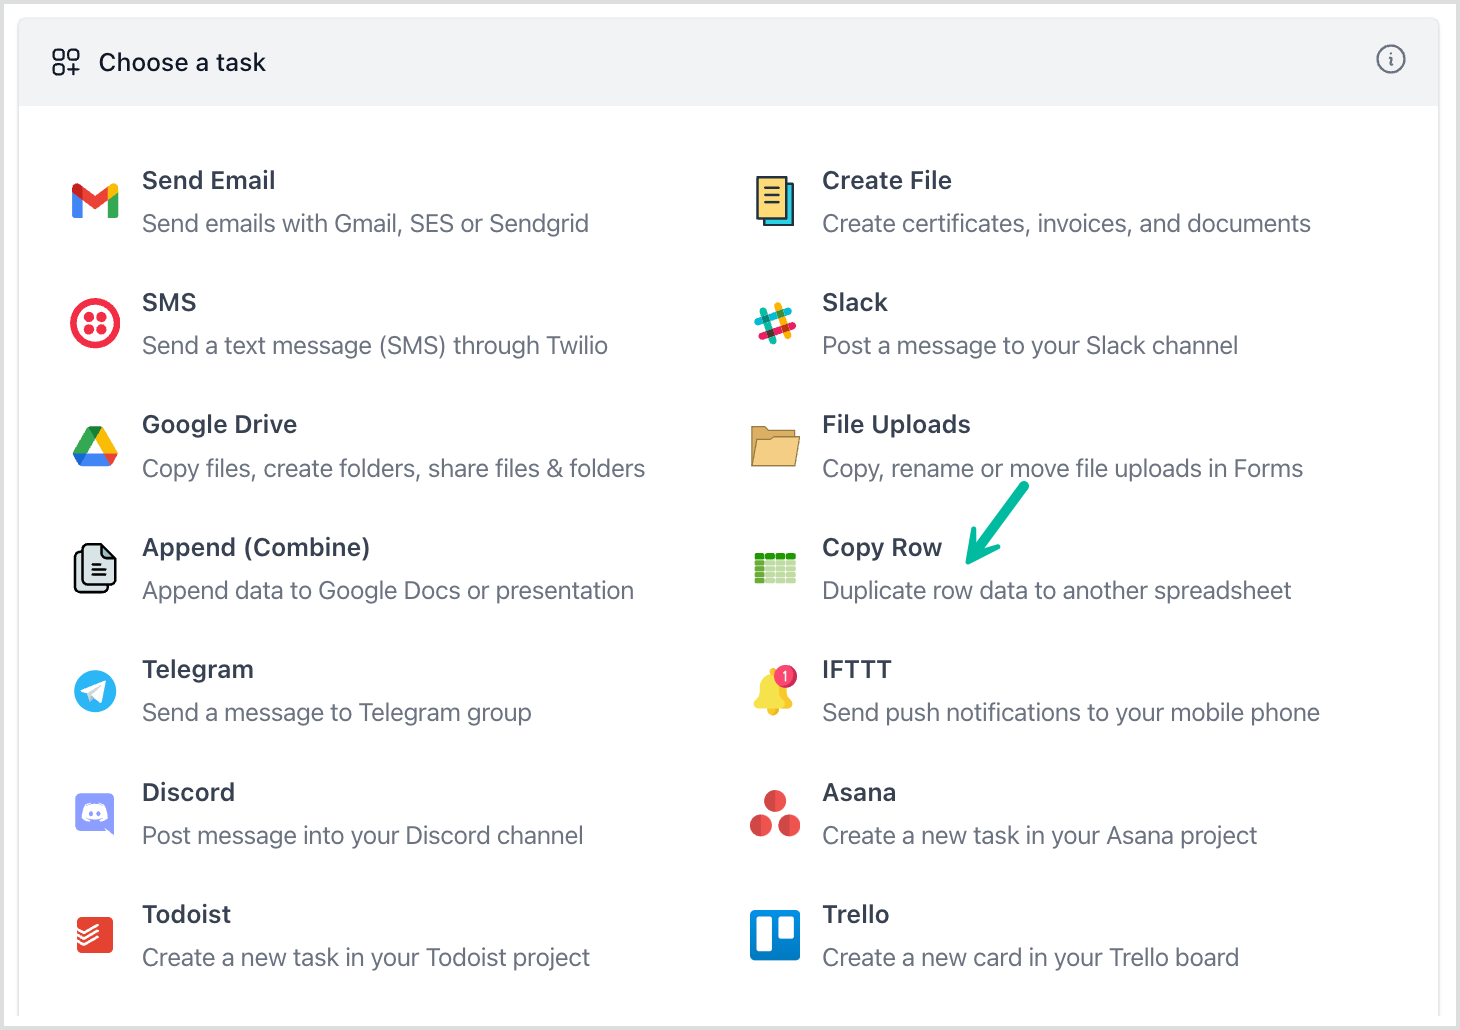
Click Continue to move to the tasks section, and choose Copy Row from the list of available tasks.
Connect Google Sheets to MS Excel
Select Excel Sheets from the list of available spreadsheet applications, and click on Link your Microsoft Excel account.
Once your Microsoft account has been linked, copy the Worksheet URL from MS Excel, and paste it into the Spreadsheet URL field.
Next, specify the name of the worksheet where you want the rows to be copied. If you have created a worksheet previously, simply enter its name in this field. You can also choose to create a new worksheet by specifying a custom name for the sheet.
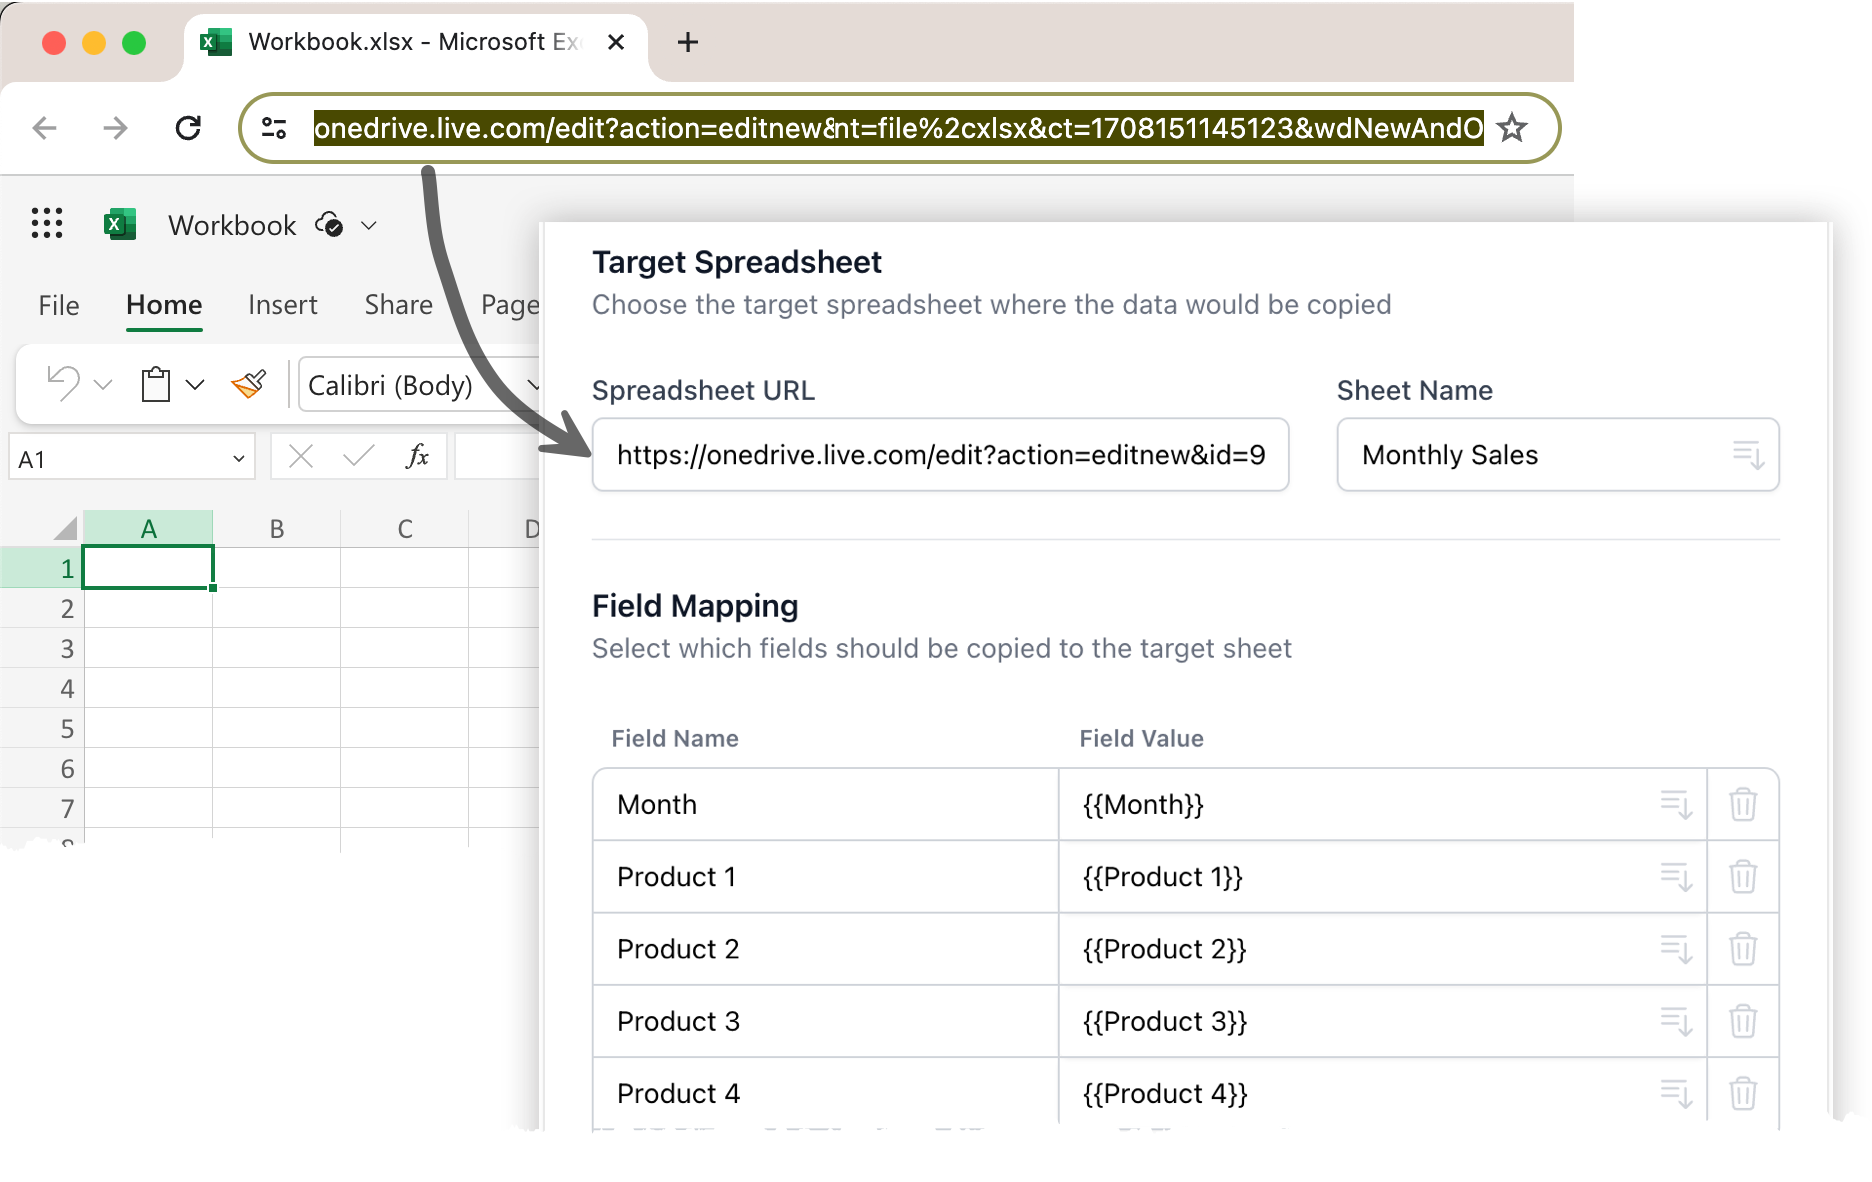
The next section is Field Mapping where you define the source columns that should be mapped to the columns in the destination Excel sheet.
Field Name: represents the heading of the column created in the worksheet Field Value: represents the dynamic values that will be stored in that column according to the actual cell values in the sheet.
For instance, if a column in the source sheet is titled “Zip” and you would like to store it as “Postal Code”, the mapping would look like this:
| Field Name | Field Value |
|---|---|
| Postal Code | {{ Zip }} |
You have a list of default fields available, including the columns in the existing sheet. You can edit the field names, delete an entire field, and add as many new fields as you want.
Click Done to save this task.
Activate Workflow
Click on Continue to proceed to the triggers screen. If you want the workflow to be automatically triggered every hour, so that any new rows added in that duration are processed automatically, you can choose the option Run workflow every hour and then click on the Save button.
Or you can choose to run it immediately by simply clicking the Save and Run button.
The workflow will also appear in the workflow dashboard where you can edit, delete, or manually run the workflow.