Send documents for signature with Adobe Sign and Google Sheets
With Adobe Sign and Document Studio, you can send documents for electronic signatures in bulk from within Google Sheets. The digital signatures are legally valid, verifiable and you can send the same document to multiple recipients for e-signing.
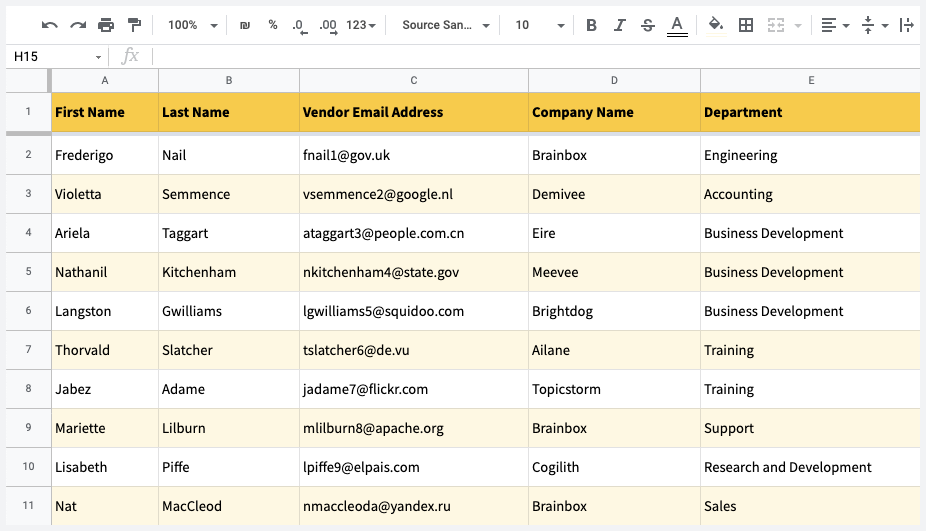
For this example, we have a Google Sheet that contains a list of vendors in a Google Sheet and we need to send the vendor onboarding documents to each email address for signature. After the vendor signs the document, the document is sent to the internal sales and purchase team for review and signature.
Create Template in Adobe Sign
Sign-in to your Adobe Sign account, formerly EchoSign, and click the Create a Reusable Template button to add a new library template.
Give your template a name and upload the document(s) you want to send for signing with the signature. You may upload the Word or PDF document for your computer or import an existing document from Google Drive, Box, Dropbox or Microsoft OneDrive.
Click the Preview and Add Fields button and add the fields you want to use for the signature request.
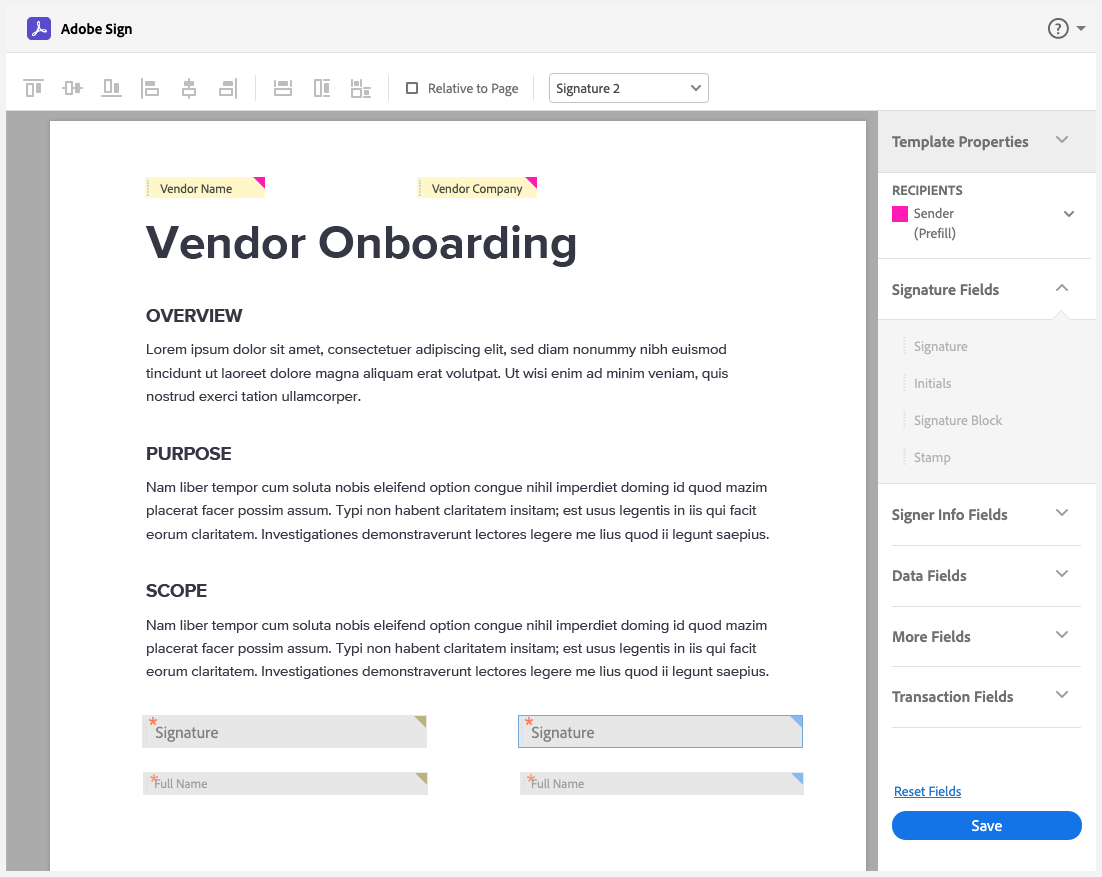
All fields placed are assigned to the first recipient by default. You can change who the placed fields are assigned to by accessing the Recipients drop-down list and changing the selected recipient. Choose Sender for any pre-filled fields that will be auto-filled with data from Google Sheets.
Connect Adobe Sign to Google Sheets
Install the Document Studio add-on and open your Google Sheet to launch the add-on. You may either open an existing Google Sheet or create a new sheet and add data in one or more rows of the sheet.
Inside the Document Studio app, provide a descriptive name for your workflow and choose the specific worksheet in your Google Spreadsheet that contains the merge data. Click on Continue to move to the conditions page.
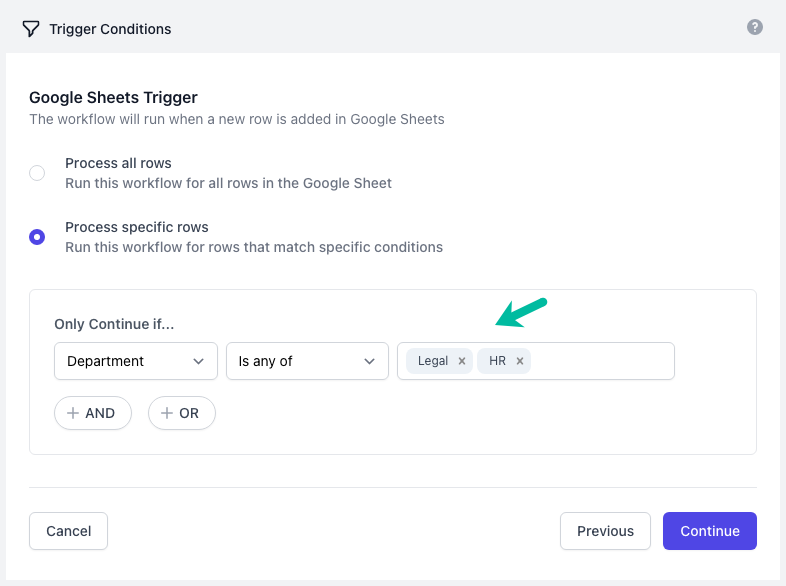
Inside the Conditions section, specify if you want your workflow to run only if the row data satisfies certain conditions. For instance, you may only want to run the signature workflow for vendors who are assigned to specific departments in your organization.
Configure Adobe Sign Service
Choose Signatures from the list of automation tasks and select Adobe Sign as the signature service provider.
Click the Link your Adobe Sign account button to authorize Document Studio to send signature requests on your behalf through Google Sheets. Once the authorization is complete, you'll see a list of templates from your Adobe Sign account in Google Sheets. Select the specific vendor onboarding template you want to use for this e-signature workflow.
Document Studio will now fetch the signature template and create a list of fields that you can pre-fill using data from Google Sheets. You can use variable form fields - like {{ Company Name }} for the vendor's company name text field - and these will be replaced with the actual values from the Google Sheet when the document is sent.
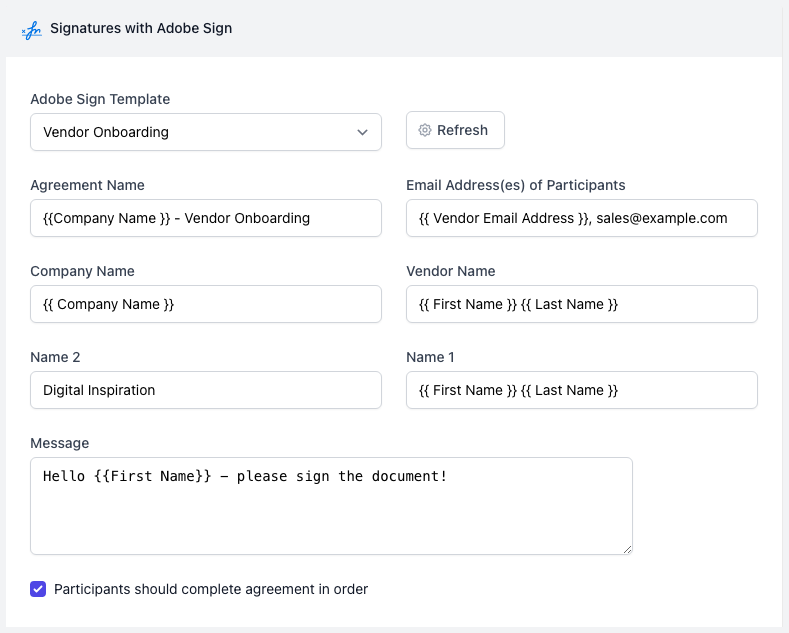
Email Address of Recipients
You can put one or more email addresses in the Email Addresses of Participants field, separated with a comma. The email address can be made dynamic using double curly braces and the values are pulled from the Google Sheet.
You can set the signing order by checking the option that says "Participants should complete the agreement in order". The order of email addresses listed in the participants field will the control the order in which recipients can sign the document.
Preview and Save Workflow
Click the Preview button and a signature request will be sent to recipients listed in first row of the source Google Sheet. Click Done to locally apply your changes.
Click on Continue to proceed to the triggers screen. If you want the workflow to be automatically triggered every hour, so that any new rows added in that duration are processed automatically, you can choose the option Run workflow every hour and then click on the Save button.
The workflow will now appear in the workflow dashboard where you can edit, delete or manually run the workflow.