How to Send WhatsApp Messages from Google Sheets
With Document Studio, you can send personalized WhatsApp messages from Google Sheets. This guide explains how you can automatically send birthday wishes to your customers from Google Sheets using the WhatsApp API.
Prepare Google Sheets
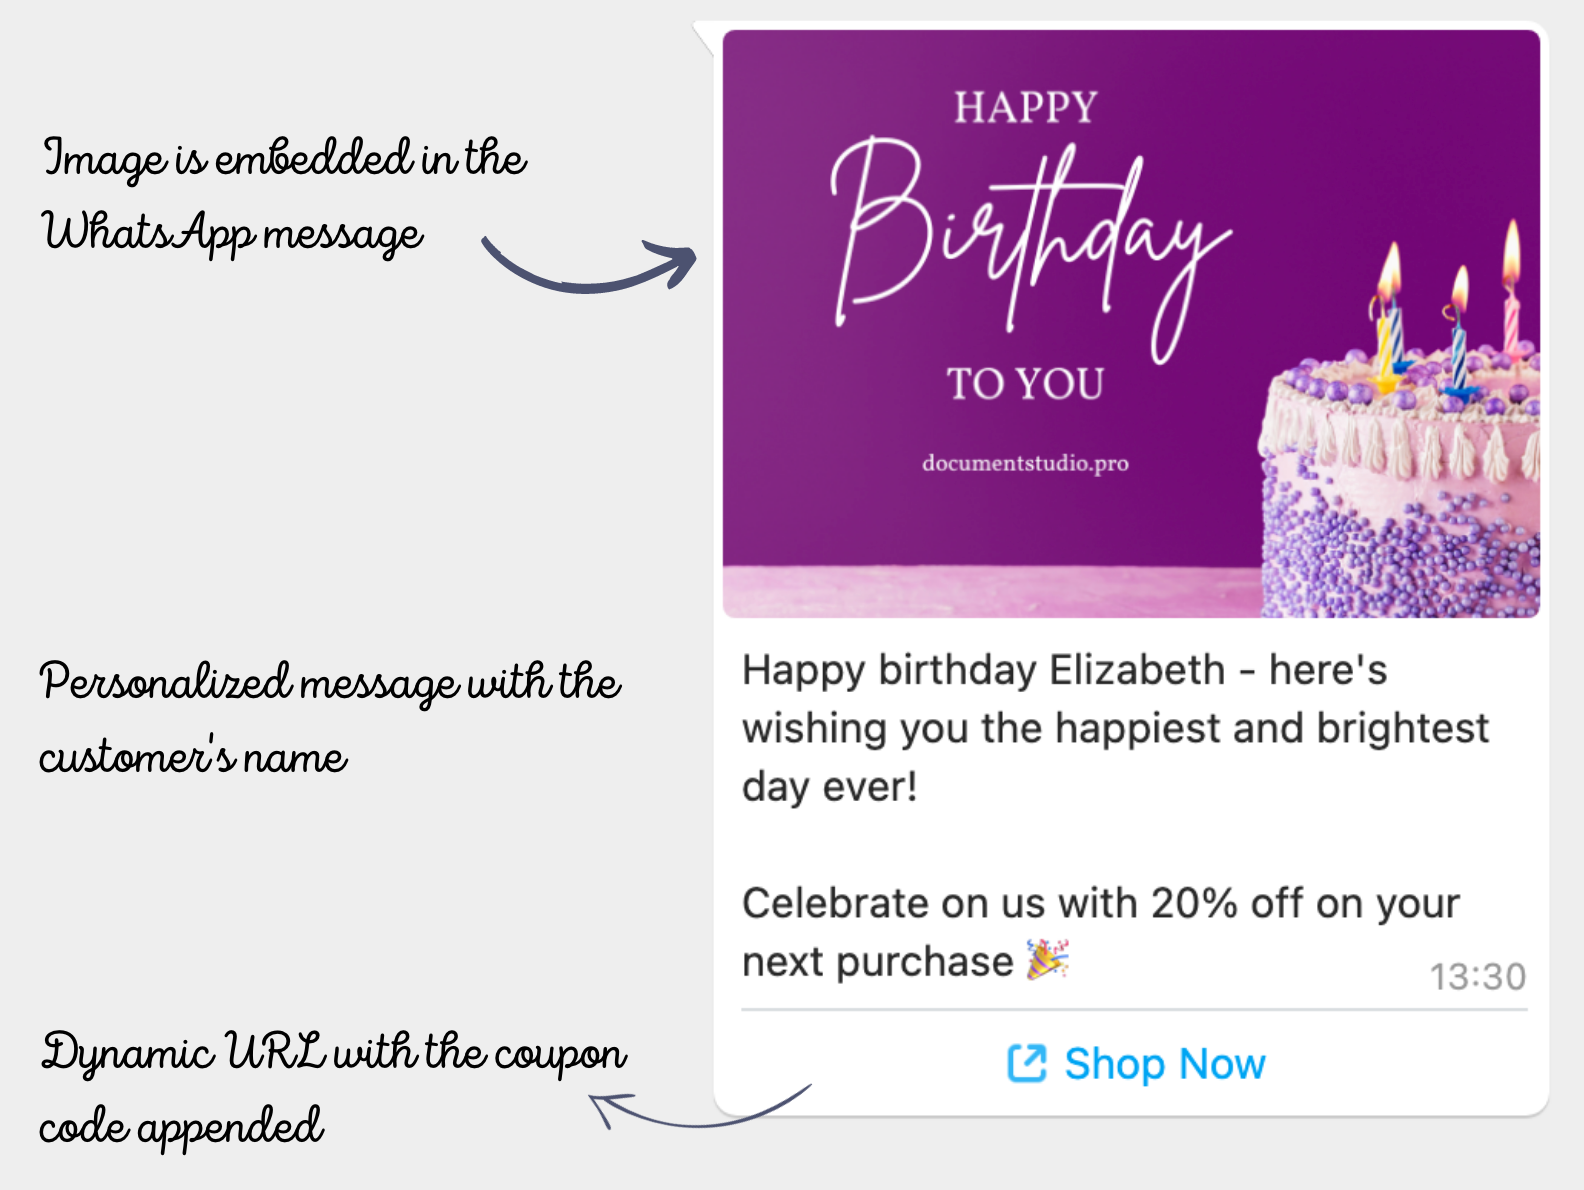
For this example, we have a Google Sheet with customer names, phone numbers, country of residence, and birth dates. We want to send a personalized greeting to each customer on their birthday, and this WhatsApp message will also include a discount coupon code for their next purchase.
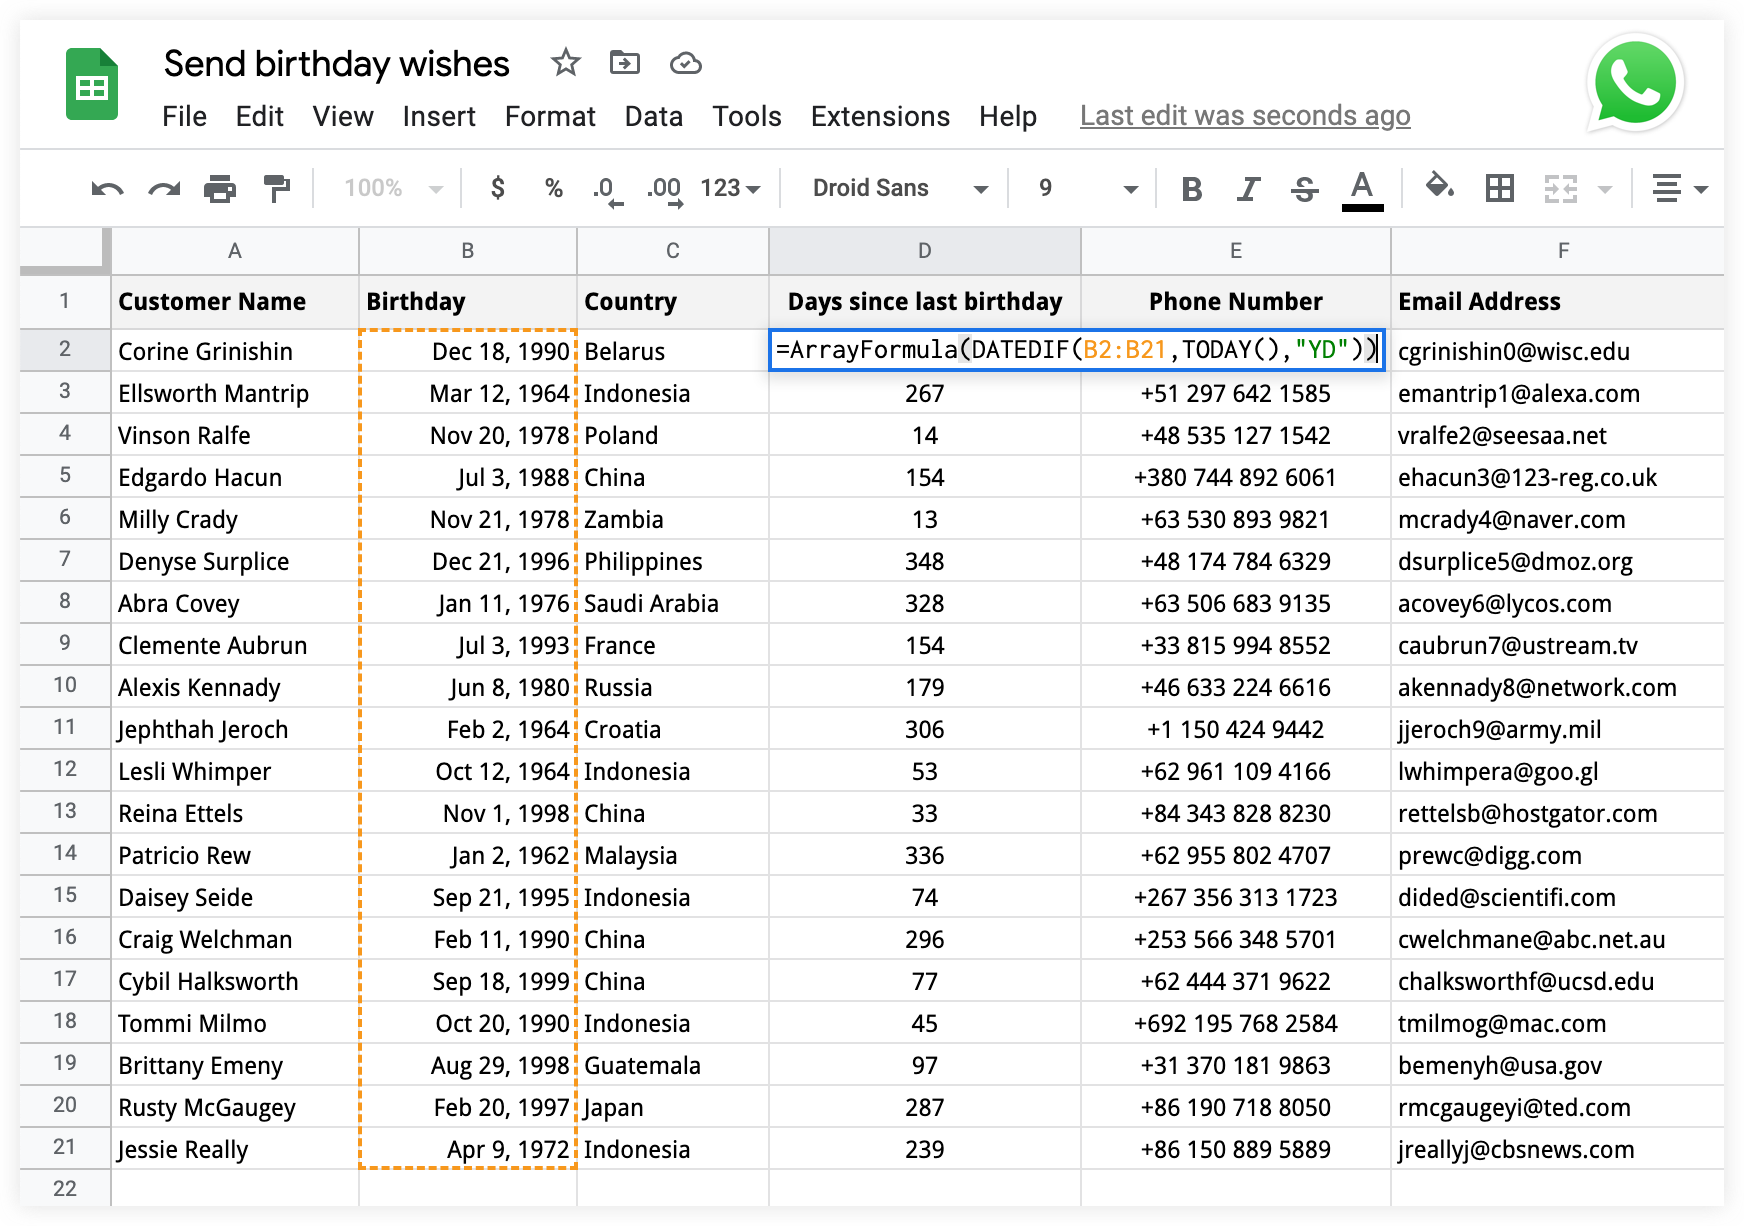
Let's add a new column to our Google Sheet and name it Days since last birthday. We will use the DATEDIF function to calculate the number of days since the customer's last birthday. If the customer's birthday is today, this value would be 0.
=ArrayFormula(IF(NOT(ISBLANK(B2:B)),DATEDIF(B2:B,TODAY(),"YD"),))
Prepare WhatsApp Message Template
Now that our source data in Google Sheets has been prepared, create a new Facebook app and associate a phone number with it. Next, generate a permanent token to make WhatsApp API calls from your app.
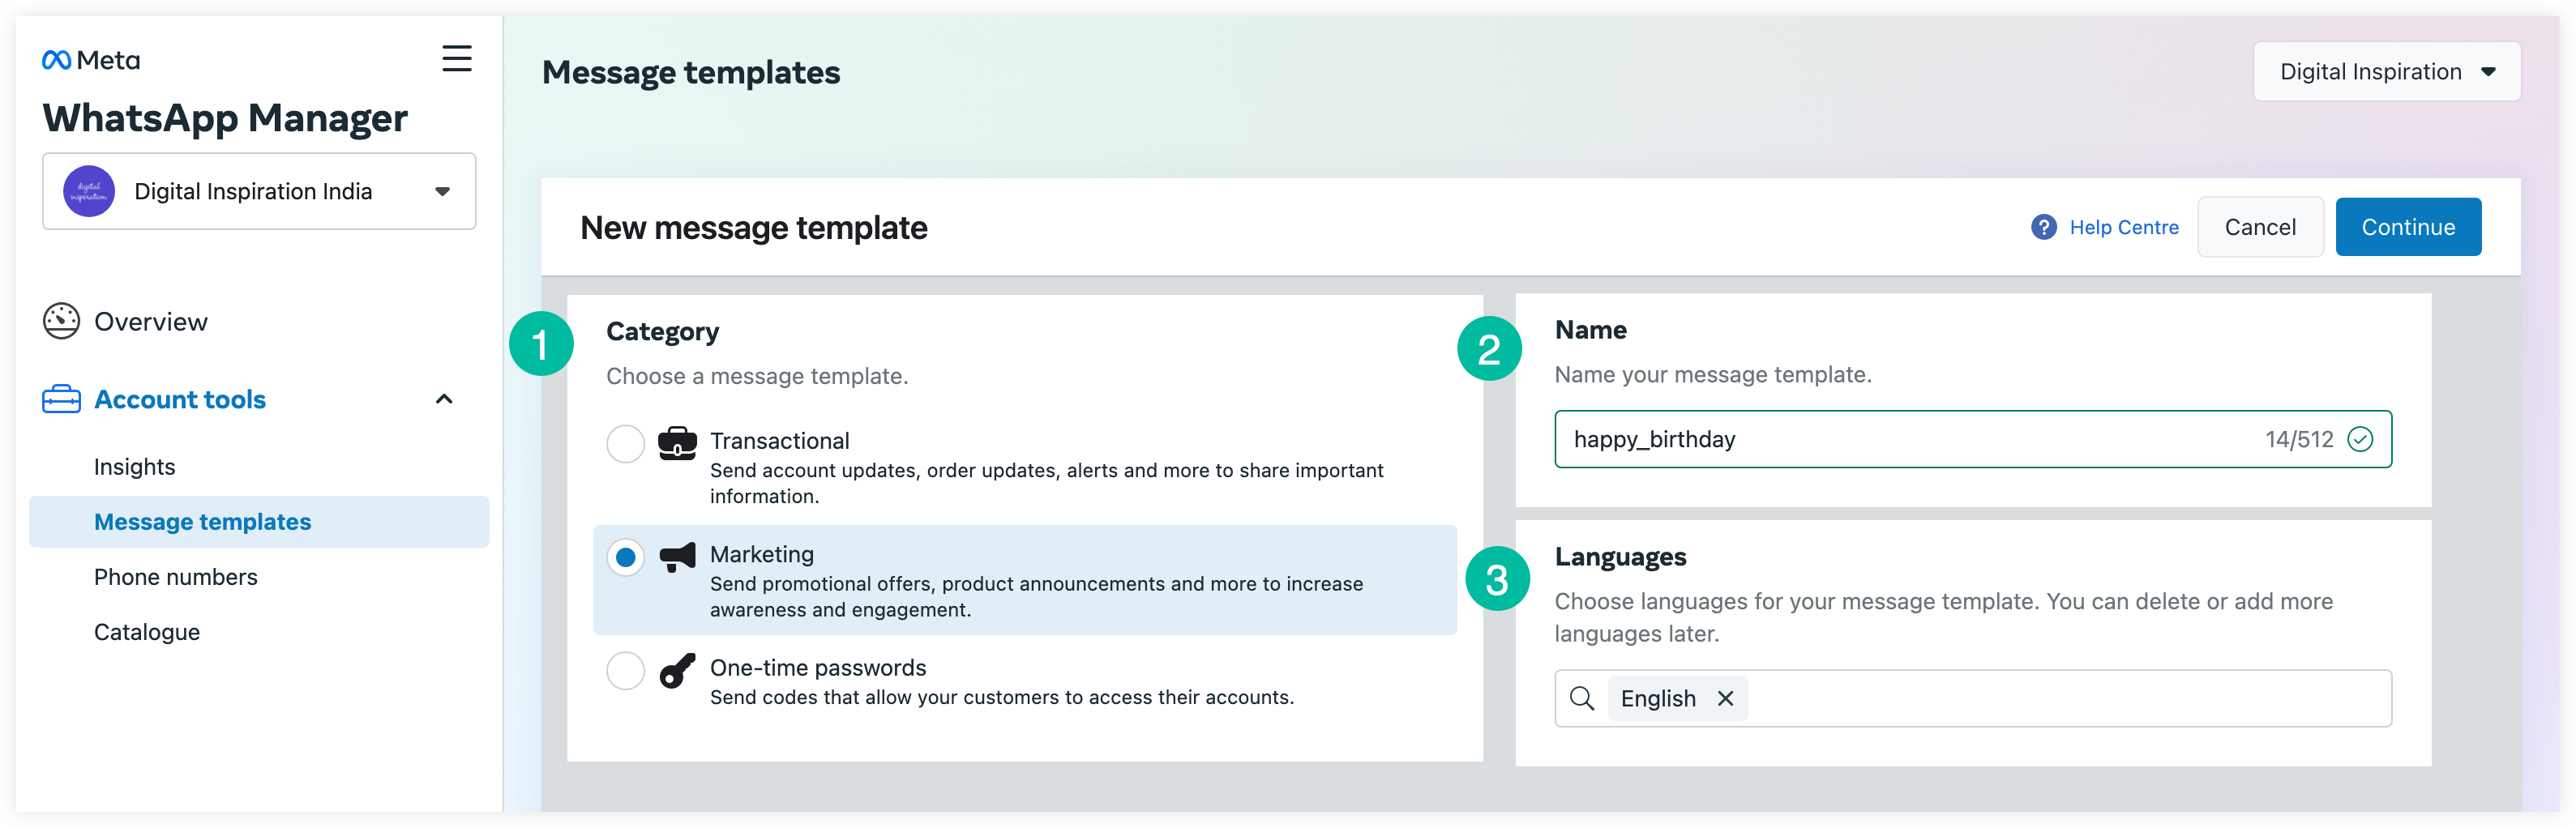
Next, go to business.facebook.com and create a new WhatsApp message template. Give your template a name, set the category as Marketing, and choose the default language as English.
Inside the template, add a header and set the type as Media. We'll choose Image as the media type and upload a birthday image later that will be embeded in the WhatsApp message.
Happy birthday
{{1}}- here's wishing you the happiest and brightest day ever! Celebrate on us with{{2}}off on your next purchase 🎉
For the message body, the variable {{1}} will be replaced with the customer's name for personalization. The second variable, {{2}} will include a unique discount coupon code for the customer.
Next, add a Call to action button with the action set as Visit website. The URL type can be static (fixed), or we can make it dynamic and include a single variable. WhatsApp allows you to have only one variable that is always added at the end of the URL.

Click the Add Sample button to add sample values for the various variable fields. This will help you preview the message template and see how it will look in WhatsApp. Click the Submit button, and your template will go into the review queue. Once approved, the approval process can take a few minutes, you can start using this template to send WhatsApp messages from Google Sheets.
Send WhatsApp Messages from Google Sheets
Install Document Studio and then open your Google Sheet to launch the add-on.
Create a new workflow inside Document Studio, give a descriptive name - like Send Birthday greetings with WhatsApp - and then click on Continue to move to the conditions page.
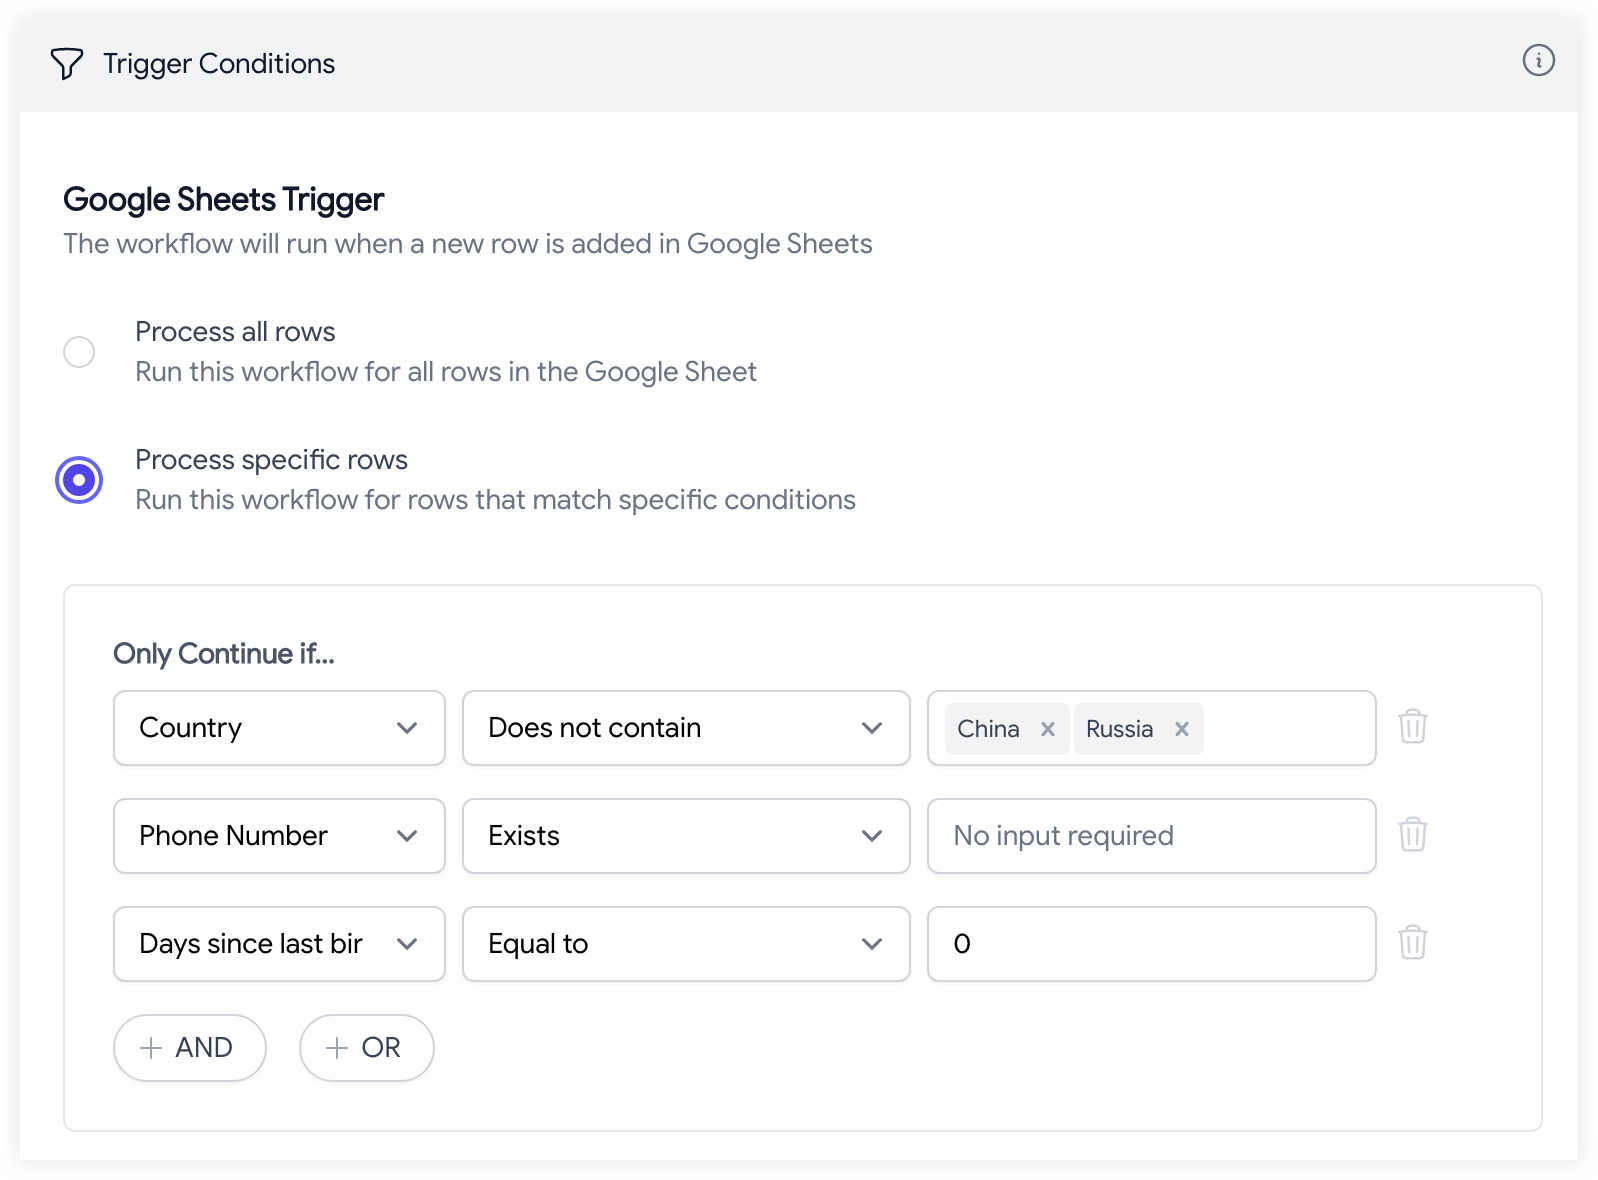
On the Conditions screen, specify if you want your workflow to run only if the Google Sheet row satisfies certain conditions. For this example, we would only send WhatsApp messages when the following conditions are met:
- Days since last birthday is 0 (birthday is today)
- The customer's phone number is not empty
- The customer's country is not Russia or China
Click Continue to move to the apps page and choose the WhatsApp app.
Configure WhatsApp in Google Sheets
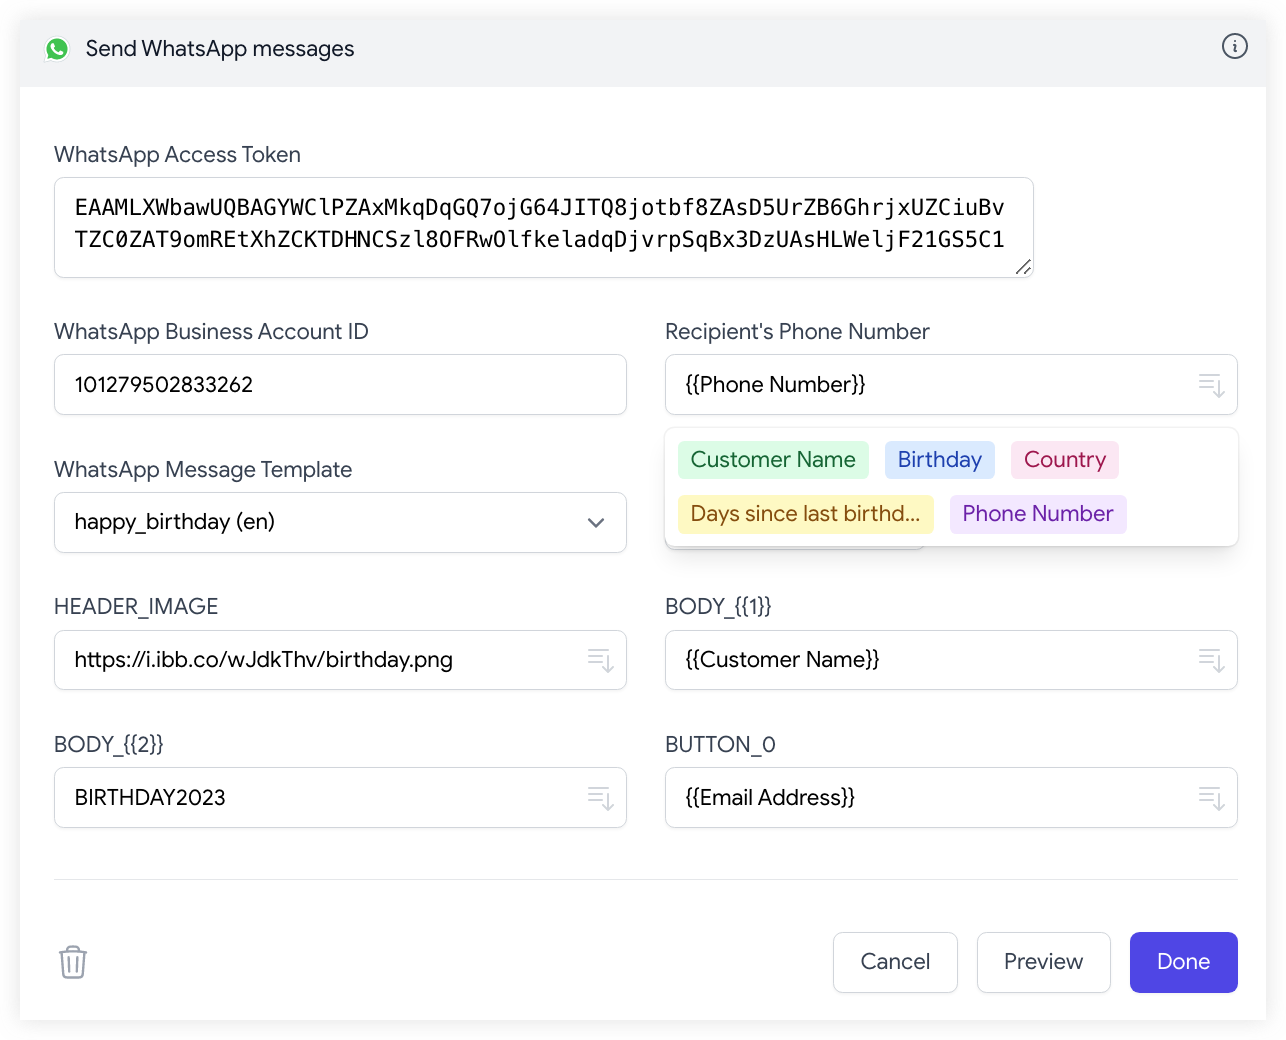
Provide your WhatsApp Account ID and the permanent token that you generated earlier. Select the happy_birthday template from the list of WhatsApp templates and put the merge field {{Phone number}} for the recipient's phone number field.
For the header image, you can use any image that you want to embed in the WhatsApp message. The image should be publicly accessible on the web, and you can use an image hosting service like ibb.co to upload your image.
The {{Body_1}} field corresponds to the first variable {{1}} in the message template and will contain the customer's name. The {{Body_2}} field corresponds to the second variable {{2}} and will have the coupon code for the customer.
Activate your WhatsApp integration
After configuring the WhatsApp message, click the Preview button to send a live message to any recipient. You can use your phone number (with country code) to test the integration.
On the next screen, turn on the Run workflow every hour option and the workflow will run in the background. It will continuously look for rows that match the specified criteria and send WhatsApp messages to the recipients.
Click the Save button, and the workflow will now appear in the workflow dashboard where you can edit, delete or manually run the workflow.