Send Emails with SendGrid from Google Sheets
SendGrid is a popular cloud-based email sending service from Twilio, the company well-known for their SMS and Voice platform. The Document Studio add-on for Google Workspace enables you to send unlimited emails using the SendGrid service from Google Sheets.
Create a SendGrid API key
Sign in to SendGrid and go to Settings > API Keys. Click the Create API Key button, give your API key a name and choose Restricted Access since we will be using the API key to send emails only.
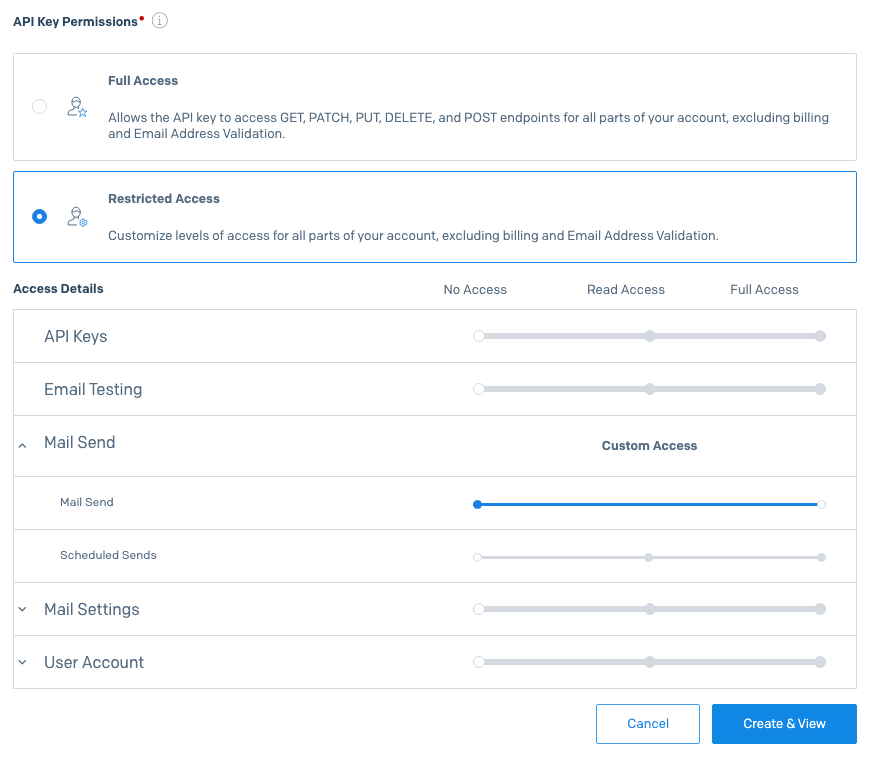
Expand the Mail Send group and drag the slider from No access to Full Access. Click Create and View to generate your SendGrid API key for sending emails. Make a note of the key at a safe location since SendGrid will not show it to you again.
Verify an Email Sender
Inside the SendGrid Settings page, go to Sender Authentication > Verify a Single Sender and click the Create New Sender button. Fill in all the fields and click Save. SendGrid will send a verification email to the email address you provided.
- From Email Address - This will display to the user as the email address who sent this email.
- From Name - This is a user-friendly name that is displayed to your recipient when they receive their email.
- Reply To - If your user hits reply in their email, the reply will go to this address.
It is recommended that you authenticate your domain with SendGrid. Your email recipients will no longer see the
via sendgrid.netmessage on your emails and, by adding proper SPF and DKIM records, your emails are less likely to land in the spam folder. Click here to learn more.
Prepare Data in Google Sheets
Install Document Studio and open your Google Sheet to launch the add-on. You may either open an existing Google Sheet or create a new sheet and add data manually.
Inside the Document Studio app, provide a descriptive name for your workflow and choose the specific worksheet in your Google Spreadsheet that contains the email data. Click on Continue to move to the conditions page.
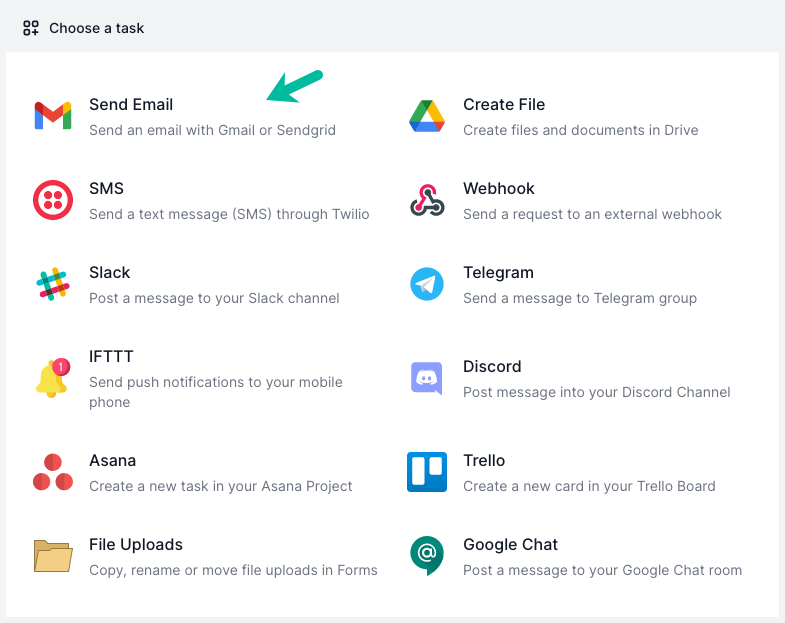
On the Conditions pane, specify if you want the email workflow to run only if the row data satisfies certain conditions. Click Continue and, on the next screen, choose Send Email from the list of available tasks.
Connect SendGrid with Google Sheets
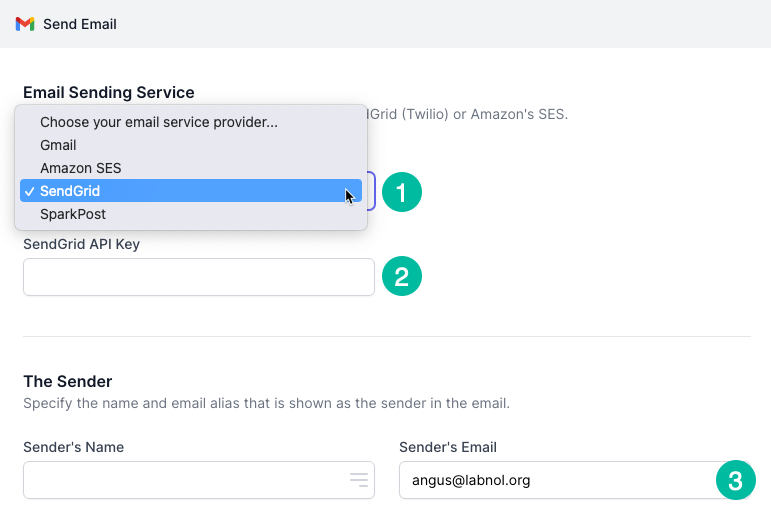
Choose SendGrid from the list of available email sending services. You can also send emails through Amazon SES, SparkPost and Google's own Gmail service.
Next, enter your SendGrid API key and the sender's email address that you have created and verified in the previous steps.
Configure Email Message
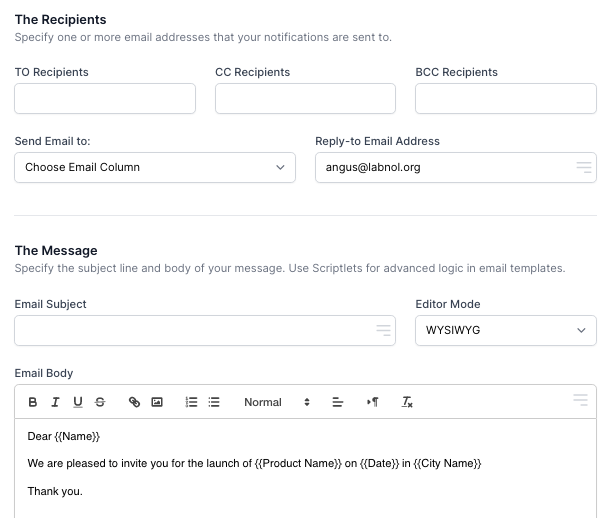
Next, specify a list of TO, CC and BCC recipients in the respective input boxes. You can specify multiple recipients in the same email, separated by commas. If the email addresses are listed in a spreadsheet column, you can choose the column name from the Send Email to dropdown. The reply-to address should be set to the same value that you have entered in the SendGrid settings.
Provide a subject and body for the email. You can use {{variables}} in the subject and body for personalized emails. Advanced users may add Scriptlets in the email body for conditional text.
Preview and Save
Click the Preview button and you should see a sample email sent via SendGrid to your own email address. Document Studio will take the data from the second row of the selected Google Sheet and use it to personalize the email message. Click Done to locally apply your changes.
On the next screen, turn on the Run workflow every hour option and the workflow will run in the background. Click the Save button and the workflow will now appear in the workflow dashboard where you can edit, delete or manually run the workflow.