Send Emails with Amazon SES from Google Sheets
Amazon's Simple Email Service, or SES, is a cloud-based email service that you can use to send bulk emails, newsletters, transactional emails or any other emails messages at scale. The Document Studio add-on enables you to send unlimited emails using AWS SES email service for rows in your Google Sheets.
Create a Sender Identity
Log into your SES console, and from the menu bar, choose the AWS Region where want to verify the email address or the domain for sending emails.
In the sidebar, go to Verified Identities and click on the Create Identity button. Choose the Email Address box, enter your email address and click on the Create Identity button. AWS will send an email to that address to verify your identity.
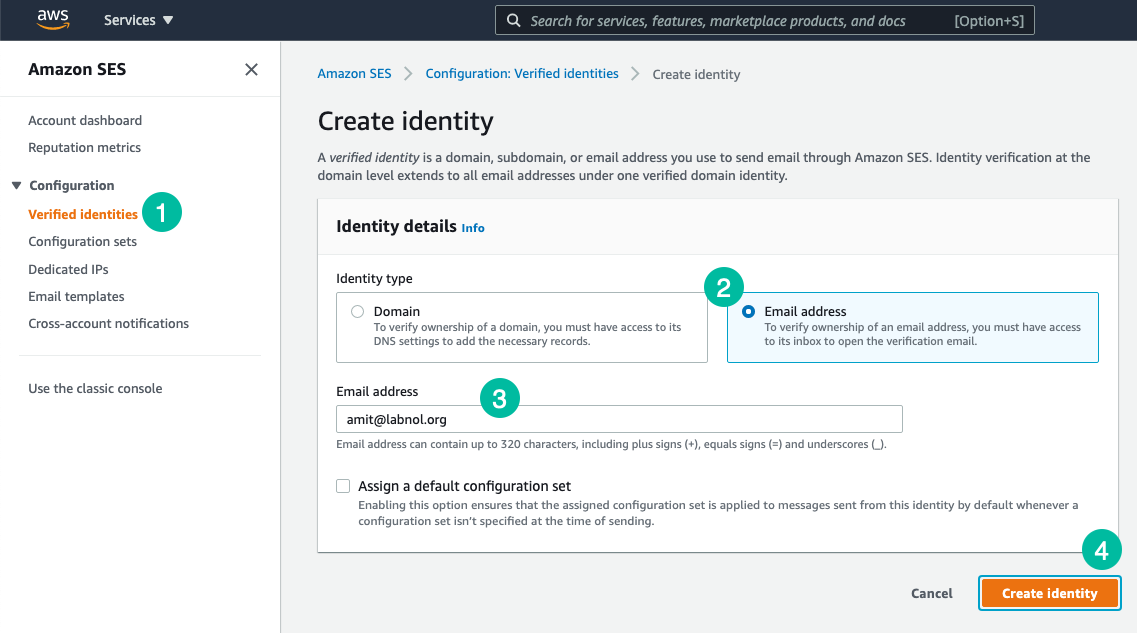
You can either verify a single email address or a domain. When you verify an entire domain, you are verifying all email addresses from that domain, so you don't need to verify email addresses from that domain individually. Learn more
Add an SES User
The first step is to create a new user in the AWS SES console that will have permissions to send emails on your behalf through SES and will not have access to any other AWS service.
Click your name in the top right corner of the AWS console, and then click on Security Credentials in the menu bar to access the Identity and Access Management (IAM) dashboard. In the sidebar, go to Access management > Users and click the Create User button to add a new SES users for sending emails.
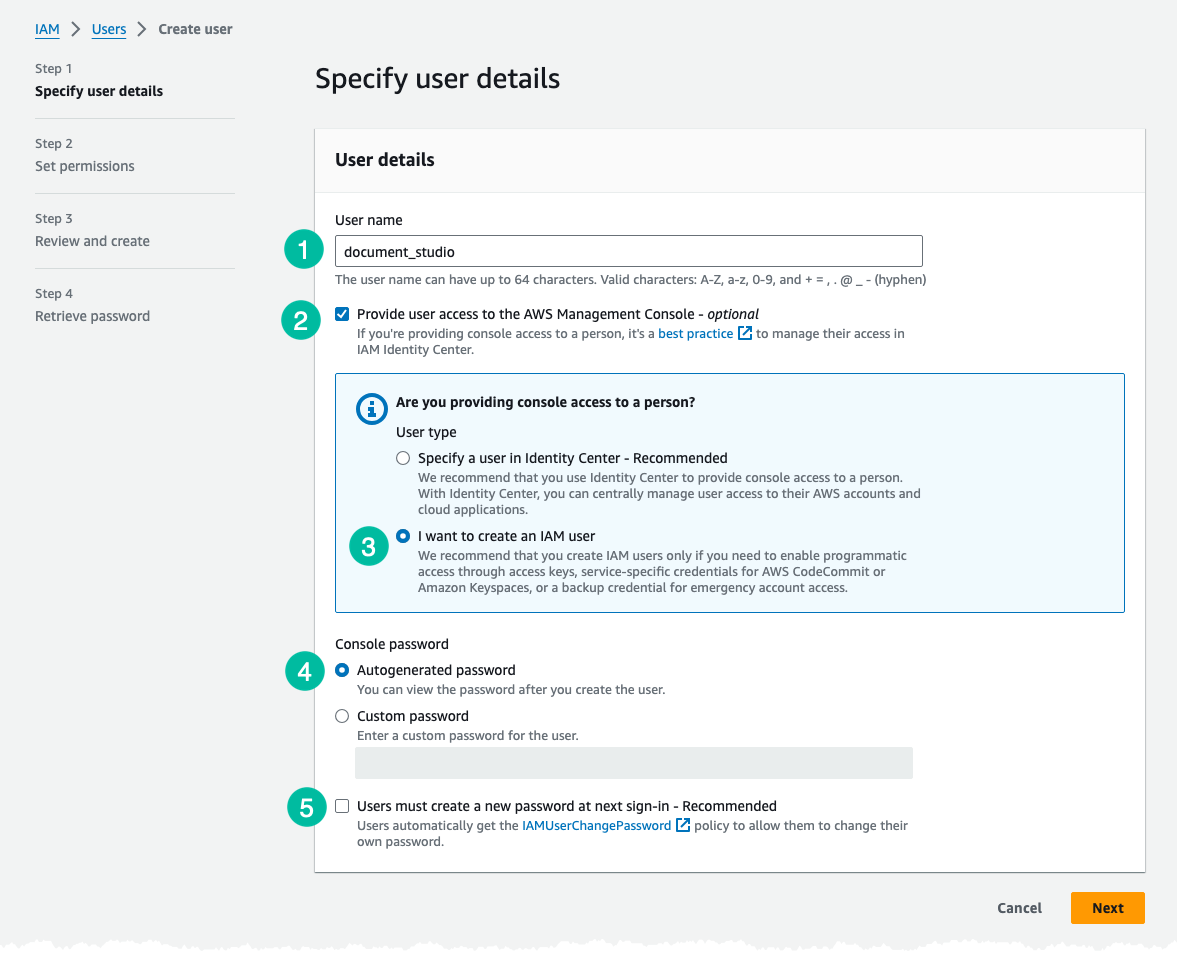
Give your new user a unique name (up to 64 characters) and check the option that says Provide user access to the AWS Management Console. Select the I want to create an IAM user option under the Are you providing console access to a person? section. Choose Autogenerated password, uncheck the option that says Users must create a new password at next sign-in and click the Next button.
Next, we'll attach the SES policy to the user so that they can send emails through SES.
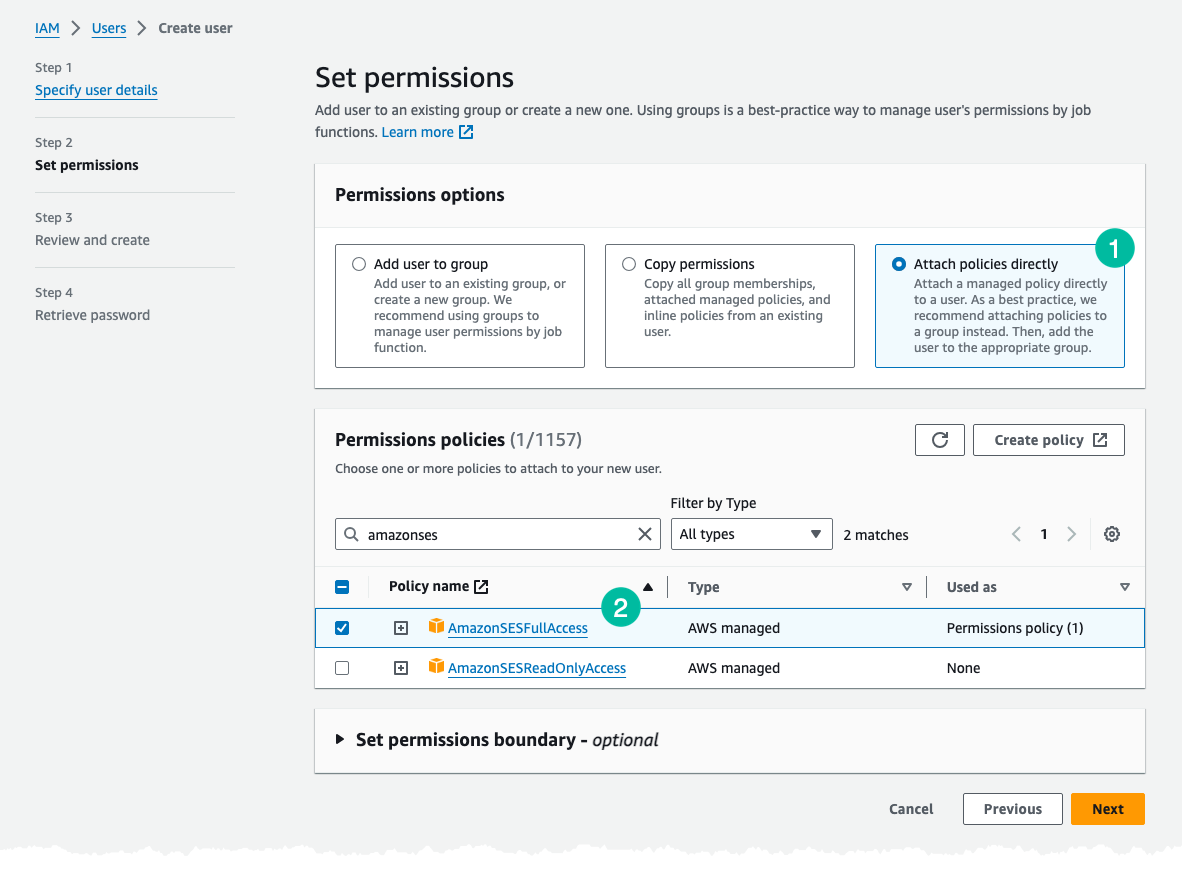
Under the Set Permissions section, select Attach policies directly, search for AmazonSES, check the filtered option that says AmazonSESFullAccess and click the Next button.
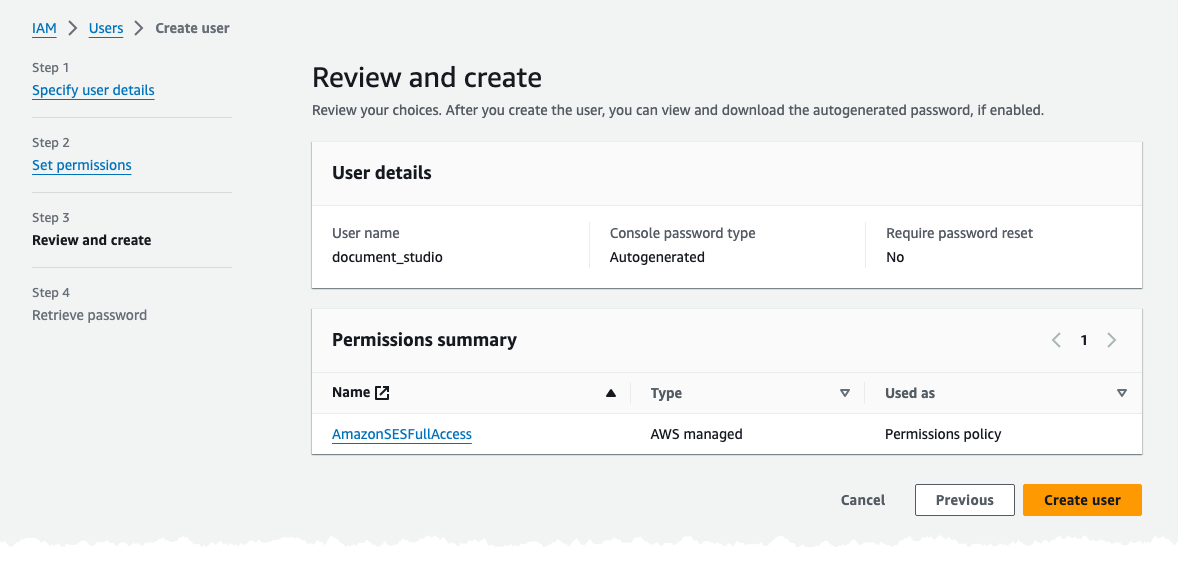
On the next screen, you'll see a summary of the user you are about to create. Click the Create User button to complete the user creation.
Generate SES Credentials
Now that your SES user is created, you need to generate the access keys that will be used by Document Studio to send emails through SES. Click the View user button to open the user details page. If you have closed the window, you can always find the user by going to Access management > Users in the IAM dashboard.
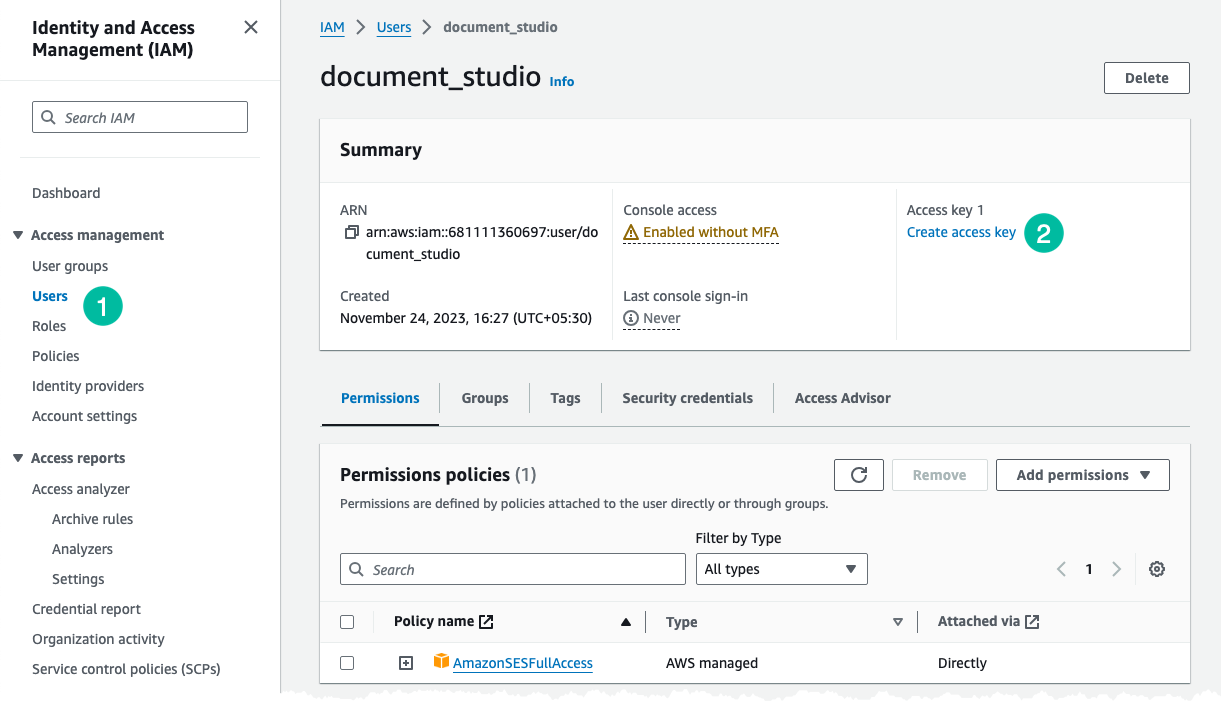
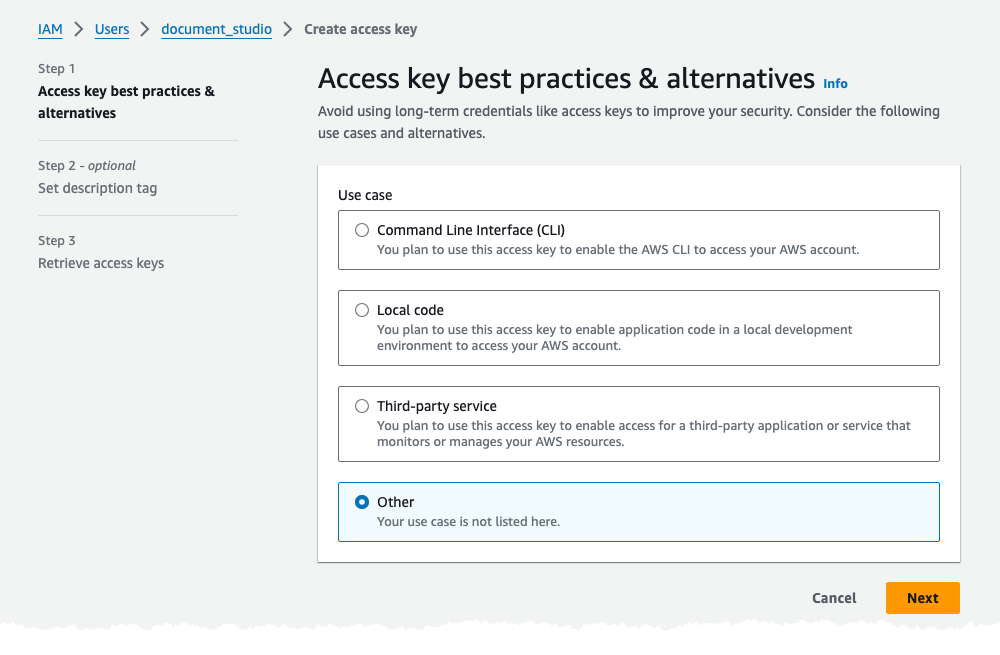
Click the Create access key link unde rthe Access key 1 section. On the next screen, choose Other as the use case and click the Next button. Give your access key a descriptive tag, like Document Studio and click the Create access key button.
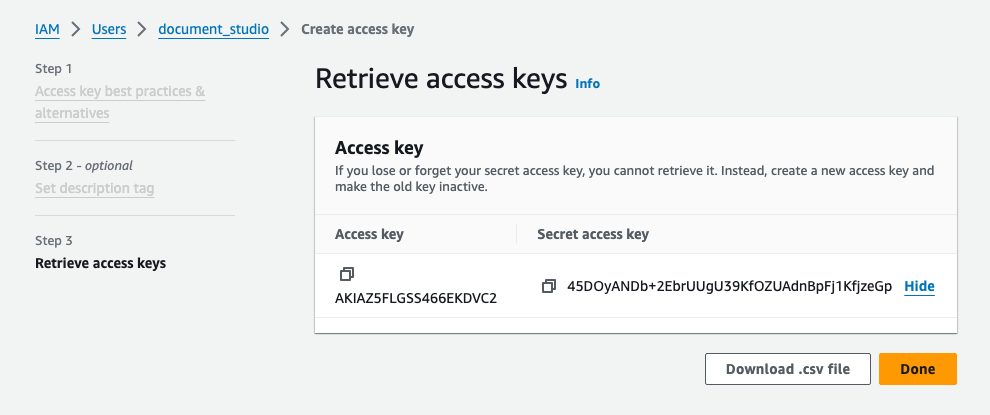
You'll now see the access key and the secret key that you'll need to provide in the Document Studio add-on to send emails through SES. Click the Show button to reveal the secret access key and copy both the keys to your clipboard.
Connect Google Sheets to SES
Install Document Studio and open your Google Sheet to launch the add-on. You may either open an existing Google Sheet or create a new sheet and add data manually.
Inside the Document Studio app, give your workflow a name, like Send Emails with SES and select the specific worksheet in your Google Spreadsheet that contains the merge data. Click on Continue to move to the conditions page.
On the Conditions pane, specify if you want the email workflow to run only if the row data satisfies certain conditions. Click Continue and, on the next screen, choose Send Email from the list of available tasks.
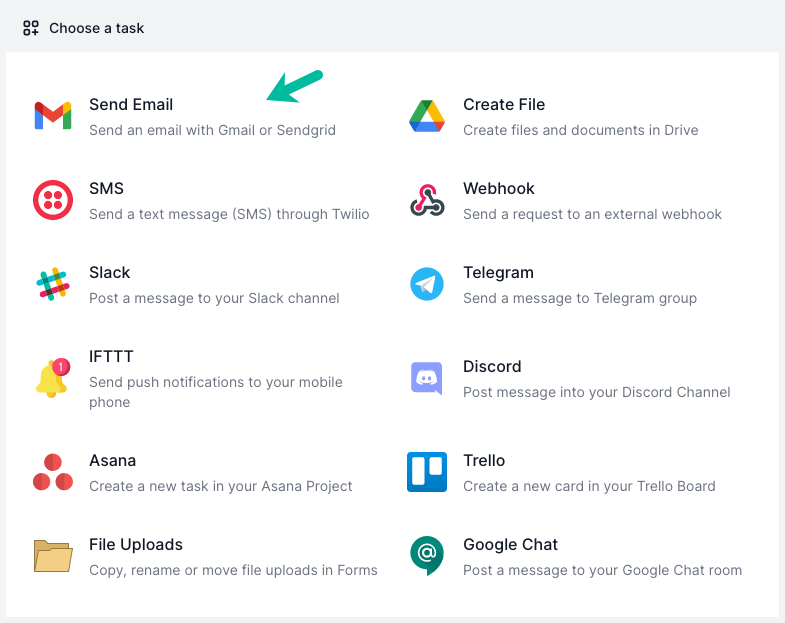
You can also send emails through Sparkpost, Resend, SendGrid and Google's own Gmail service.
Configure SES in Sheets
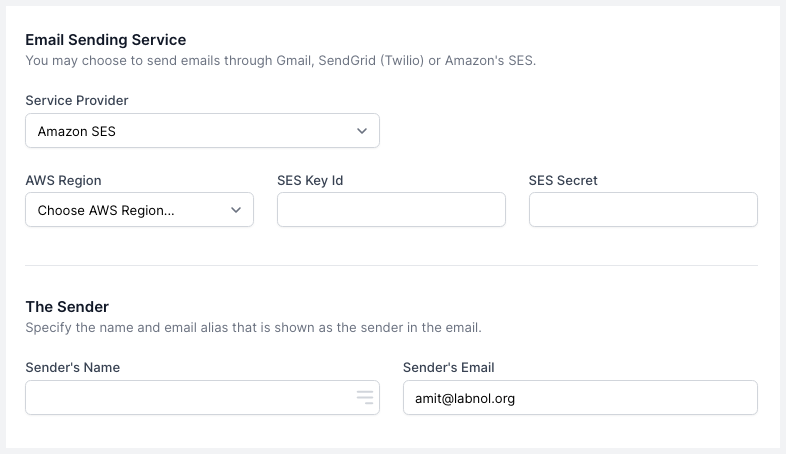
Choose Amazon SES from the list of available email sending services.
Next, chose the AWS Region that you have selected while generated SES access keys in the AWS console. Provide your SES Access Key and the Secret Key that were generated in the previous step.
For the sender's email address and reply-to fields, you need to provide the same email address that you've added as an identity is SES. If you have verified a domain, you can send email from any subdomain or email address of the verified domain without having to verify each one individually.
Configure Email Message
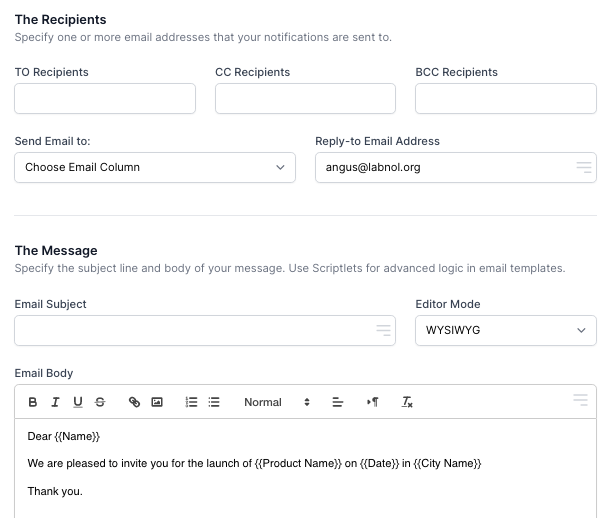
Specify a list of TO, CC and BCC recipients in the respective input boxes. You can specify multiple recipients in the same email, separated by commas.
If the email addresses are dynamic and listed in a spreadsheet column, you can choose the email column name from the Send Email to dropdown.
Provide a subject and body for the email. You can use {{variables}} in the subject and body for personalized emails. Advanced users may add Scriptlets in the email body for conditional text.
Preview and Save
Click the Preview button and you should see a sample email sent through Amazon SES to your own email address. Document Studio will take the data from the second row of the selected Google Sheet and use it to personalize the email message. Click Done to locally apply your changes.
On the next screen, turn on the Run workflow every hour option and the workflow will run in the background. Click the Save button and the workflow will now appear in the workflow dashboard where you can edit, delete or manually run the workflow.
Authenticate your Emails
It is highly recommended that you authenticate your emails sent with SES to improve deliverability.