Create Documents from Data Rows in Google Sheets
You can use Document Studio to create documents that display data from Google Sheets and Google Form responses. You can create multiple cover letters for different job applications, generate invoice, sales quotes, and other personalized documents.
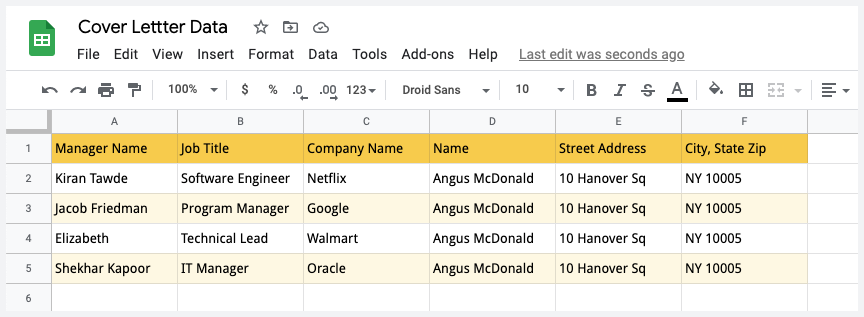
For this example, we have a Google Sheet that stores the details of different companies where the candidate is applying for jobs. The Document Studio add-on will help the candidate create a different cover letter for each job application.
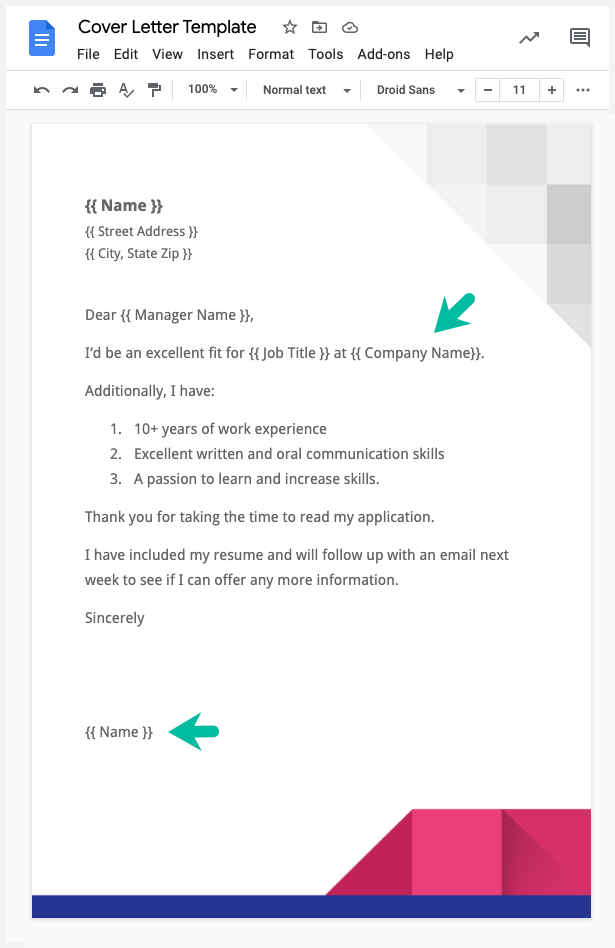
Create Document Template in Google Docs
As a first step, create a new document template in Google Docs. The merge fields are enclosed in double curly braces and they are used to display the data from the Google Sheet into the document.

The cell formatting in Google Sheets will not be carried over to the document. If you would like to apply any formatting, like make some text bold, add your brand logo or italicize a paragraph, please do that directly in the document template.
Prepare Merge Data in Google Sheets
Install Document Studio and open your Google Sheet to launch the add-on. You may either open an existing sheet or create a new sheet and add data manually to the sheet.
Create a new workflow, give a descriptive name and then click on Continue to move to the conditions page. On the Conditions pane, specify if you want your workflow to run only if the Google Sheet row satisfies certain conditions. By default, the workflow will run for all rows in the Google Sheet.

Configure Document Generation
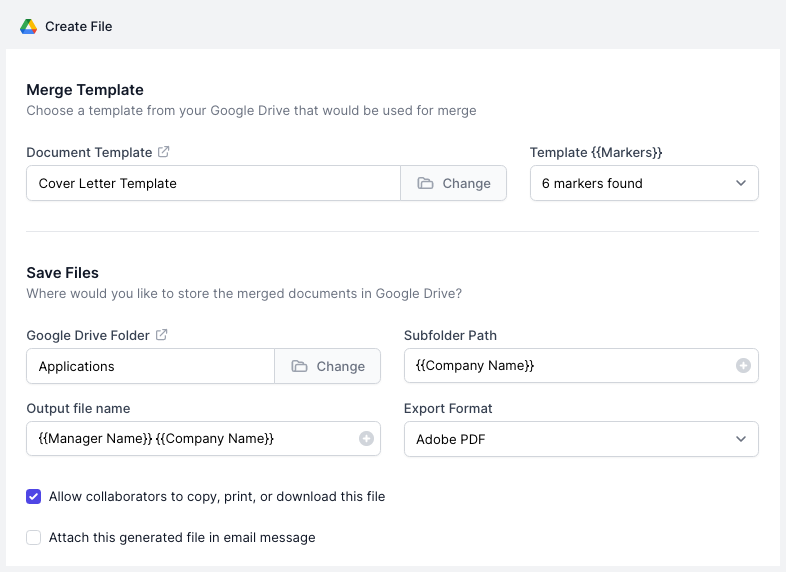
Choose File from the list of available tasks. Next:
- Choose the document template that you've created in the previous step
- Specify the Google Drive folder where the generated files would be saved
- Specify the name of the generated file
- Choose the export format (PDF, Word Document or native Google Docs)

If you would like to send the generated document as an email attachment, turn on the option that says Attach file in email message. You would also have to create a new task for sending this email.
Click on the Preview button to see the document. Document Studio will take the data from the second row of the selected Google Sheet and generate a document in Drive. Click Done to locally apply your changes.
Click on Continue to proceed to the triggers screen. If you want the workflow to be automatically triggered every hour, so that any new rows added in that duration are processed automatically, you can choose the option Run workflow every hour and then click on the Save button.
The workflow will also appear in the workflow dashboard where you can edit, delete or manually run the workflow.
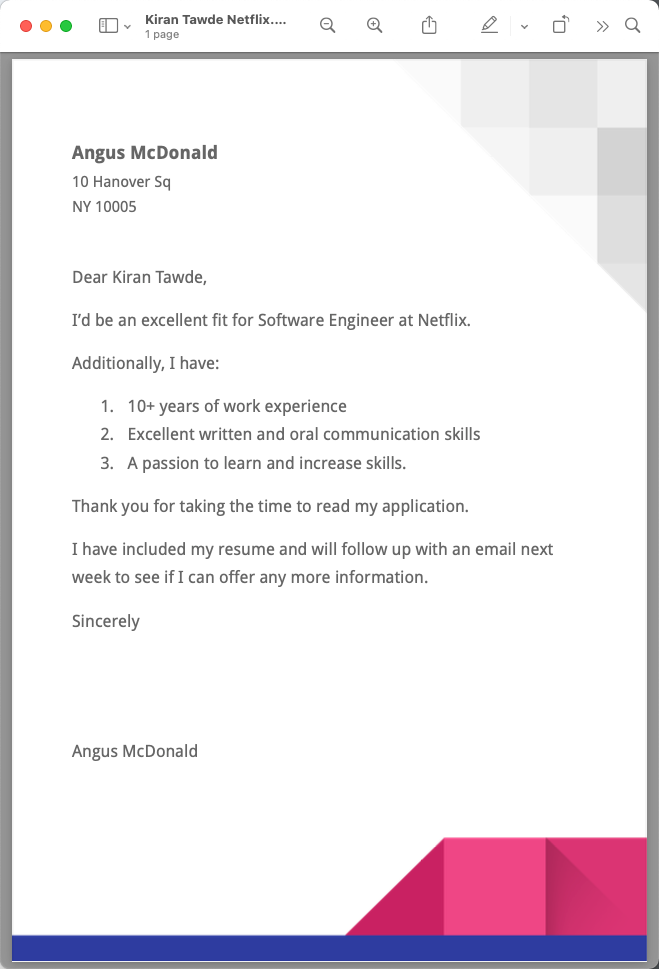
Sample Document
Here's a sample PDF document generated from the Google Docs template.
