Send SMS Messages from Google Sheets Rows with Twilio and Document Studio
You can send personalized SMS messages from Google Sheets to any phone number in the world using Twilio SMS. Here's a step-by-step guide on how to you can send a SMS messages when a new row is added in Google Sheets. You may use this workflow to send order confirmation, text reminders to pay rent, or a discount offer code to your customers.
Configure Twilio Texting
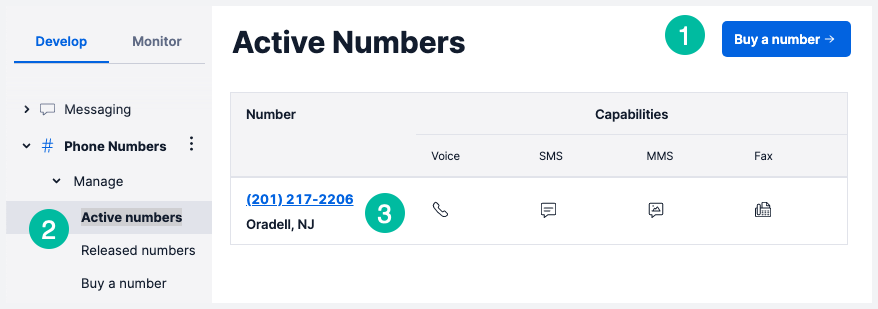
Sign-in to your Twilio account. While inside the console, buy a new phone number. Your Twilio number will be the one you will use to send text messages from Google Sheets.
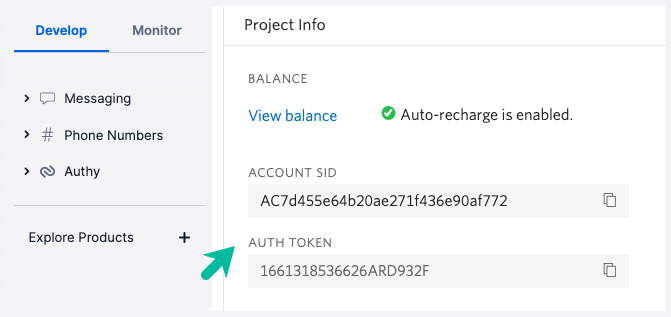
Once you have acquired a phone number, go to the project console and make a note of the Account SID and Auth Token from the dashboard as we'll need these in a later step.
Prepare Data in Google Sheets
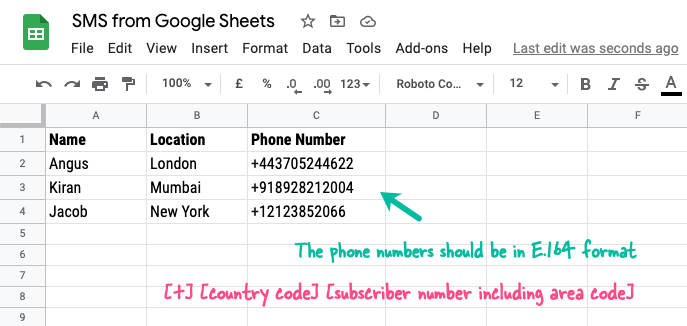
Open your Google Sheets and add data with a separate column for phone numbers of the recipients. The phone numbers should be written in E.164 format as below and can have a maximum of fifteen digits.
[+] [country code] [recipient's phone number including area code]
A separate text message would be sent for each row in the sheet.
Connect Twilio SMS to Document Studio
Install Document Studio add-on and launch the add-on inside Google Sheets. Inside the Document Studio app, give your workflow a descriptive name, and choose the specific worksheet that contains the merge data. Click on Continue to move to the conditions page.
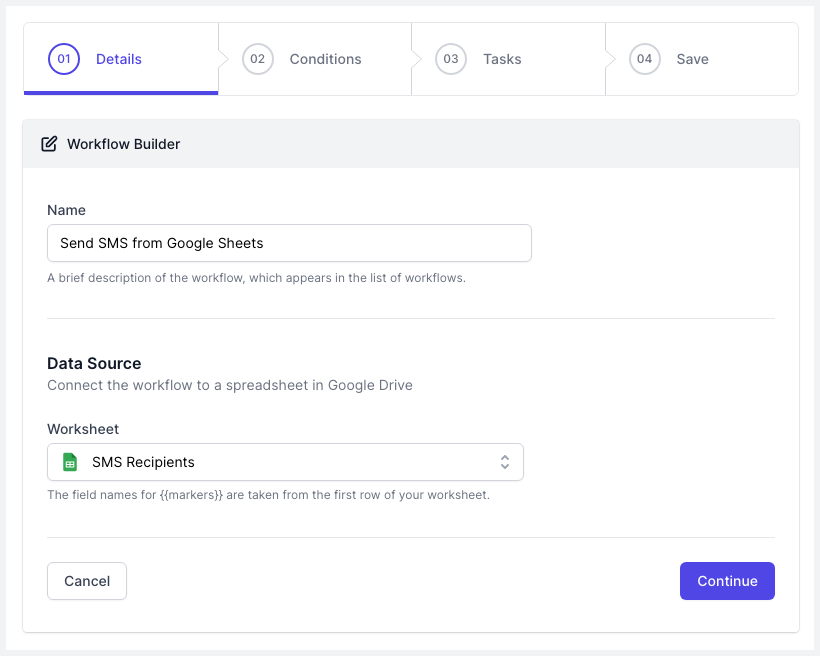
If you want your Google Sheets to SMS workflow to run only if the rows in the Google sheet satisfy certain conditions, you can add them in the Conditions screen. Next, choose Send SMS from the list of available tasks.
Configure SMS Message Template
In the SMS configuration window, choose Twilio from the list of available SMS services. Provide your Twilio Account SID and Auth Token that you made a note of in the previous step. For the sender's phone number, enter the phone number that you bought in the Twilio dashboard with the country code.
For the Recipient's Phone Number field, provide the column title that contains the phone numbers in Google Sheets. The phone numbers should have the country code, area code and the subscriber number prepended with the + symbol.
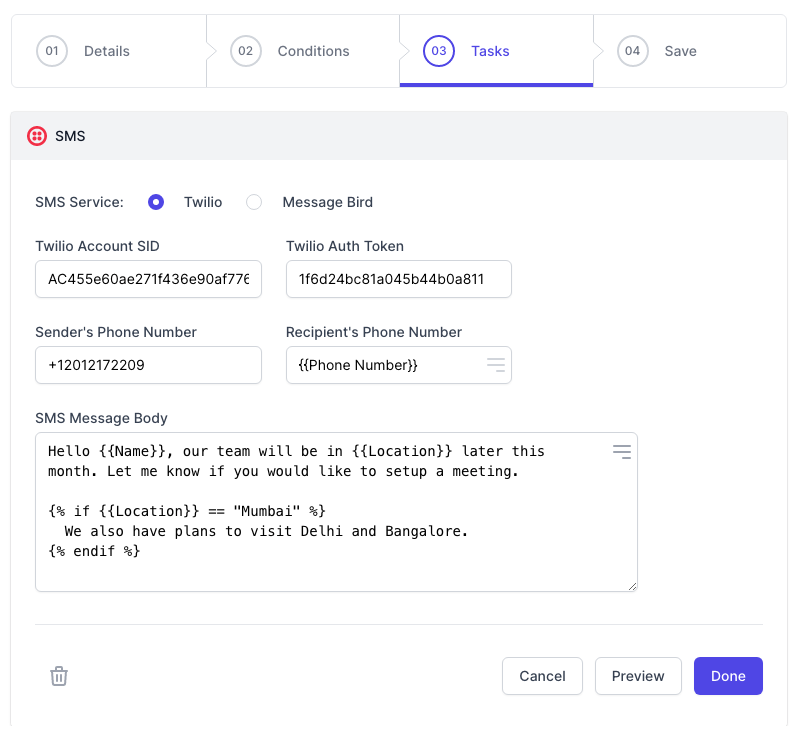
The Message field is where you can enter the text message that you want to send via Twilio. You can personalize message with {{placeholders}} that will be replaced with the values from the Google Sheet. You may also use Scriptlets to insert dynamic conditional data.
Hello {{Name}}, our team will be in {{Location}} later this month.
Let me know if you would like to setup a meeting.

{% if {{Location}} == "Mumbai" %}
  We are also visiting Delhi and Bangalore, if that works for you!
{% endif %}
Send Text Messages with Twilio
Now that your message template is ready, click the Preview button to send a sample SMS text message to the phone number listed in the second row of the specified Google Sheet. You can go to Twilio dashboard > Monitor > Logs > Messaging to see the actual SMS message sent and the delivery status of the message.
Click Done to locally apply your changes.
Activate the workflow
On the next screen, turn on the Run workflow every hour option and the workflow will run in the background, once per hour. You also have the option to run the workflow manually from the dashboard.
Click the Save button and the workflow will now appear in the workflow dashboard where you can edit, delete or manually run the workflow.