How to request UPI payments in bulk through Google Sheets
UPI is India’s real-time payment system, that enables businesses to receive instant payments from customers using their mobile phones.
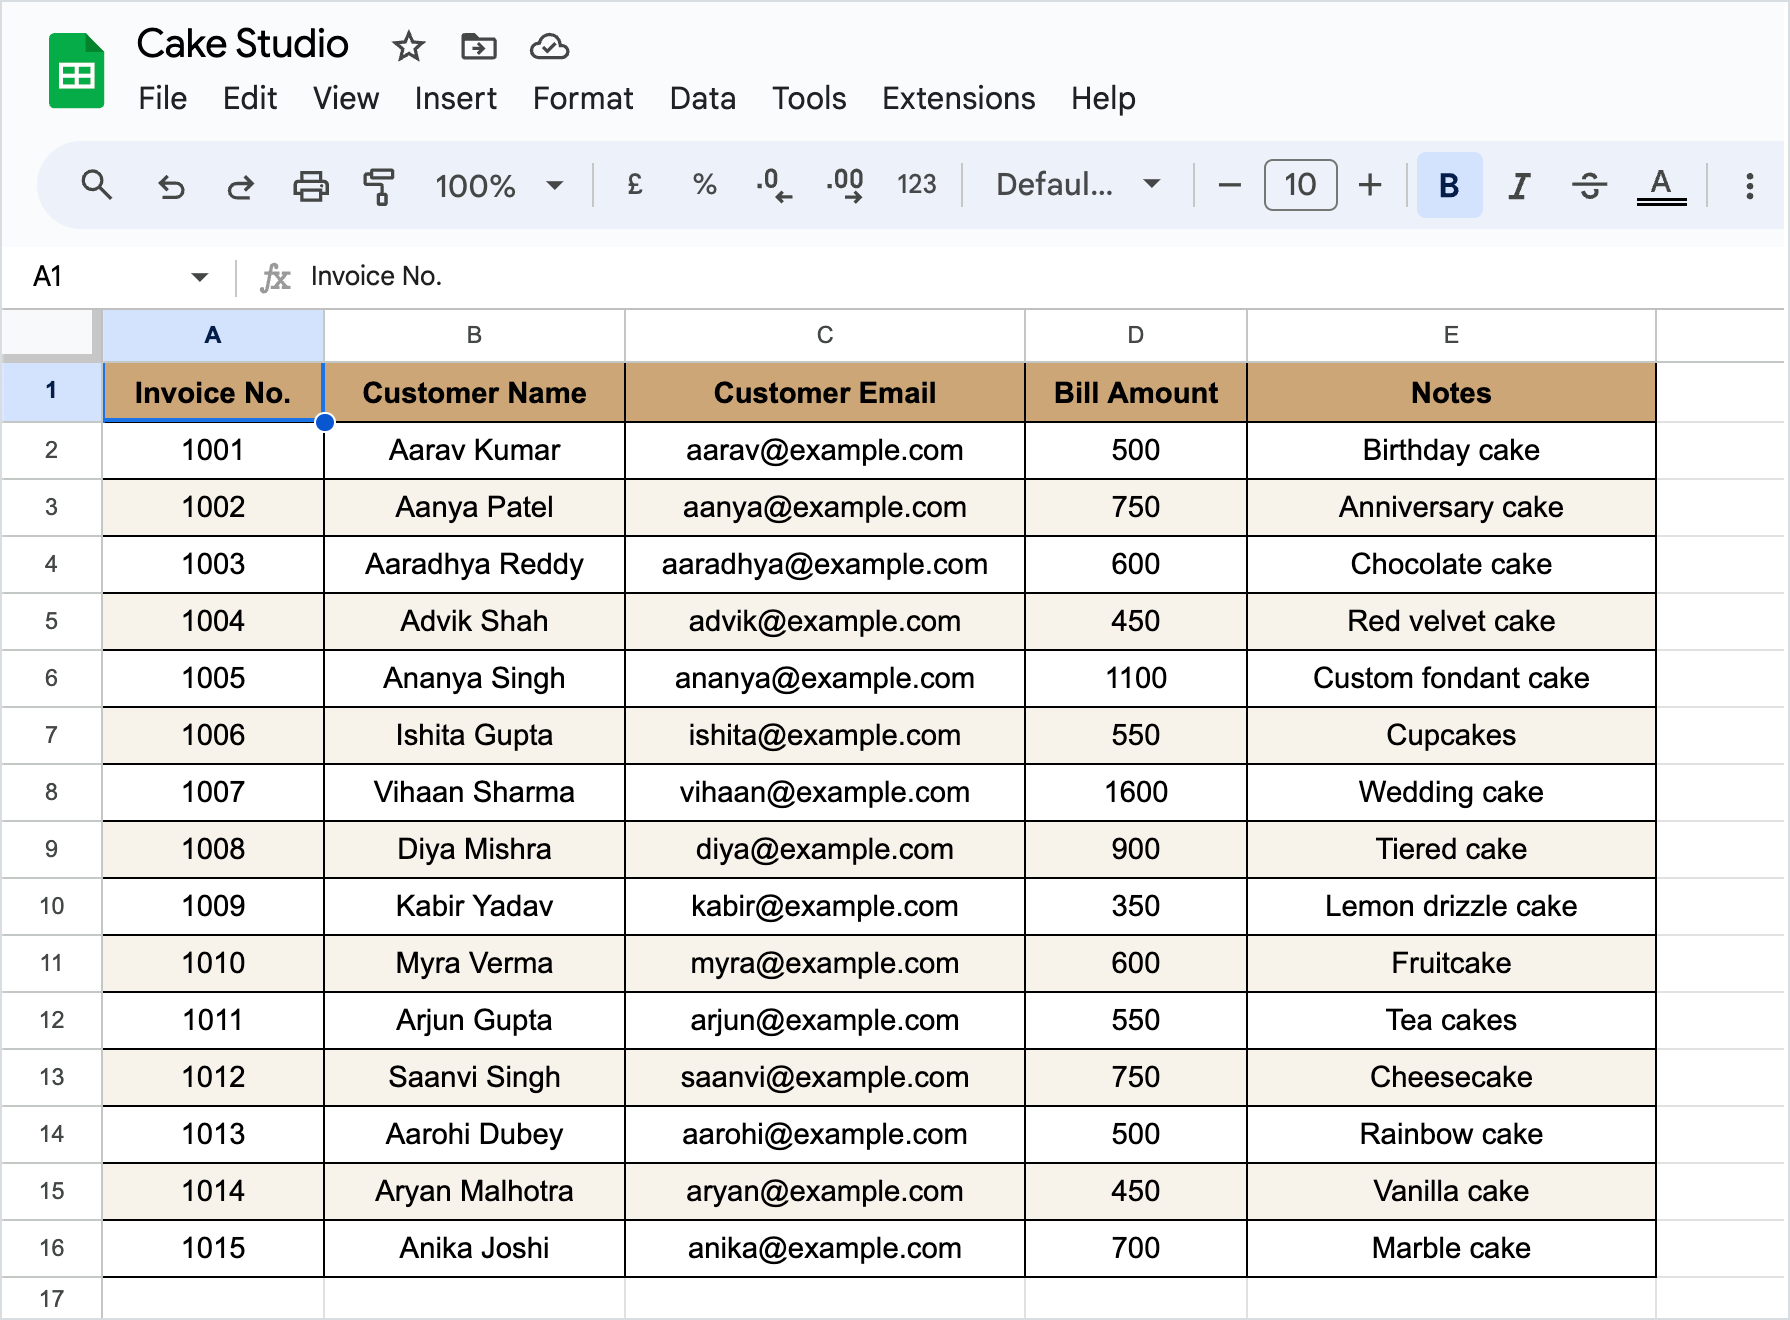
For this example, we have a Google Sheet that stores the invoices of customers. We will generate custom UPI QR codes for each invoice in the sheet. These QR codes will contain the exact invoice amount so that the customer can instantly make the payment on scanning the code.
Generate UPI QR codes in Google Sheets
Document Studio enables you to automatically send invoices and collect UPI payments from customers in bulk through Google Sheets. You can use the addon to embed UPI QR codes within an email, which the customer can scan to make the payment.
Install Document Studio and open the Google Sheet containing the invoices that you want to send to customers. Create a new column in the sheet, say UPI Links, since this column will contain the links to the customized UPI QR codes.
=UPI("labnol@upi", "Digital Inspiration", 499, "Payment for Invoice")
In the first row of this column, add the custom function UPI that makes it easy for you to generate custom QR codes inside the sheet.
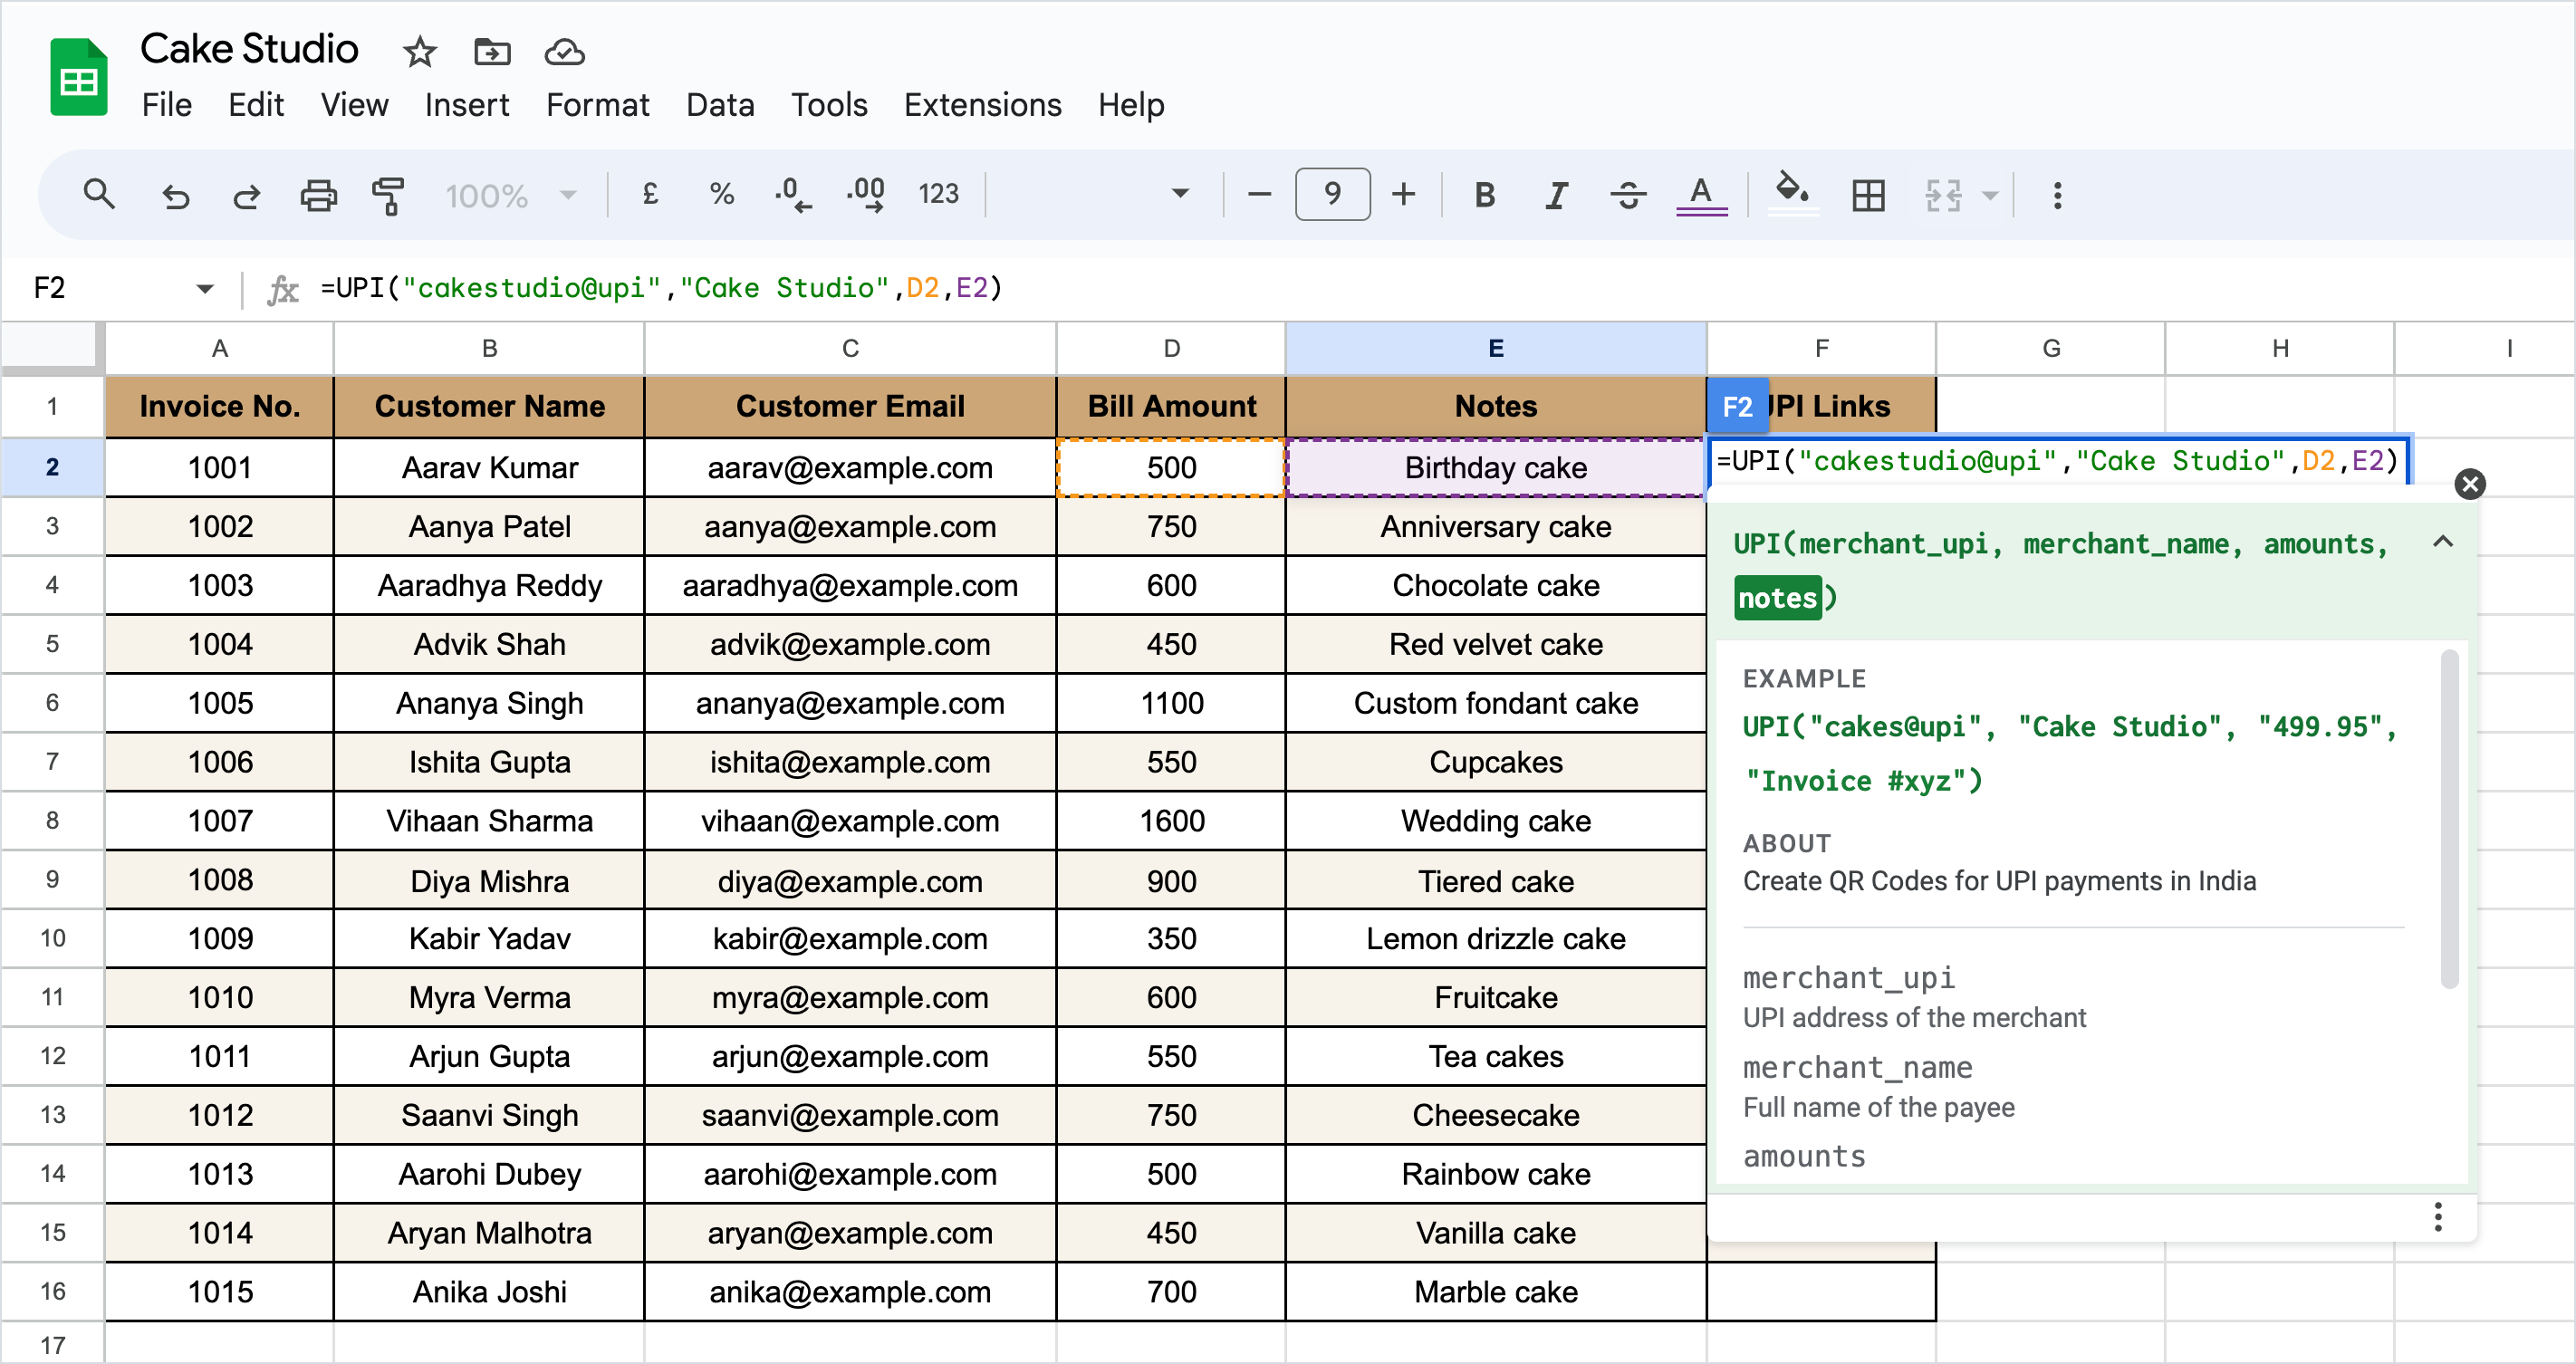
1. merchant_upi: specify the UPI ID that is linked to your bank account. The UPI ID should be enclosed in double quotes.
2. merchant_name: specify your personal or business name, enclosed in double quotes.
3. amounts: select the cell in the Google Sheet that stores the bill amount, or enter the amount manually.
4. notes: select the cell in the Google Sheet that stores the bill description, or enter it manually.
Apply UPI function to all the Rows
To apply the UPI function for all the rows, you can either copy and paste it manually, or use the ARRAYFORMULA to automatically copy down the entire column.
ARRAYFORMULA Syntax
You can copy the following function and paste it into the column header of your Google Sheet to apply the UPI function for all the rows.
=ARRAYFORMULA(IF(ROW(A:A)=1,"UPI Links",
IF(NOT(ISBLANK(A:A)),UPI("labnol@upi","Digital Inspiration", D:D,E:E),)))
In the above formula, labnol@upi is the merchant UPI ID, Digital Inspiration is the merchant name, D:D is the column range that contains the bill amount, and E:E is the column range that contains the description (notes) of the order.
To enable the UPI function in Google Sheets, you'll first need to install Document Studio. If Document Studio is already installed in your Google account, launch Document Studio inside the Google sheet, and then close the application to enable the UPI function.
Connect Google Sheets to Gmail
Launch the Document Studio app inside your Google Sheet. Create a new workflow and give it a descriptive name. Click Continue to move to the Conditions pane.
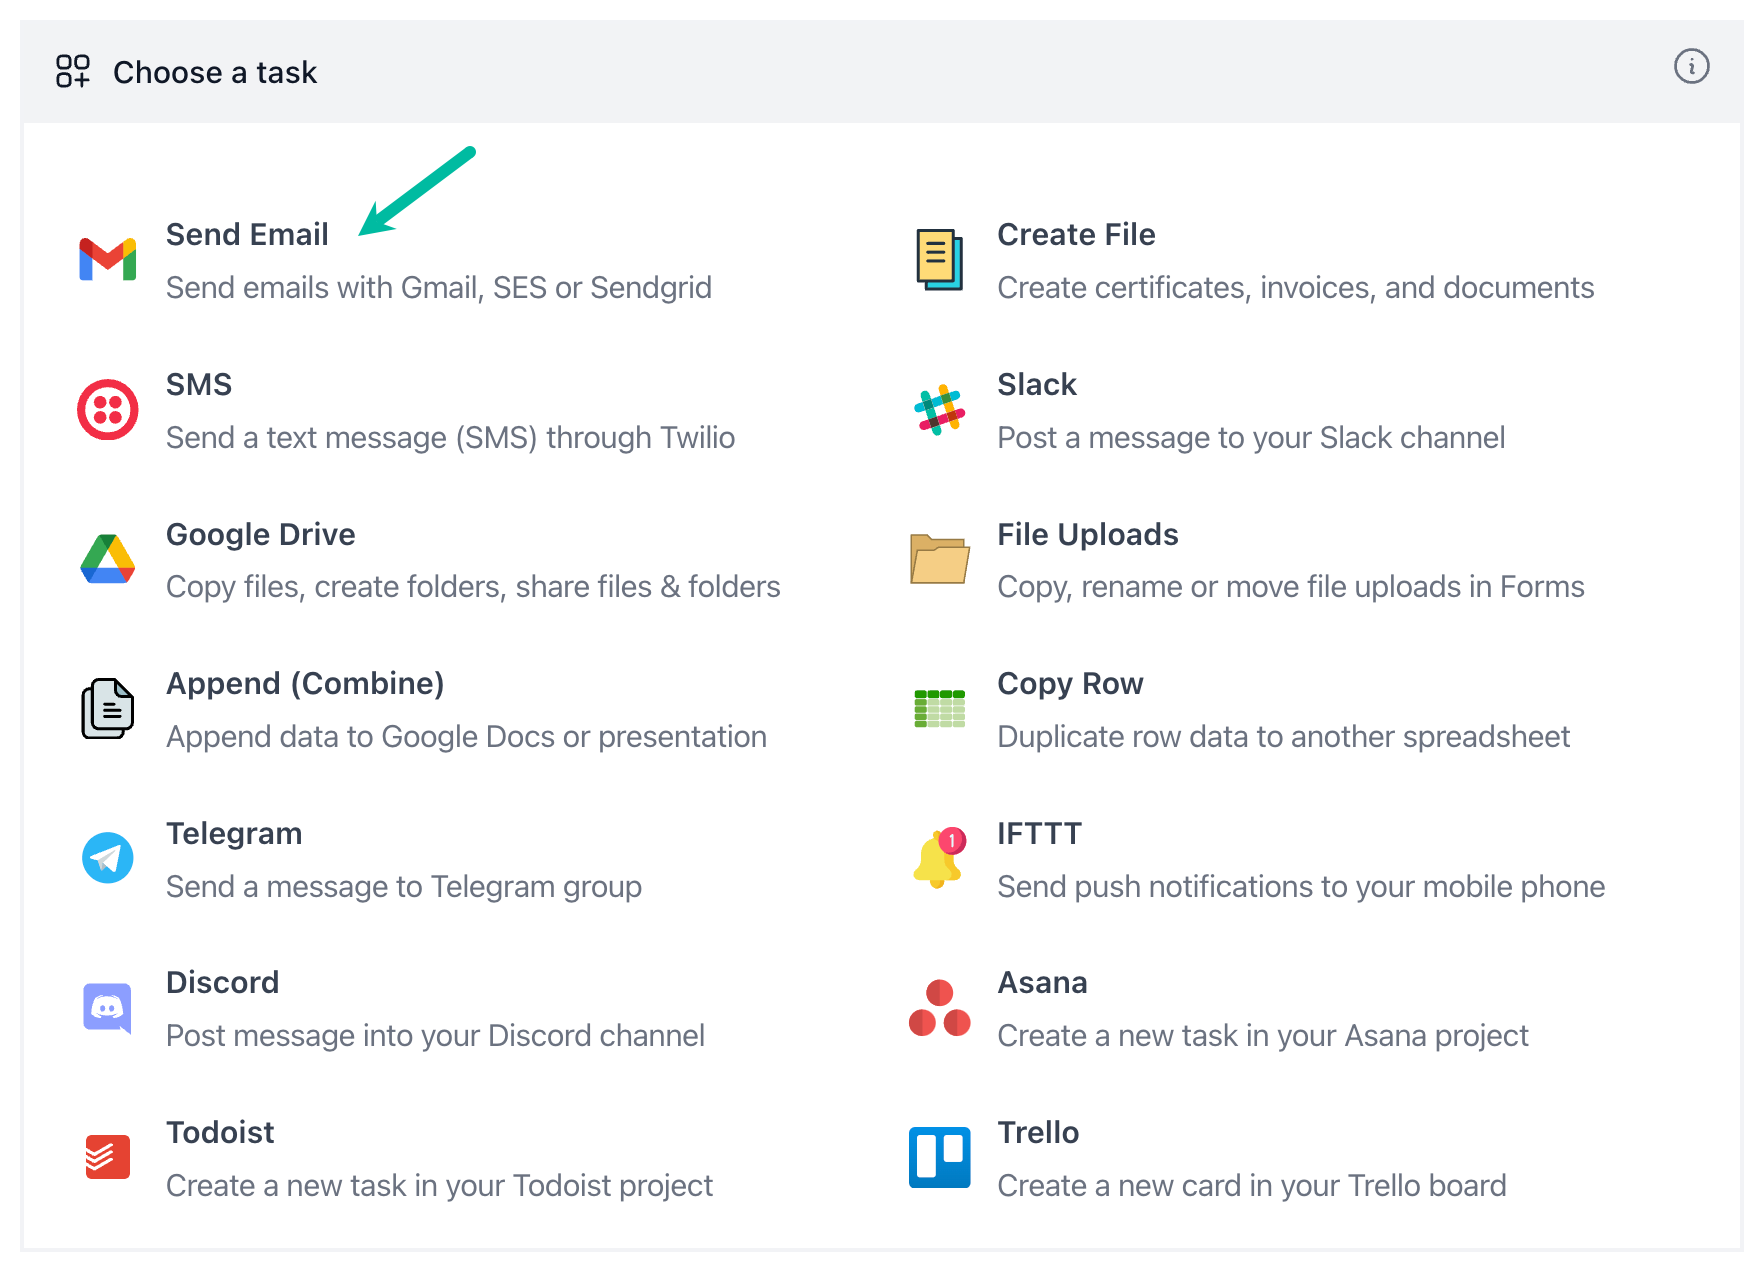
In the Conditions section, specify if you want the emails to be sent only if the row data satisfies certain conditions. Click Continue and, on the Task screen, choose Send Email from the list of available tasks.
Configure Email Message
Choose Gmail from the list of email sending services. Next, specify the Sender’s name and email address.
In the Recipients section, you can choose the email column name from the Send Email to dropdown since each row has different email addresses. You may also specify a list of TO, CC, and BCC recipients in their respective input boxes.
Next, provide the subject line and message body for the email. You can use the dynamic {{variables}} available in the dropdown to personalize the email message.
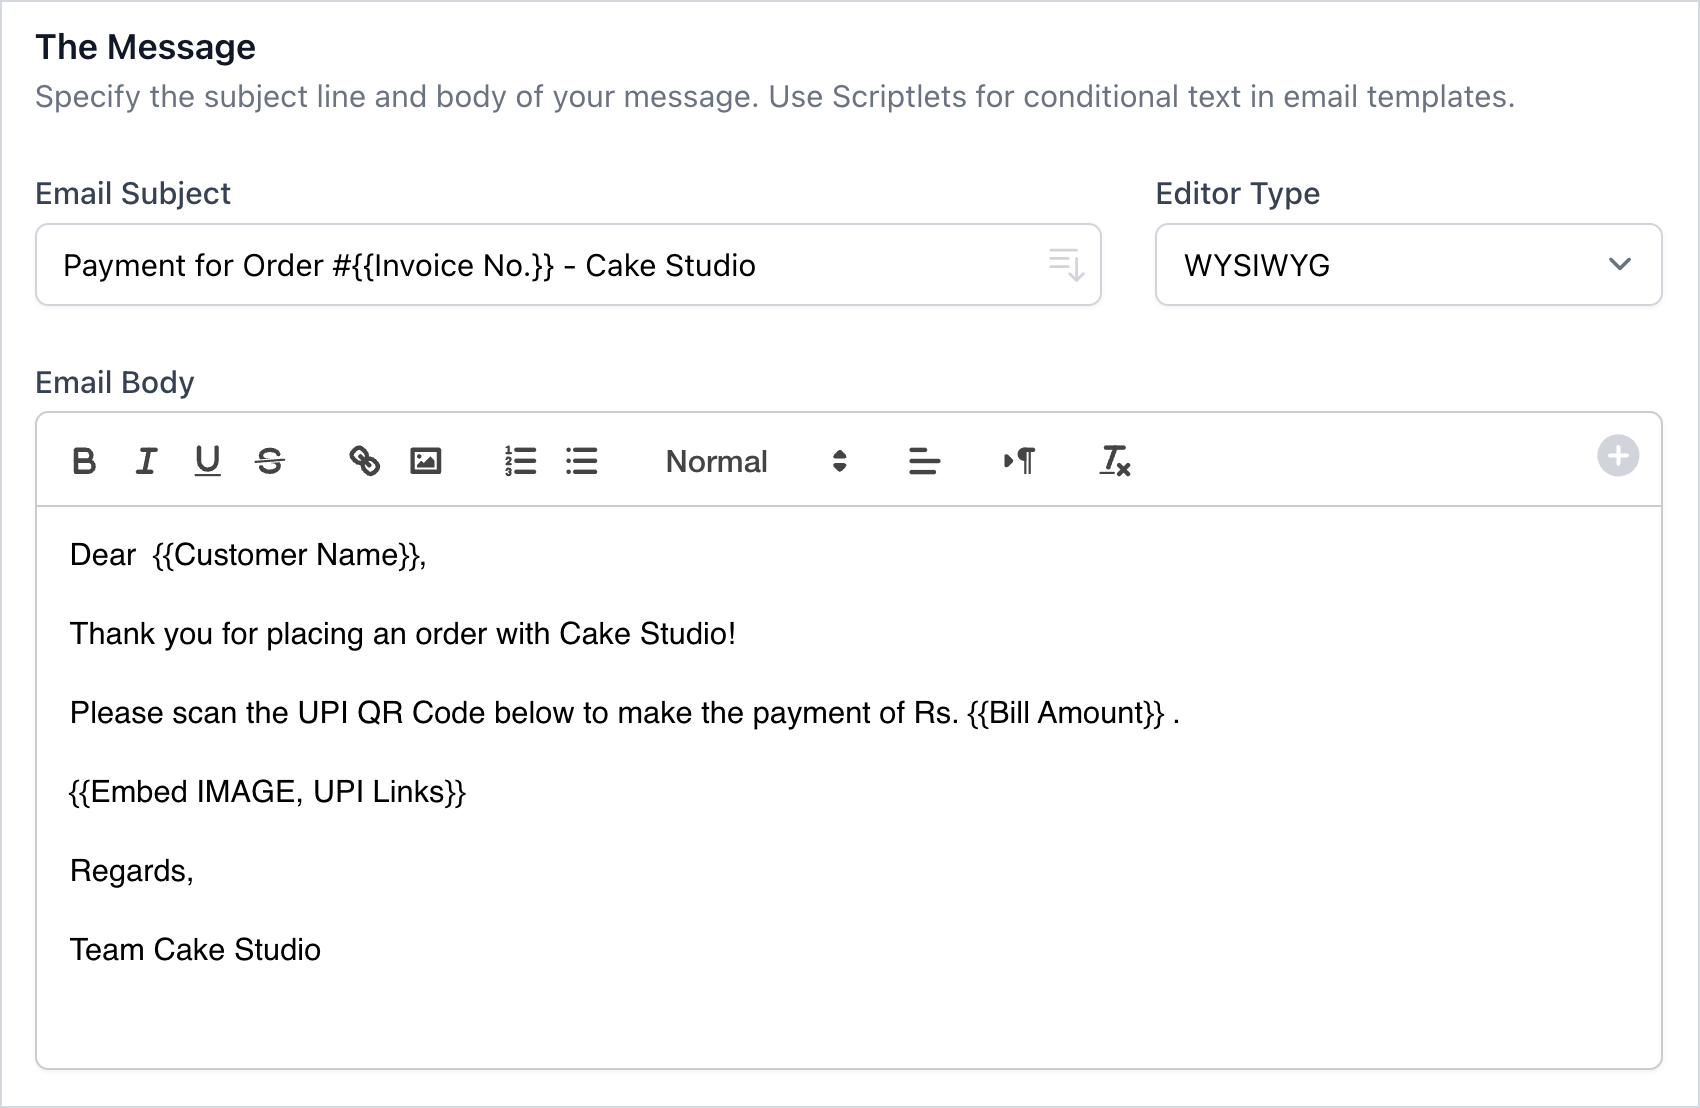
Next, use the {{Embed Image}} marker in the email template to add the UPI QR code image that we have generated in the Google Sheet. The marker should be placed in the email body where you want the QR code to appear.
{{Embed IMAGE, UPI Links}}
The second parameter UPI Links is the column name in the Google Sheet that contains the UPI QR code links.
Now that the template is ready, you can test the email by clicking on the Preview button. Click Done to apply the changes locally.
Click Continue to proceed to the triggers screen. If you want the workflow to be automatically triggered every hour so that any new rows added in that duration are processed automatically, you can choose the option Run workflow every hour.
For the last step, you can either Save the workflow and choose to run it later manually from the workflow dashboard, or you can click on the Save and Run button to run the workflow instantly.
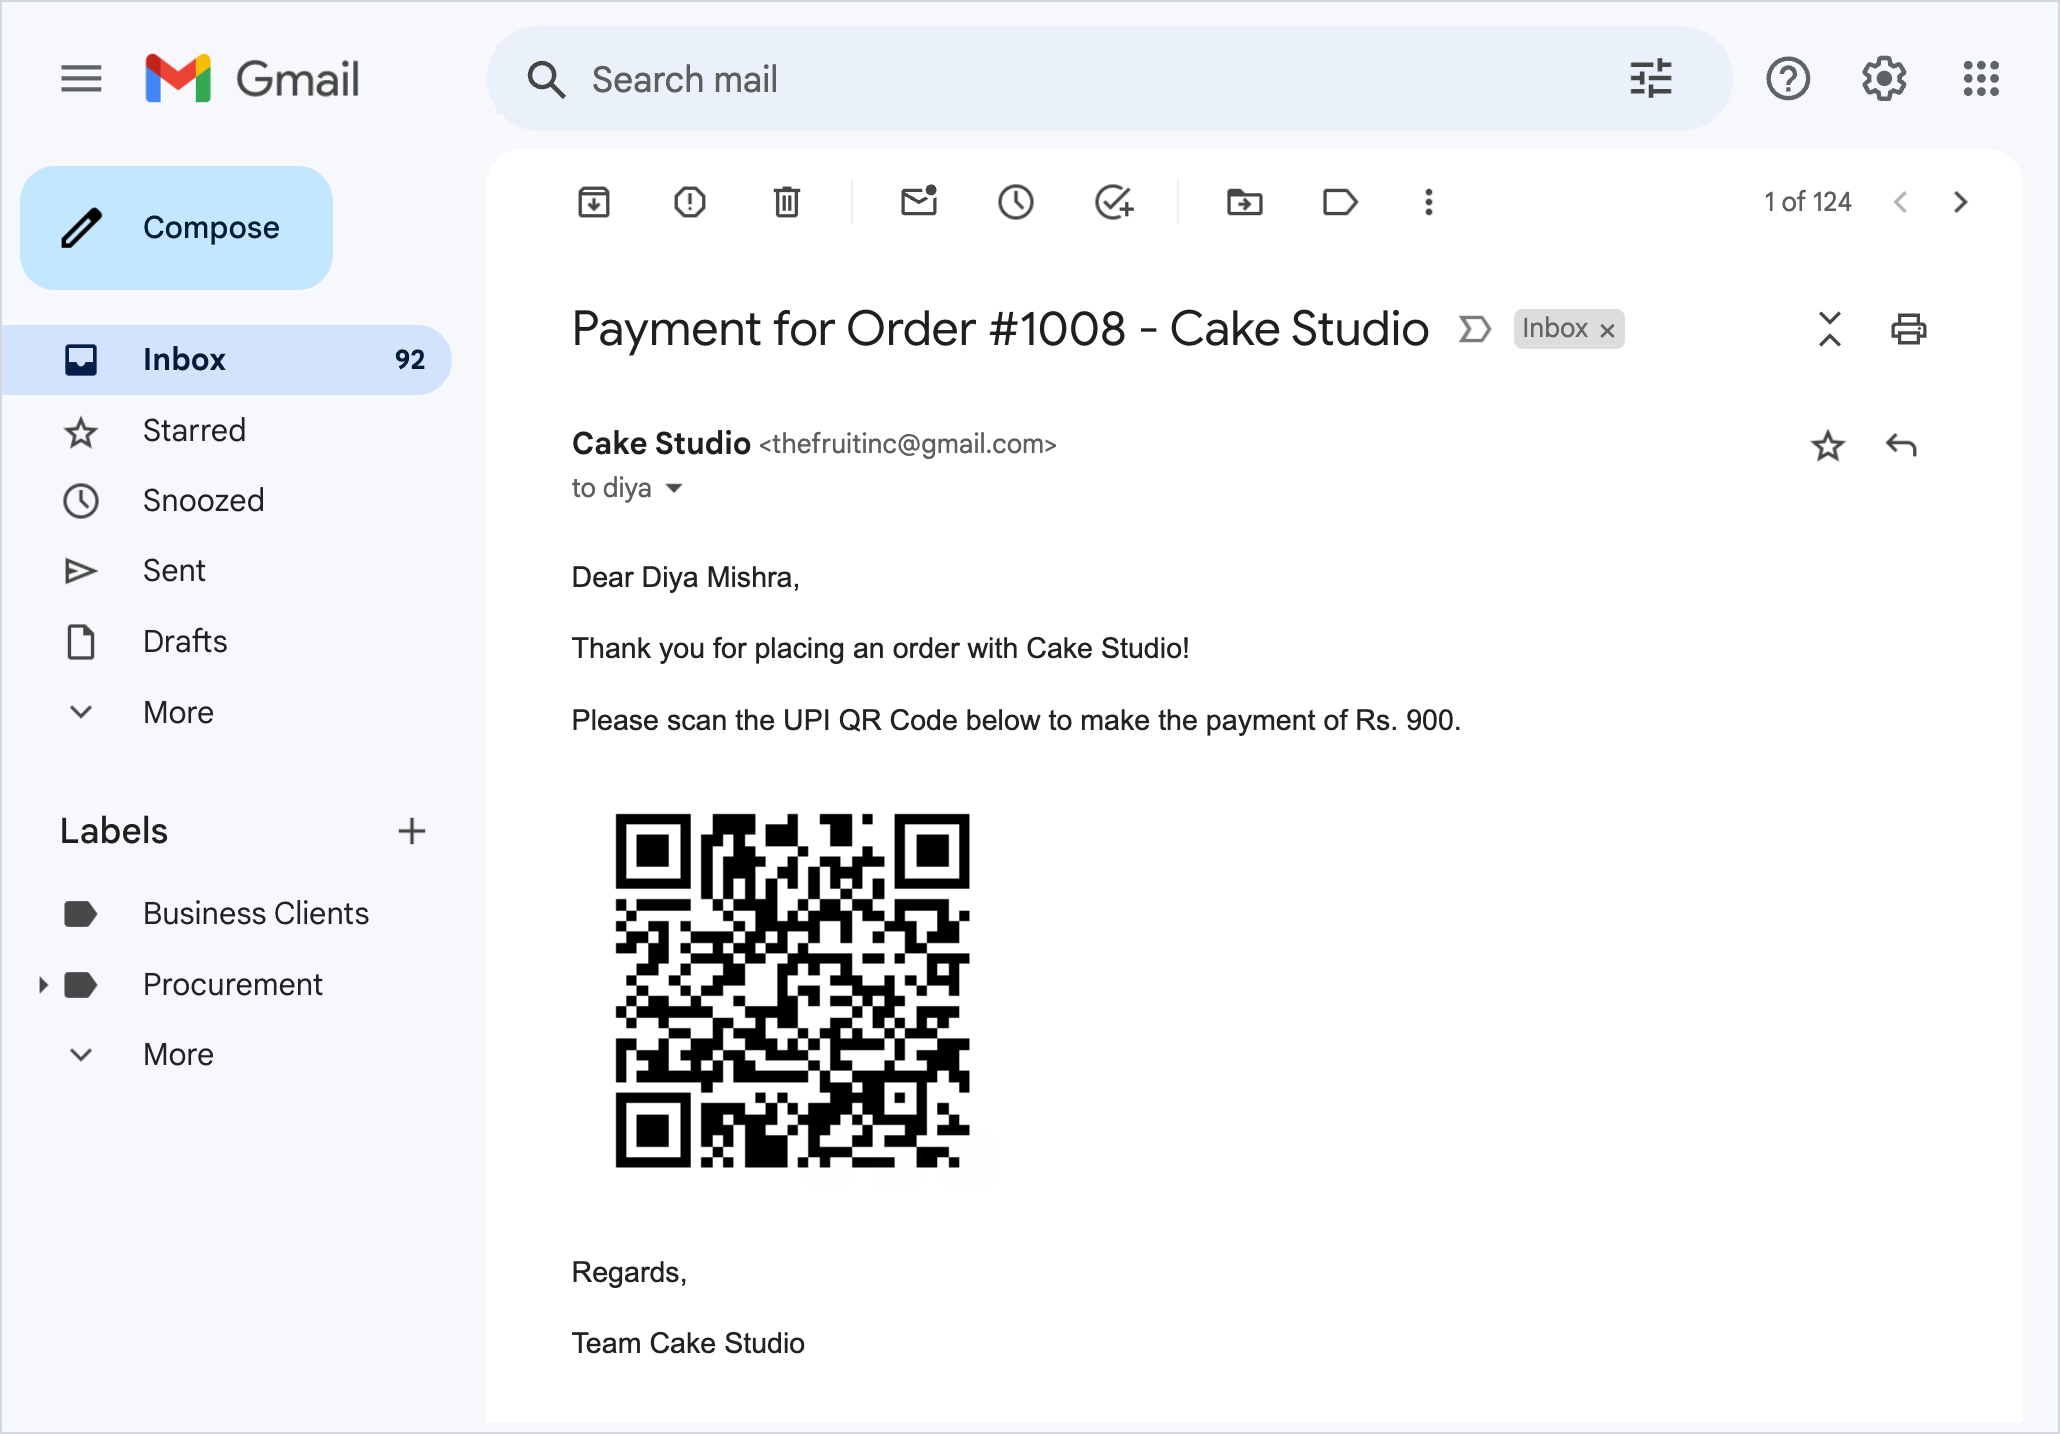
Here is a copy of the email containing the UPI QR code sent to the customers.