Embed Images in Email Messages and Google Documents
With Document Studio, you can embed images in email messages and generated files. The images can be stored in your own Google Drive or you can upload them on a public website like imgur.com or imgbb.com. You may also embed images that are uploaded by other users in the file upload field of your Google Forms.
Embed Images Syntax
The default syntax for embedding pictures in email messages and document templates is:
{{ Embed IMAGE, Image Link, width=Width, height=Height, align=Alignment }}
- The height and width values are in pixels.
- The
alignproperty is only supported for aligning images inside email templates. - The possible values for align property are left, center and right.
Embed Images from Google Drive
Provide the URL of the image file in Google Drive you want to embed in the email or document.
{{ Embed IMAGE, Drive File URL, width=300 }}
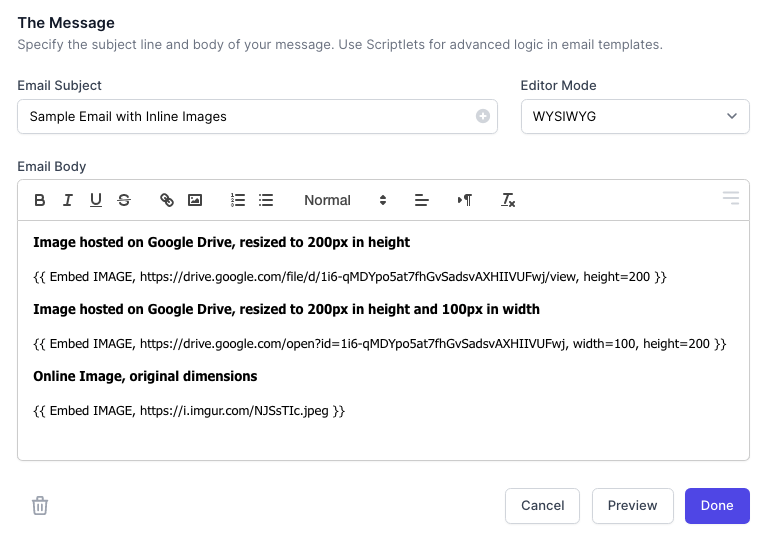
{{ Embed IMAGE, https://drive.google.com/file/d/1i6-qMDYpo5at7fhGvSadsvAXHIIVUFwj/view, height=200 }}
If you have a column in your Google Sheet that contains the URL of the image file in Google Drive, you can embed the image by specifying the column name in the embed formula.
{{ Embed IMAGE, Column Title, width=300 }}
Embed Images from Google Form Uploads
If you have file upload field in a Google Form where the respondent can upload images, you can embed the uploaded image file in your email or document by specifying the question title in the embed formula.
{{ Embed IMAGE, File Upload Question }}
You can also resize the image uploaded in Google Forms by specifying the width and height values.
{{ Embed IMAGE, File Upload Question, width=300 }}
Embed Images from the Internet
Provide the full URL of the online image.
{{ Embed IMAGE, https://i.imgur.com/NJSsTIc.jpeg, width=500, height=300 }}
Working Examples
Embed Images in Email Messages
Create a new Email Task and add the following Embed Image formula to the body of the email as show in the screenshot below. It is recommended that you do not specify both the height and width values as incorrect values may distort the original aspect ratio of the image.
Embed Images in Google Documents
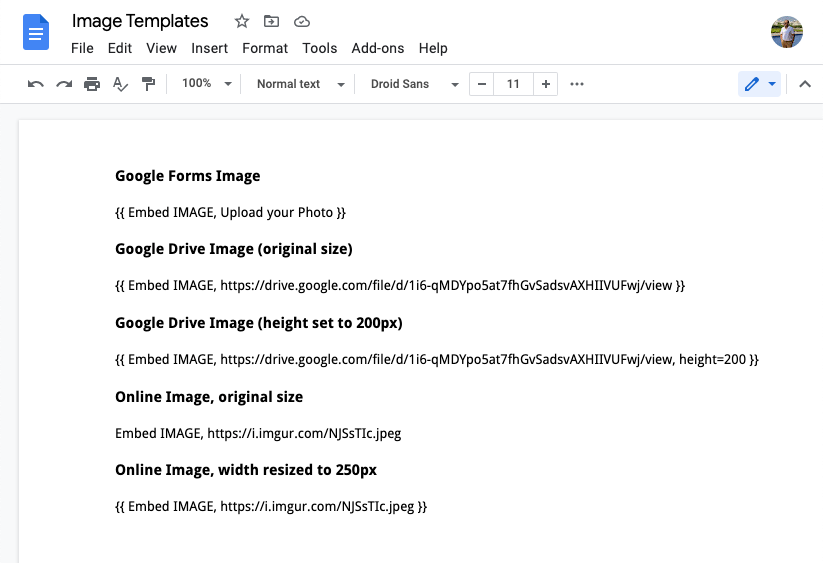
Open your document template and add the {{ Embed IMAGE }} formula to the body of the document as shown in the screenshot below. If you have a Google Form with a file upload field, you can also embed the uploaded image file in your document by specifying the question title in the embed formula. The aspect ratio will be preserved automatically.
Embed Images in Google Sheets
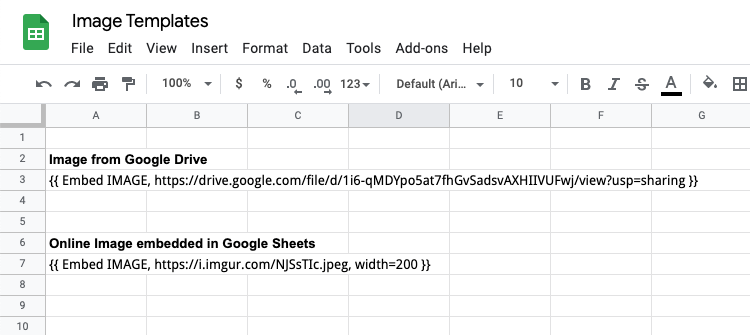
Similar to Google Docs, you can embed images in Google Sheets by adding the {{ Embed IMAGE }} formula to one or more cells of the Google Sheet.
Please note that Google Sheets will reject images that have either too large dimensions or have a big file size. The provided image should be publicly accessible, within size limit, and in supported formats.
Embed Images from Google Forms
For this example, we have a Google Form with a file upload field. The respondent can fill in their name, country and upload a profile photo in image format. You can embed the uploaded image file in your email or document by specifying the question title (like Upload Profile Photo in this case) in the embed formula.
{{ Embed IMAGE, Upload Profile Photo, width=300 }}
The images can be embedded in email messages and documents generated from document, spreadsheet and presentation templates.
Embed Images in Google Slides
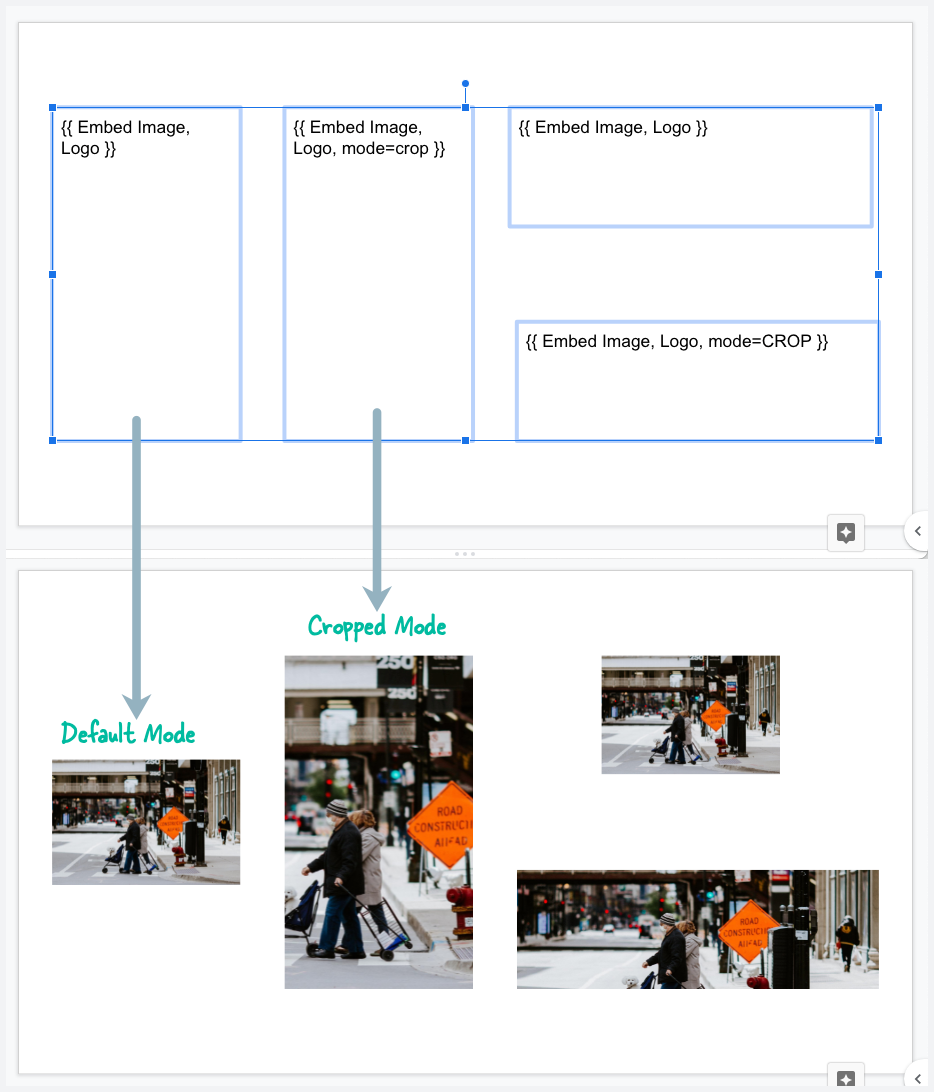
To embed images in Google Slides, go to the Insert menu and create new Text box. Add the {{ Embed IMAGE }} formula to the body of the text box and make sure that the text box is large enough to contain the image. Also turn on the Do not autofit option so that the image will not be resized automatically.
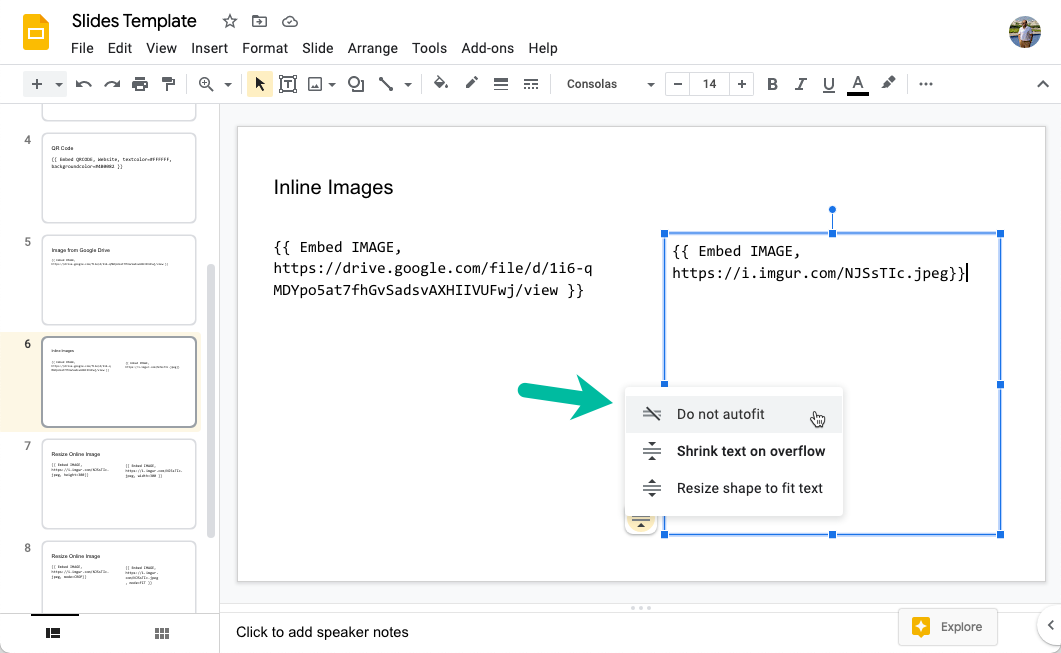
When you add an image inside a text box in Google Slides, it scales and centers the image to fit within the bounds of the container text box and maintains the image's aspect ratio. The rendered size of the image may be smaller than the size of the shape.
{{ Embed IMAGE, Profile Photo, mode=CROP }}
You can however set the mode as CROP and it scale and centers the image to fill the bounds of the original shape. The image may be cropped in order to fill the shape. The rendered size of the image will be the same as that of the containing text box.
