Change Destination Folder for Google Form File Uploads
With Google Forms, form respondents can upload files directly to your Google Drive. The files can be of any size, they can be of any type and you can accept multiple files in the same form. All files uploaded through a Google Form are stored in a single folder in your Google Drive. This can quickly become a problem as it is impossible to know which form respondent has uploaded which set of files.
Document Studio can help you automatically organize files as they are uploaded to your Google Drive through Forms. You can setup workflows in Document Studio to organize files in subfolders based on the form responses. You can even rename files based on user's answers.
File Upload Form
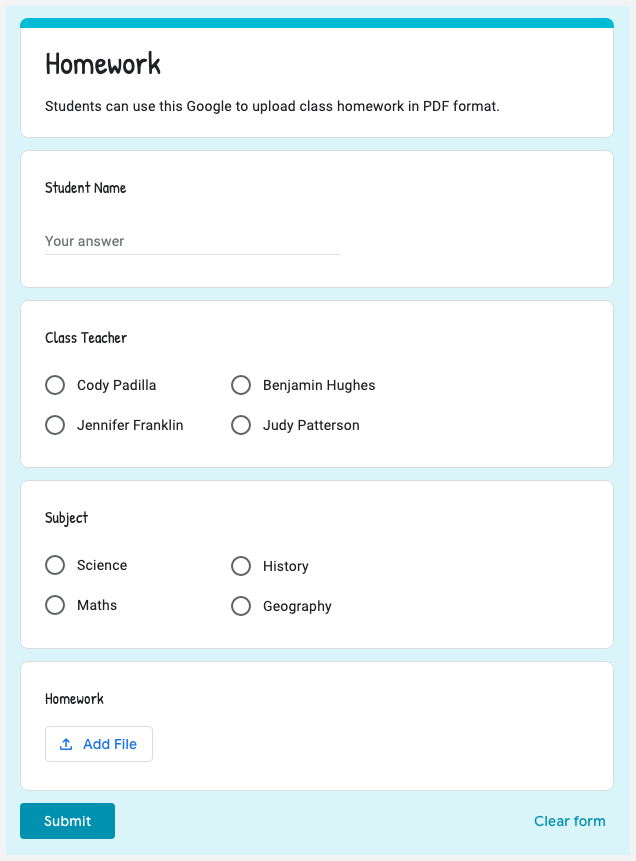
To give you an example, here's a Google Form for a school where students can upload their homework assignments in PDF or Word format. The school can setup workflows so the files are arrange in Google Drive as /Homework/Teacher Name/Subject Name/Student Name.pdf and so on. Thus if Jennifer wants to look at all History assignments for her class, she can just look at the folder /Homework/Jennifer/History.
Copy or Move File Uploads
Install the Document Studio add-on and launch the add-on inside your Google Form. Give your workflow a descriptive name, and click on Continue to move to the conditions page.
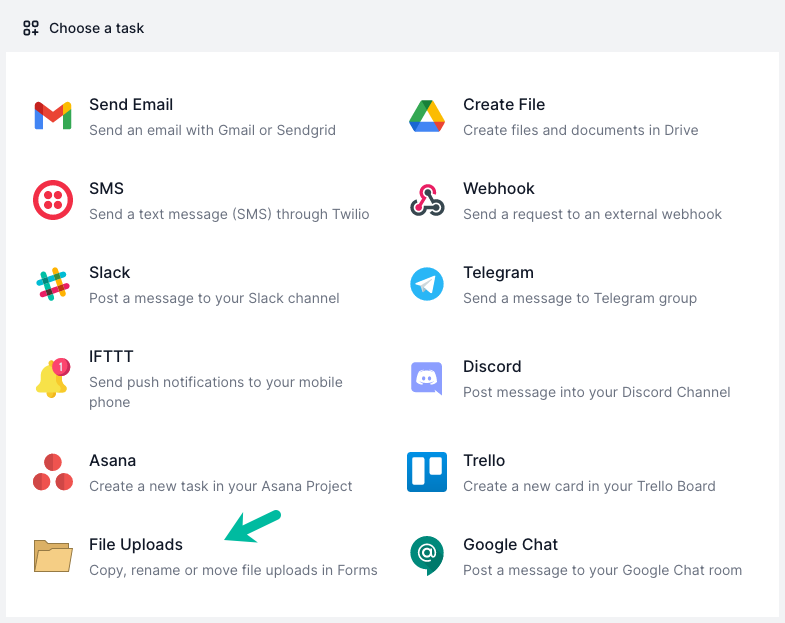
If you want this workflow to run only for specific form responses, like when the subject entered is History, you can add them in the Conditions screen. Next, choose File Uploads from the list of available tasks.
Configure File Uploads
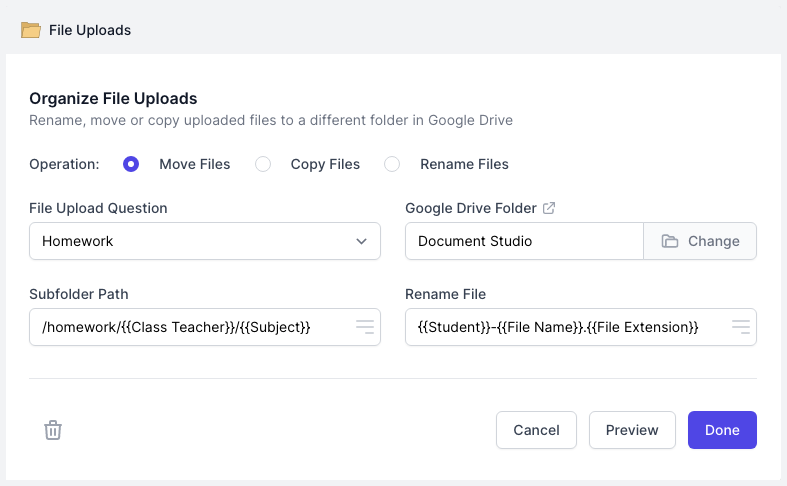
Document Studio lets you perform three operations on files uploaded through Google Forms. You can:
- Move files to another folder
- Copy files to another folder
- Rename files based on user's answers
As a first step, select the File Upload question from the list of available questions.
Change Destination Folder
Next choose the parent Google Drive Folder where you wish to copy or move these uploaded files. Then provide the subfolder path and this can be generated dynamically based on the form responses.
For instance, if you wish to create separate folders for each student in your Google Drive, you can use the following subfolder path:
/homework/{{Class Teacher}}/{{Subject}}/{{Student Name}}
Rename Uploaded Files
When you copy or move files to another Google Drive folder, the original file name is retained. You can however rename the files based on the answers given by the respondents.
For instance, if you wish to prepend the student's name in the original file, the renamed file would become:
{{Student Name}}-{{File Name}}.{{File Extension}}
The {{File Name}} and {{File Extension}} variables refer to the original file name and extension as uploaded by the user in your Google Form.
Click Done to locally apply your changes. If you have multiple file upload questions in your Google Form, you can add another File Upload task for them in the same workflow.
Activate workflow
On the next screen, turn on the Run on Form Submit option and the workflow will run whenever a new Google Form submission is received.
Click the Save button and the workflow will now appear in the workflow dashboard where you can edit, delete or manually run the workflow.