Timelines in Google Sheets - Create Beautiful Visual Timelines
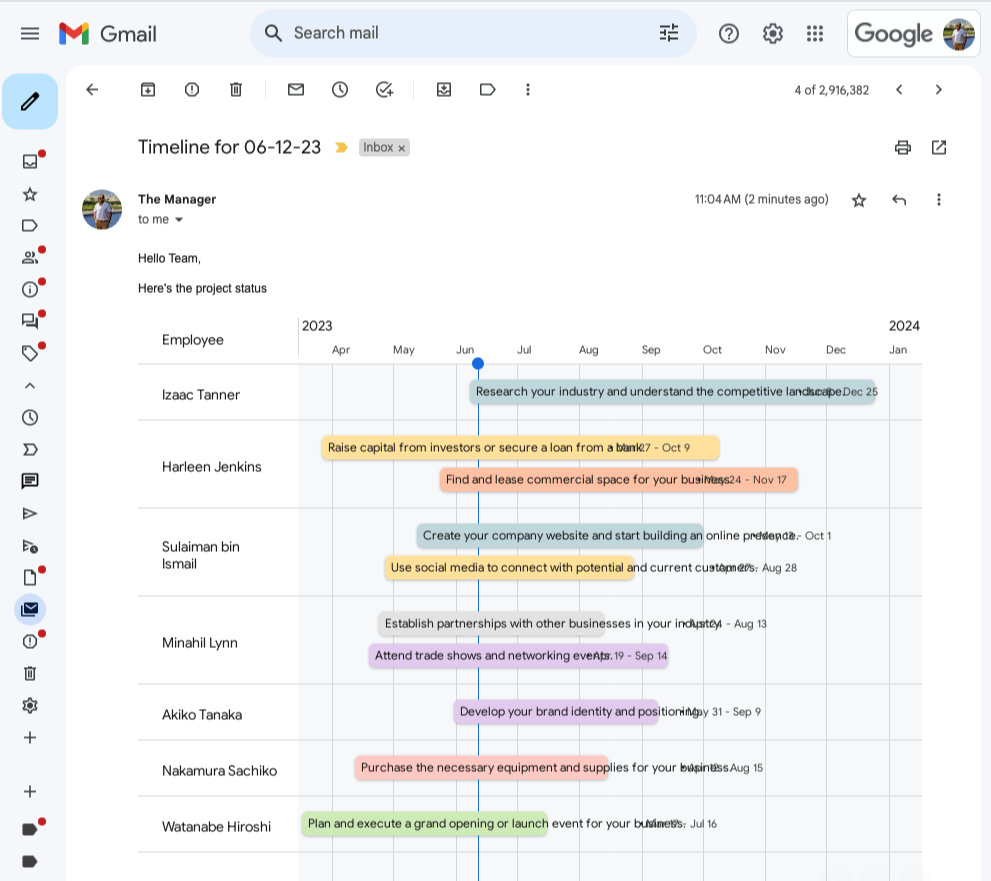
A timeline is a visual representation of the tasks and milestones involved in a project. You can use a timeline to track the progress of project tasks, and schedules and communicate the big picture of a project.
Create Timeline in Google Sheets
To create a timeline in Google Sheets, please follow these steps.
- Inside your Google Sheets, switch to the workbook that contains the data.
- Go to the Insert menu in Google Sheets and choose Timeline.
- Select, or specify, the data range in A1 notation that you want to include in the timeline.
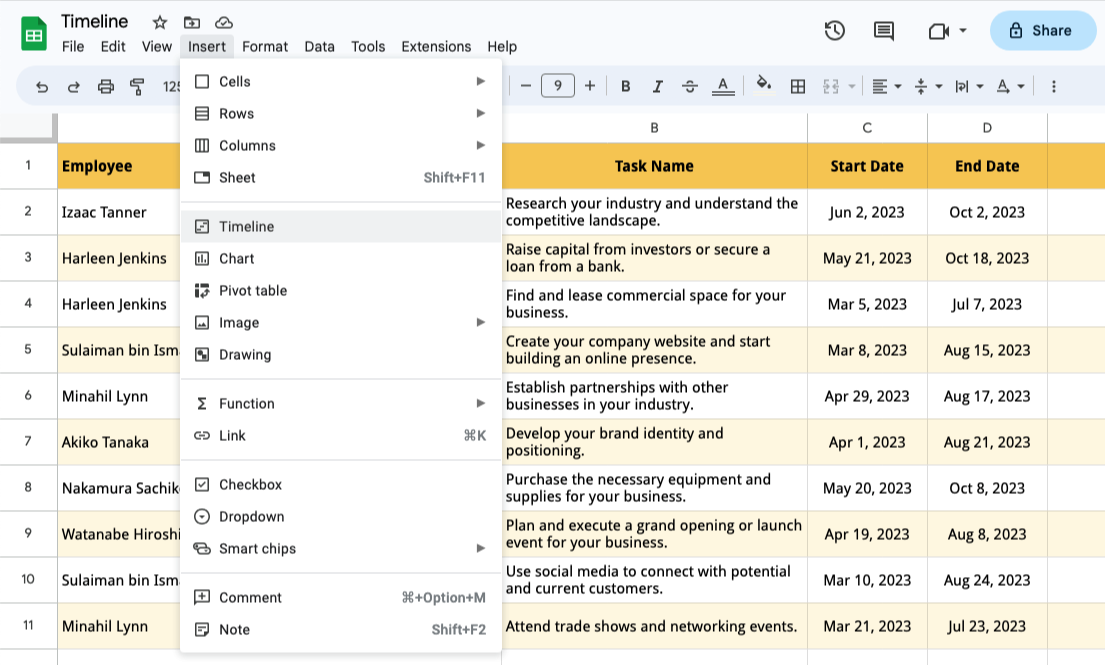
For this example, we have a list of employees and they have been assigned one or more tasks. Each task has a start date and a due date. We’ll select the data range and go to Insert > Timeline to add the timeline sheet to our spreadsheet.
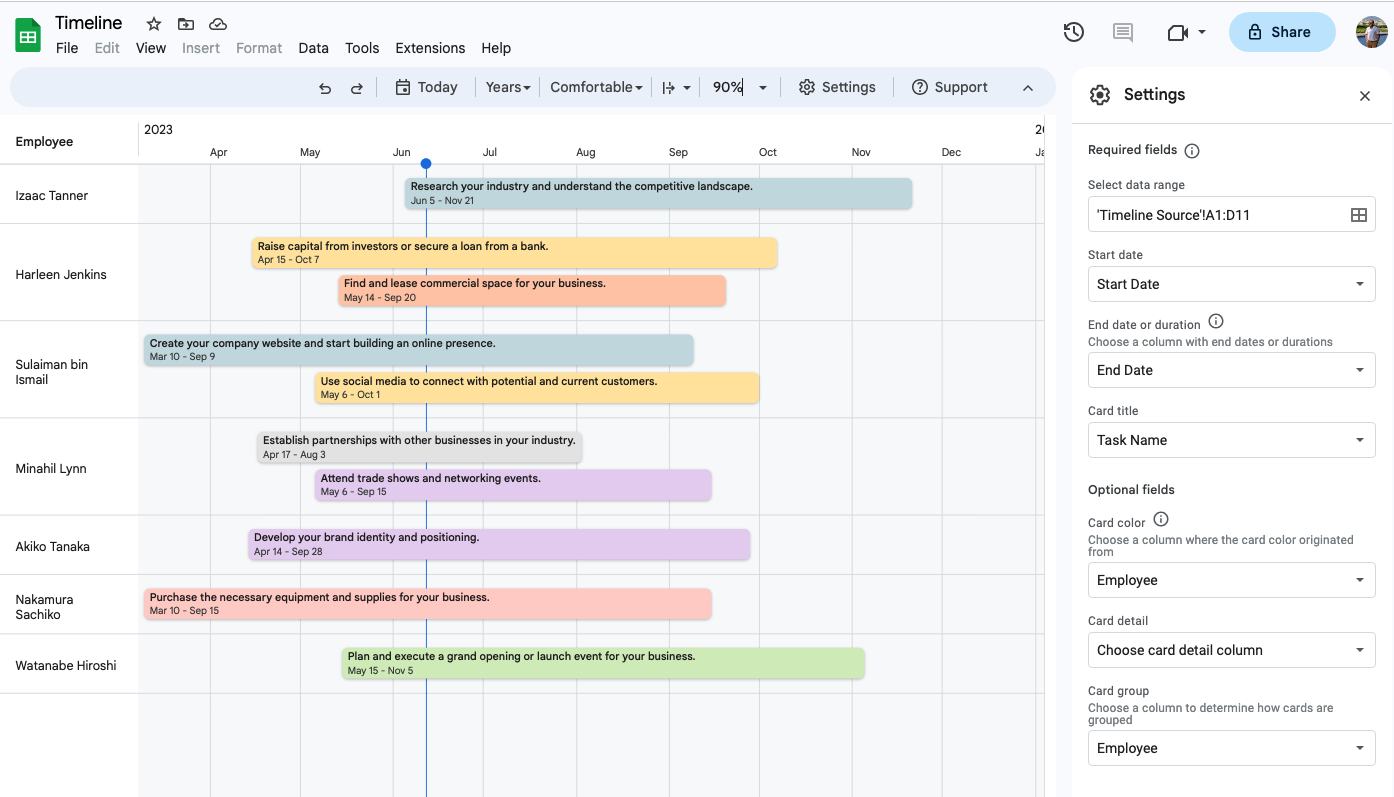
The timeline is added as a new workbook in the current Google Sheet. You can then customize the timeline by changing the colors, fonts, and other settings.
If the timeline view is too big to find in the current window, you may either change the zoom level or change the view mode from “Comfortable” to “Condensed” which will reduce the spacing between timeline cards.
Google Sheets offers you an option to download the current timeline view as a PDF file on your local computer. However, if you would like to save the timeline as a high-resolution PNG image, or send the timeline to your team in an email automatically, the Google add-on Email Spreadsheets can help.
Download Timelines in Google Sheet
Launch the Email Spreadsheets add-on in your Google Sheets and create a new workflow.
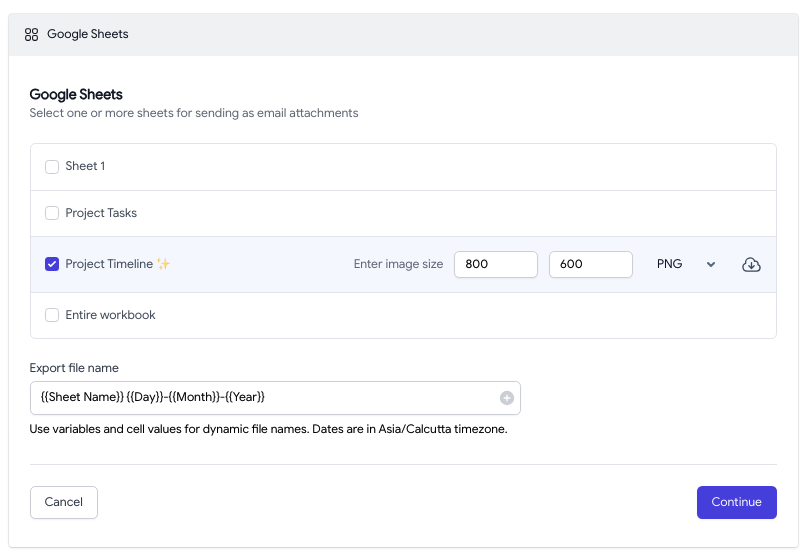
To download a timeline view as a PNG image, select the workbook that contains the timeline graph. Specify the width and height of the image, select the PNG format from the dropdown and click the Download icon to save the timeline view as an image.
Send Google Sheets Timeline in an Email
You can set up a recurring schedule and email the latest version of your timeline to your team automatically. For instance, the manager may set up a schedule to automatically email the current timeline to all team members at 9 am daily.
Launch the add-on and create a new workflow. Go to the email tab and fill in the basic details like the sender’s name, the email recipients and the email subject. You may also pull the list of email recipients dynamically from any cell or range of cells in the Google Sheet.
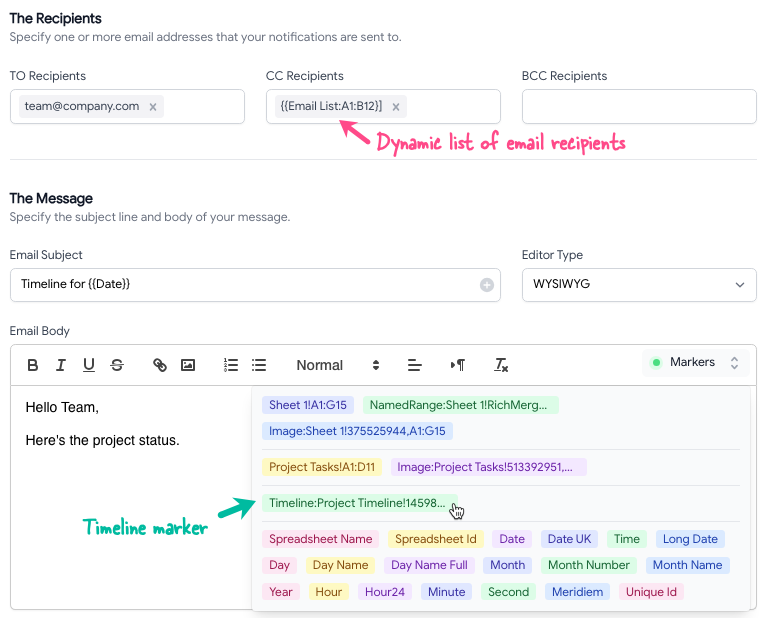
For the message body, click the Markers dropdown and choose the Timeline marker from the list of markers. The timeline marker is special and has the following syntax.
{{ Timeline:Project Timeline!1459862907,800,600 }}
Let’s break it down. It starts with the prefix Timeline indicating that we are trying to embed a timeline image in our email. Next is the sheet name that contains the timeline.
Then we have the unique sheet ID that Google automatically assigns to each sheet in the spreadsheet. This is required because, later, if you change the timeline sheet name to something else, the marker would continue to work as the internal sheet ID won’t change.
That is followed by the width and height of the PNG image that should be generated. The maximum allowed size is 1280x1280 pixels. Click the Preview button to send a test email to yourself to confirm how the embedded timeline image would look like in the email.