How to Specify Email Recipients in Google Sheets
Once you have selected your file export preferences, the next step is to design your email template and specify the list of email recipients. To enable the email editor, you need to check the ‘Send Email’ option and follow the next steps.
Specify Email Sender and Recipients
Let’s specify the sender’s details by adding Sender’s Name. The mail will be sent through the Gmail account which is associated with the current spreadsheet. If you wish to receive replies to this email on a separate email address, you can specify that in the ‘Reply-to Email Addresses’ field.
You can add one or more email recipients in the TO, CC and BCC fields. A useful feature of this add-on is that it allows you to pull a list of dynamic recipients from any cell, or range of cells, in the current Google Spreadsheet.
Pull Email Addresses from Google Sheets
You can use the A1 notation - like {{ Sheet Name!Range of cells }} - in the recipient fields to pull email addresses from the sheet itself, without having to type out all the addresses manually.
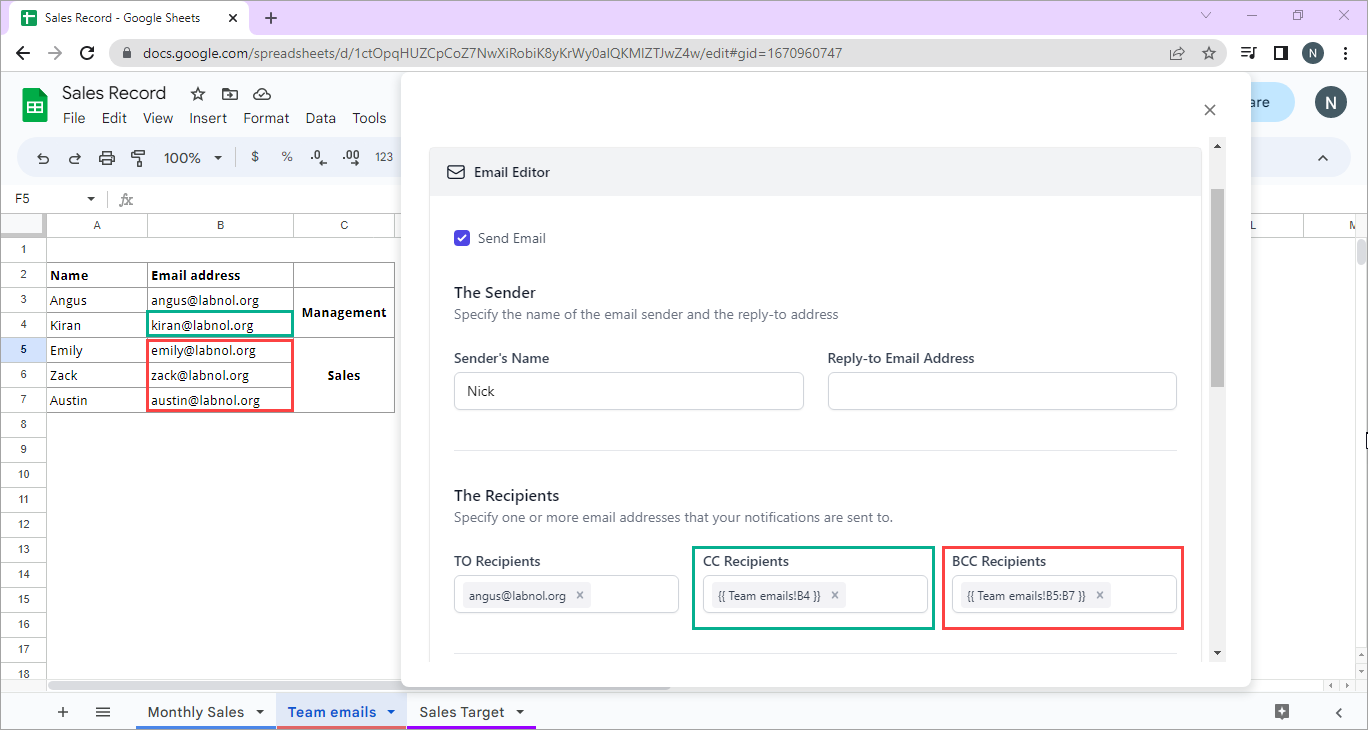
For our sample workflow, we have a separate Google Sheet containing the email addresses of the Management and the Sales team.
In the above screenshot, you may observe that the email addresses are listed from cells B3 to B7 in the Team emails sheet. One of the managers’ addresses has been mentioned in the TO field, and the other manager has been added in the CC field. You may type out the address manually, or you can pull the address from the sheet by typing {{ Team emails!B4 }}.
We have added the Sales team in the BCC field by importing the range of cells from the sheet using the A1 notation {{ Team emails!B5:B7 }}.