How to Email Named Ranges in Google Sheets
You can assign a custom name to any cell range in Google Sheets, allowing for improved organization and clearer formulas. This feature is called "Named Ranges" and can be used to send emails to specific cell ranges in Google Sheets.
For example, instead of using "A1:B2" to describe a range of cells, you could name the range "budget_total." This way, a formula like "=SUM(A1:B2, D4:E6)" could be written as "=SUM(budget_total, quarter2)."
Create Named Ranges in Google Sheets
- Open a spreadsheet in Google Sheets.
- Select the cells you wish to assign a name to.
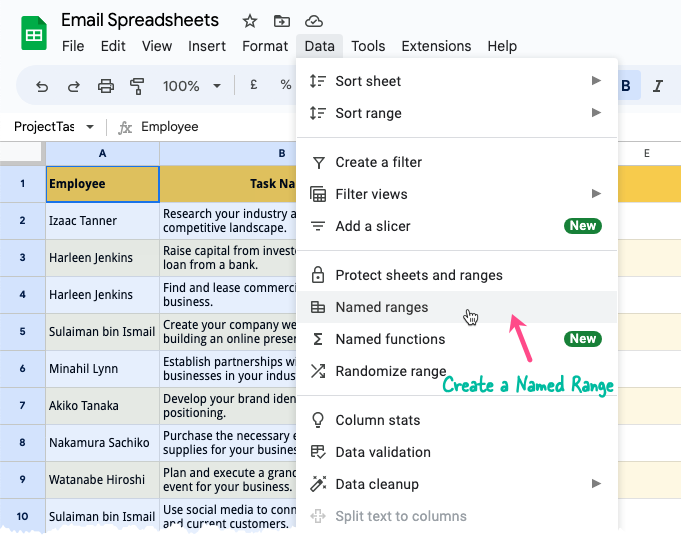
- Click Data and then
Named Ranges. A menu will open on the right. - In the provided menu, enter the desired name for the range and click "Done" to complete the process.
Email Named Ranges in Google Sheets
For example, we have recorded daily impressions for the last 15 days to prepare the marketing report for a company.
There are two ways in which we can email this data using the Email Spreadsheets add-on.
- By embedding range of cells in the marker for the email message body, the syntax for which would be
{{ Daily Impressions!A1:D17 }} - By assigning a name to this range, and embedding the named range in the message body.
Let’s understand how we can embed the named ranges.
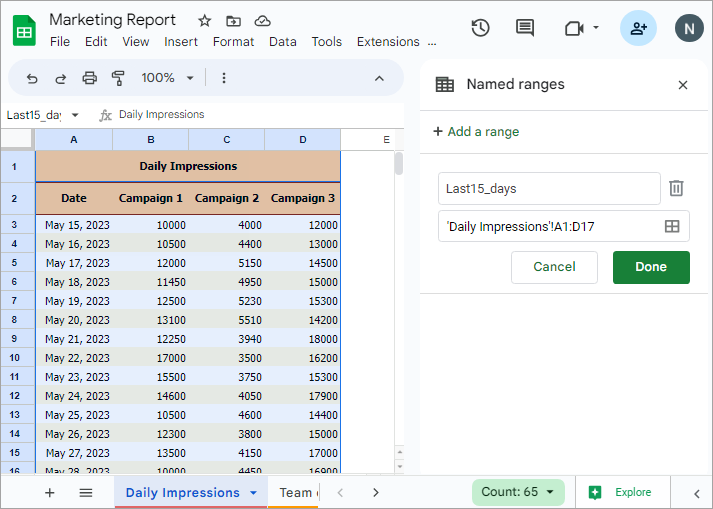
We have followed the steps given above to name the range as ‘Last15_days’.
Now launch the add-on and complete the steps before moving to the Email Editor.
In the list of markers for the message body, you will see a separate marker for the named range, appearing as a part of the sheet in which it exists. Select the marker to embed it in your mail body.
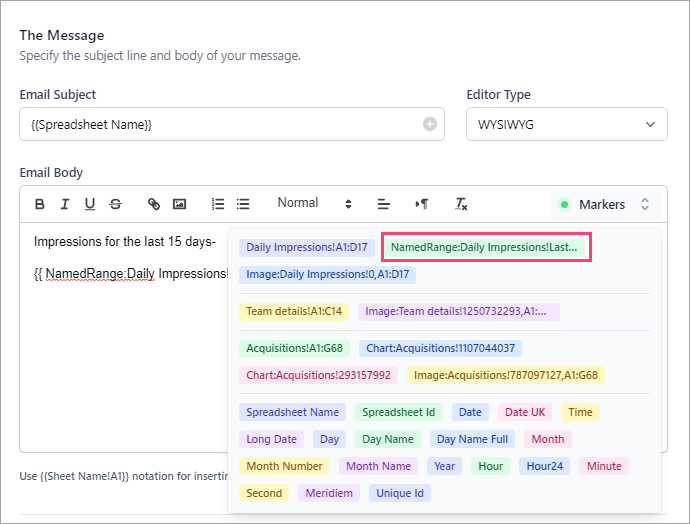
All named range markers will be listed in the format {{ NamedRange!Sheet Name!Range Name }}. In our example, the marker for the named range will be {{ NamedRange!Daily Impressions!Last15_days }}.