
Send your first mail merge with Gmail in 5 minutes
In this quickstart, we will walk you through the process of sending three personalized emails from Google Sheets to your own inbox. You’ll write the message template once, and Mail Merge will fill in each person’s name: Hi {{First Name}} becomes Hi Angus, and {{City}} becomes New York. The add-on will create a sample sheet for you, so you don’t need a mailing list.
You can also attach a different file to each email from your Google Drive.
Before you start
Section titled “Before you start”Install the Mail Merge with Attachments extension in your Google Sheets. You can use your own Gmail or Google Workspace account. If you are logged into multiple Google accounts, you need to switch to the account from which you will be sending the emails.
It is recommended that you use a private or incognito browser window to open the Google Sheets and the Mail Merge extension to avoid any conflicts with other Google accounts.
Launch the Mail Merge extension
Section titled “Launch the Mail Merge extension”Type sheets.new in your browser’s address bar to open a blank spreadsheet.
-
In the new spreadsheet, go to Extensions > Mail Merge with Attachments > Open Mail Merge.
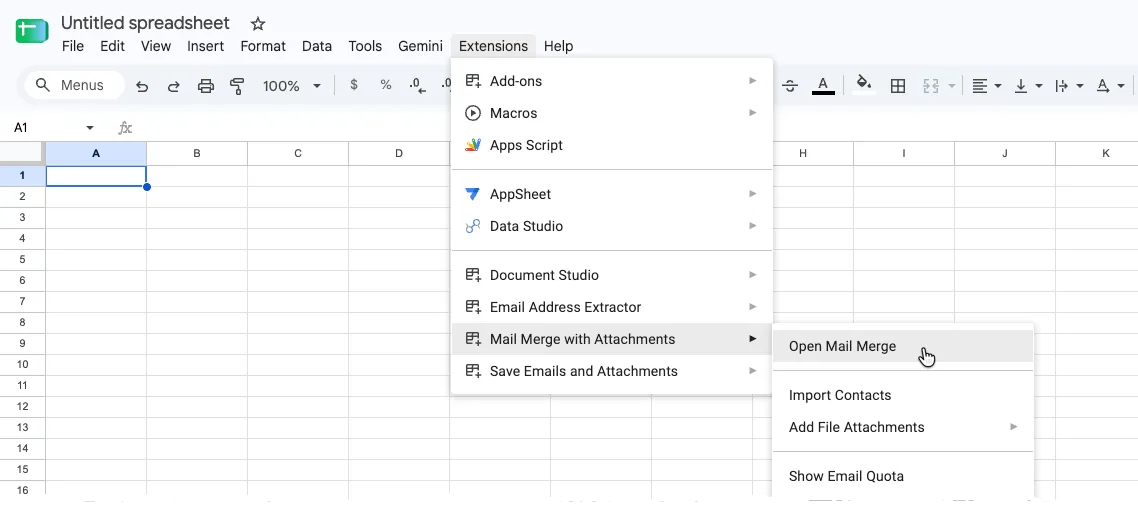
Open the add-on from the Extensions menu in Google Sheets. -
Your spreadsheet is empty, click Start mail merge and the add-on will create a tab called Mail Merge Data with three dummy recipients. The app window opens on top of the sheet.
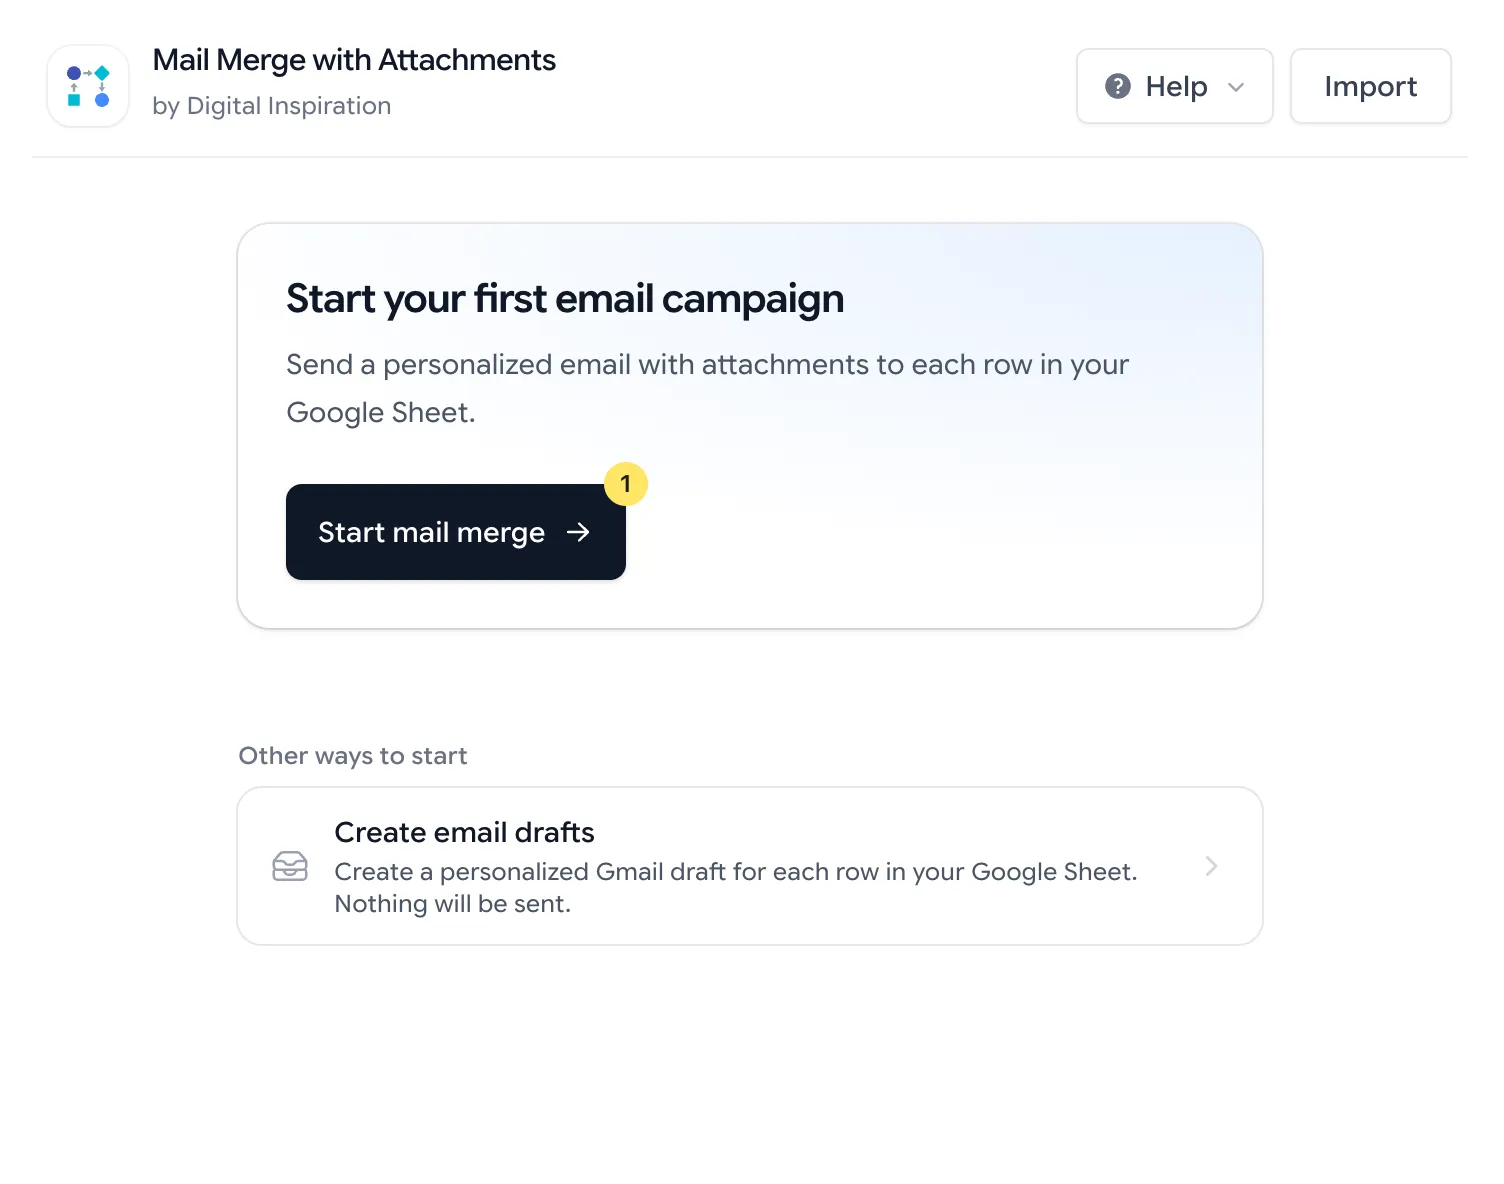
Click Start mail merge to create a new campaign after you've prepared the addresses. -
You can drag the Mail Merge window to a different position on your screen if you would like to update the email addresses in the sample sheet.
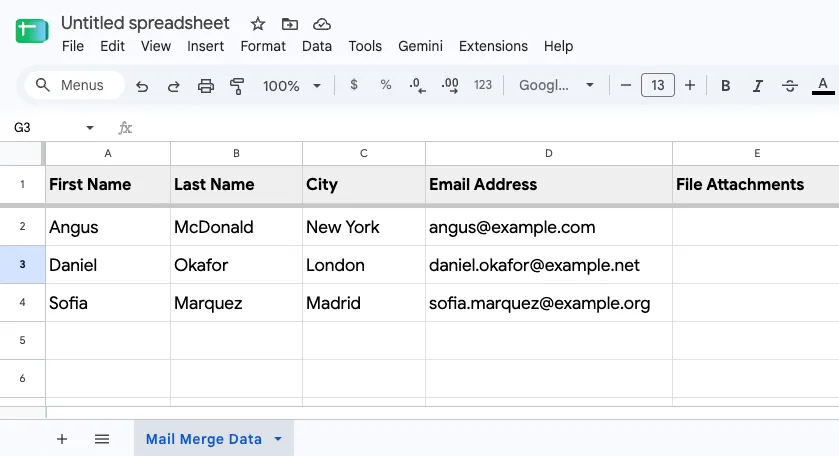
Keep the sample names and cities. Replace the addresses before starting your campaign.
1. Initialize mail merge
Section titled “1. Initialize mail merge”-
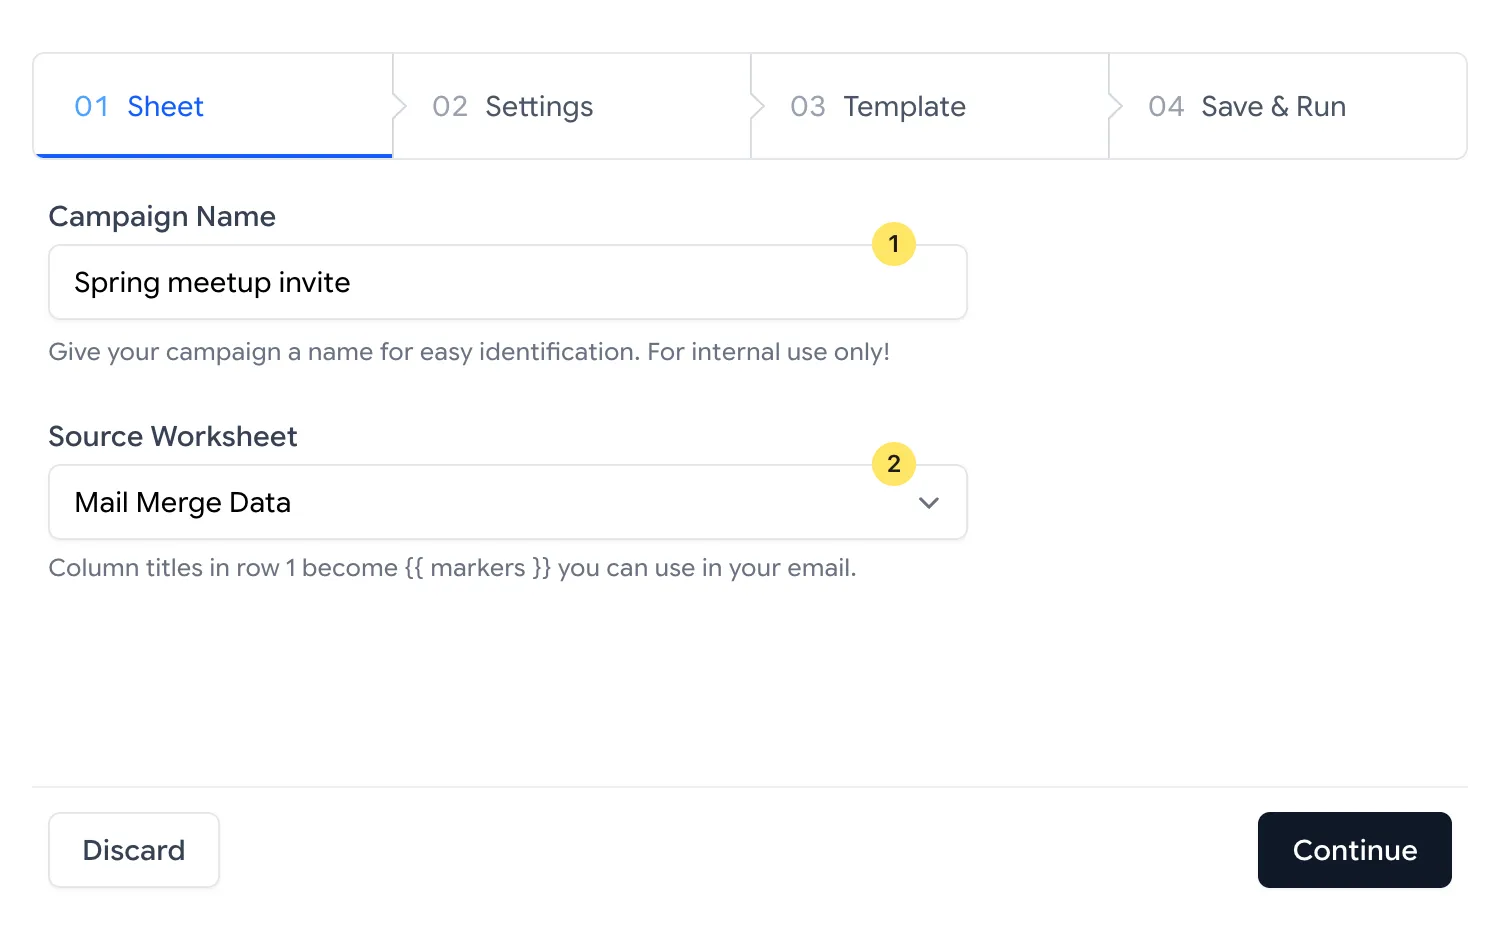
Give your campaign a name, like Spring meetup invite. Only you will see this name and it will be used to identify the campaign in the add-on.
-
Under Source Worksheet, choose Mail Merge Data. The add-on reads the column titles in row 1, and those become the merge fields for your email template. You can also pick a different worksheet if you have one with your contacts.
-
Click Continue.
2. Configure sender and recipients
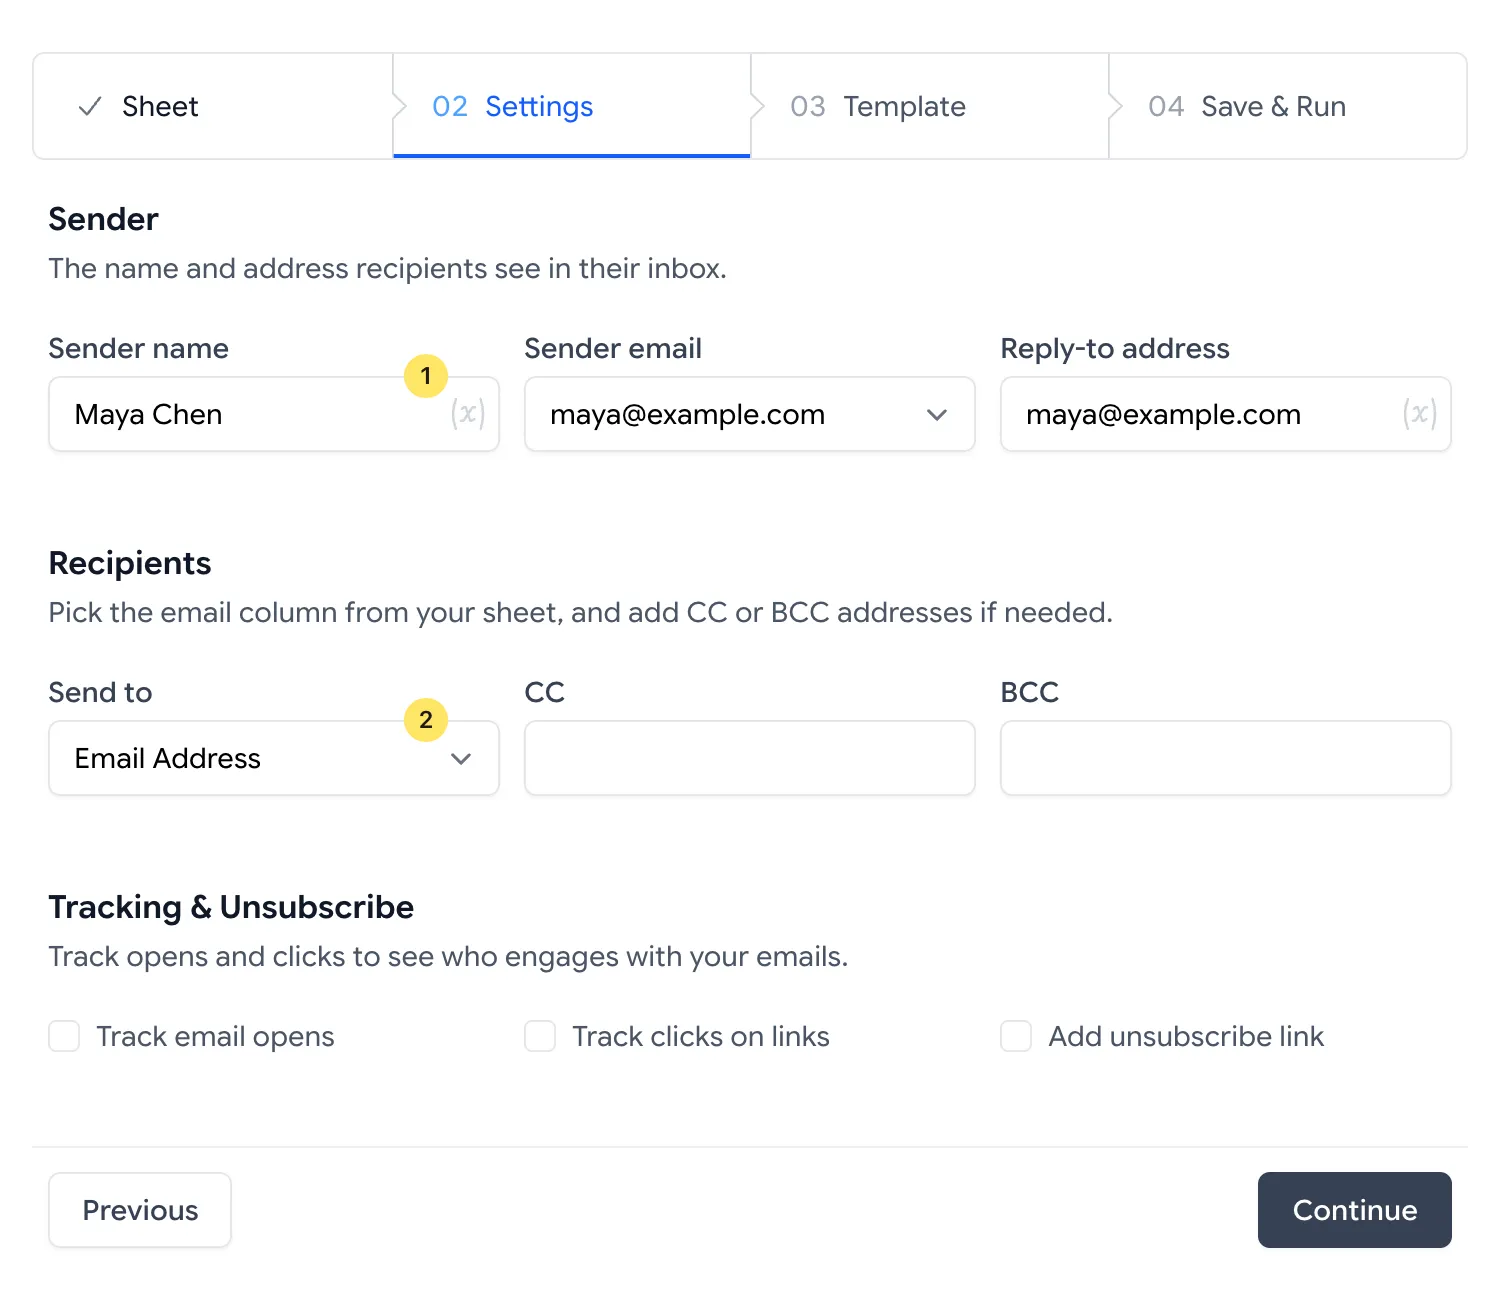
Section titled “2. Configure sender and recipients”- Type your name in the Sender name. This is the name people see in their inbox.
- Choose your own Gmail address in the Sender email field. To send from another address you own, first add it as a Gmail alias.
- In the Send to field under Recipients, choose the column that holds the email addresses of your recipients. Our sample sheet uses the Email Address column but if another column has addresses, you can pick that instead.
- You can also add a CC or BCC address if you would like to and all emails will also be copied to these addresses.
- Leave the rest as it is for now, and click Continue.
3. Write the email template
Section titled “3. Write the email template”-
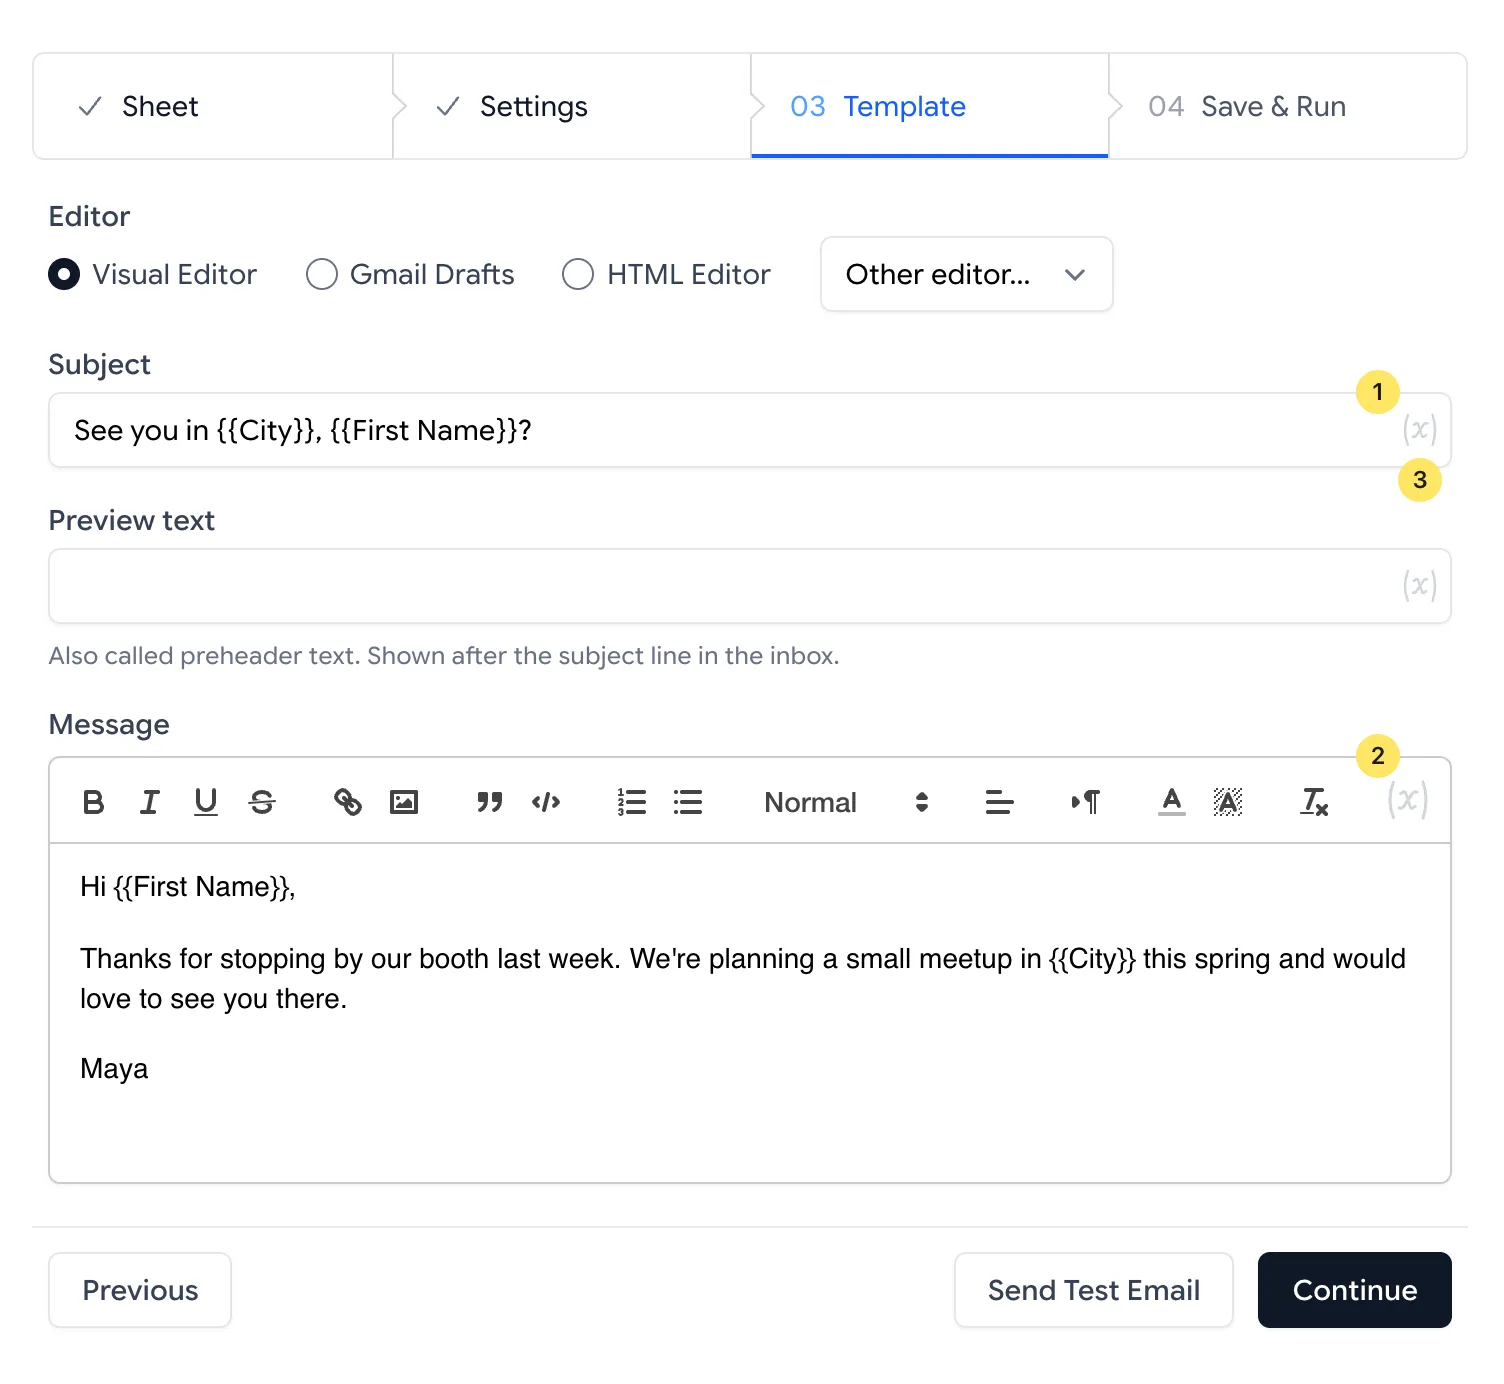
You can use any Gmail draft as an email template but for this quickstart, we’ll use the Visual Editor option. Copy this into Subject. The column titles in double curly braces are merge fields:
Subject See you in {{City}}, {{First Name}}? -
Copy this into Message Body:
Message Body Hi {{First Name}},Thanks for stopping by our booth last week.We're planning a small meetup in {{City}} this spring and would love to see you there.MayaTo insert other merge fields, click the (x) icon at the right end of the subject box or the editor toolbar, and pick a column.
Leave Preview text (preheader text) empty for now.
4. Send a test email
Section titled “4. Send a test email”As a safety check, send a test email before running the campaign. Gmail cannot recall an email after sending it so this is a good way to check that your email template is working correctly.
- At the bottom of the Template screen, click Send Test Email to open the test email form.
- In the Email address field, enter your own email address or any other address you can check.
- For the File Attachments field, add either the name or URL of a file in Google Drive. This will be attached to the test email. You can also leave this field empty.
- Click Send Test Email and wait for the email to be sent.
- Switch to your Gmail inbox and you’ll find the test email in the Sent folder.
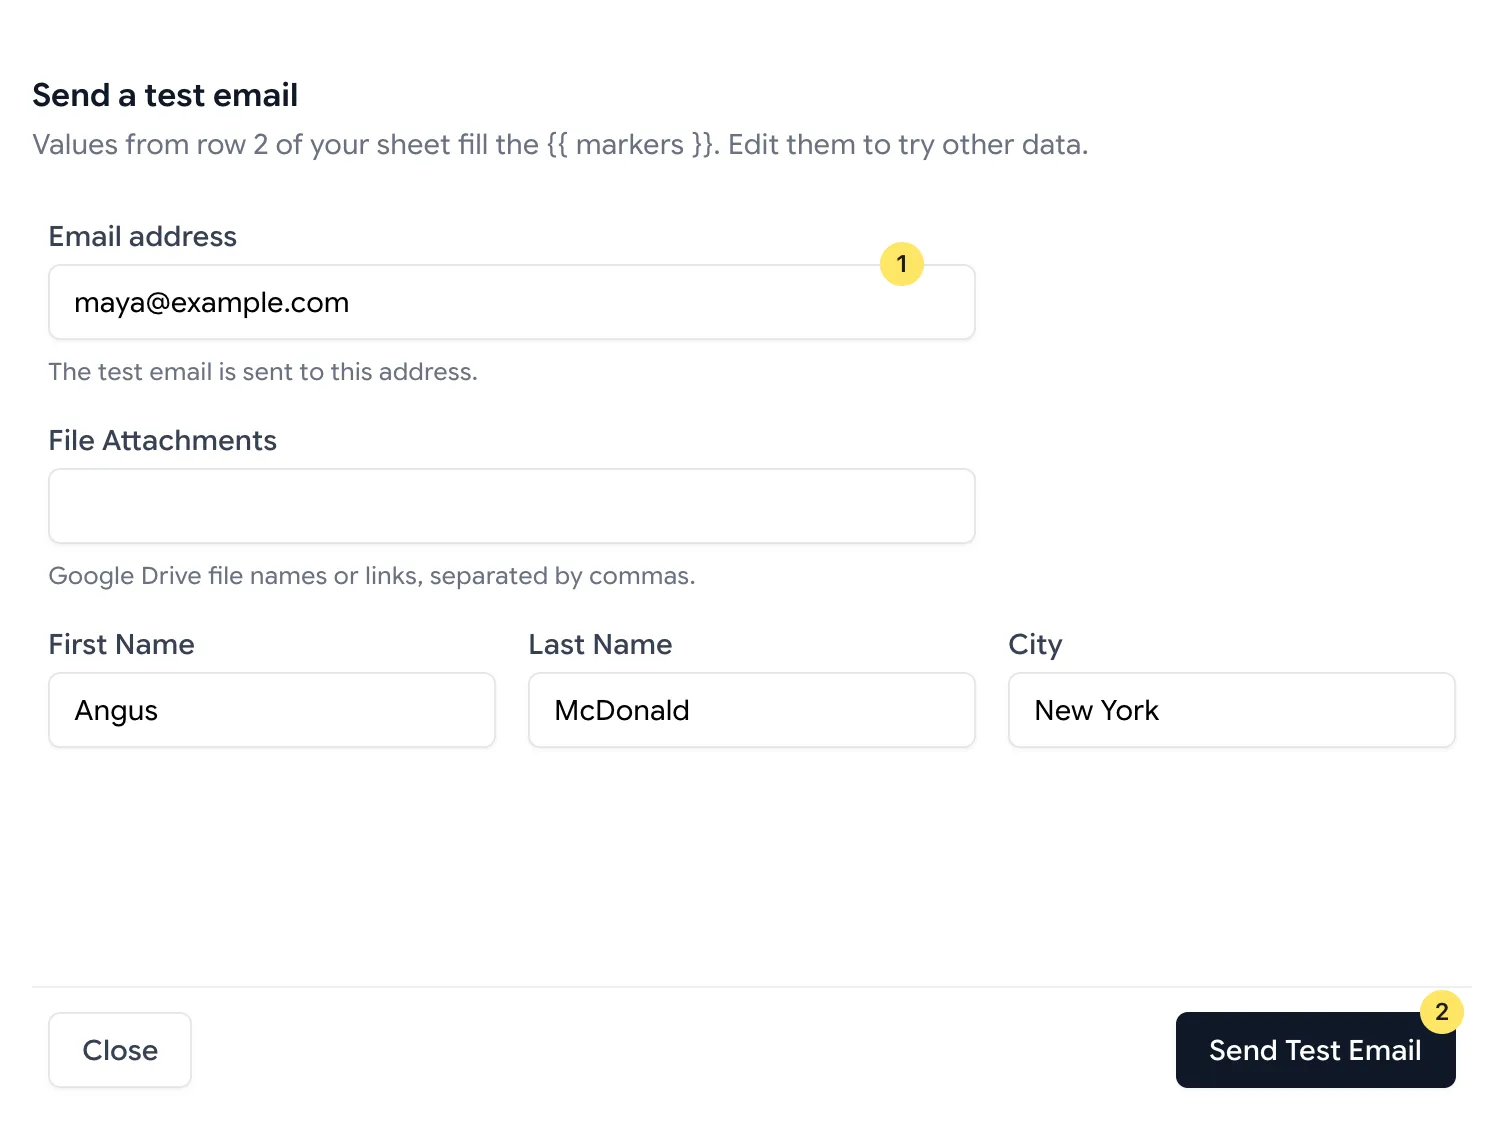
The test goes only to the address in the form. CC and BCC are left out, so nobody else gets copied on a test.
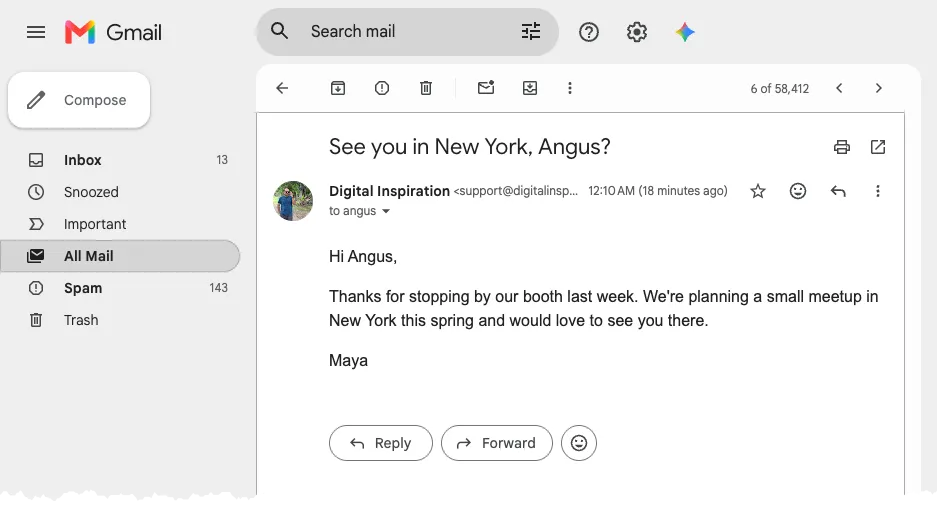
If the mail merge is working correctly, you should see Angus and New York in place of the merge fields in the email and no curly-brace markers should remain.
5. Send the merge campaign
Section titled “5. Send the merge campaign”When the test looks right, it is time to send the mail merge campaign to the actual recipients in the Google Sheet. Please note that one email goes out for each row in the Google Sheet.
-
Back on the Template screen, click Continue. If the test form is still open, click Close first.
-
Leave Enable this campaign checked and click Send Emails. This will start sending emails immediately.
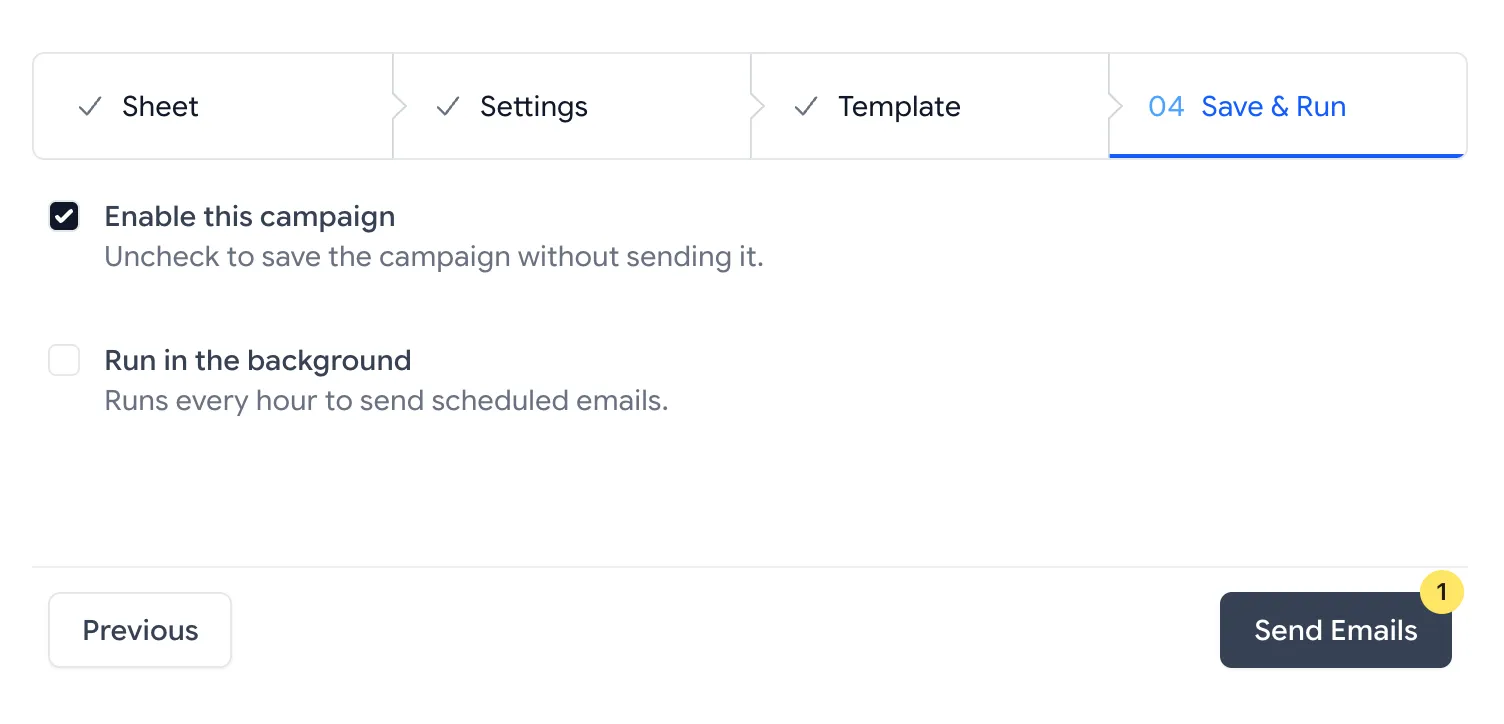
Step 4: Send Emails starts the merge. -
Watch the logs while the emails are being sent. Three rows take a few seconds to send. When it’s done, click Close.
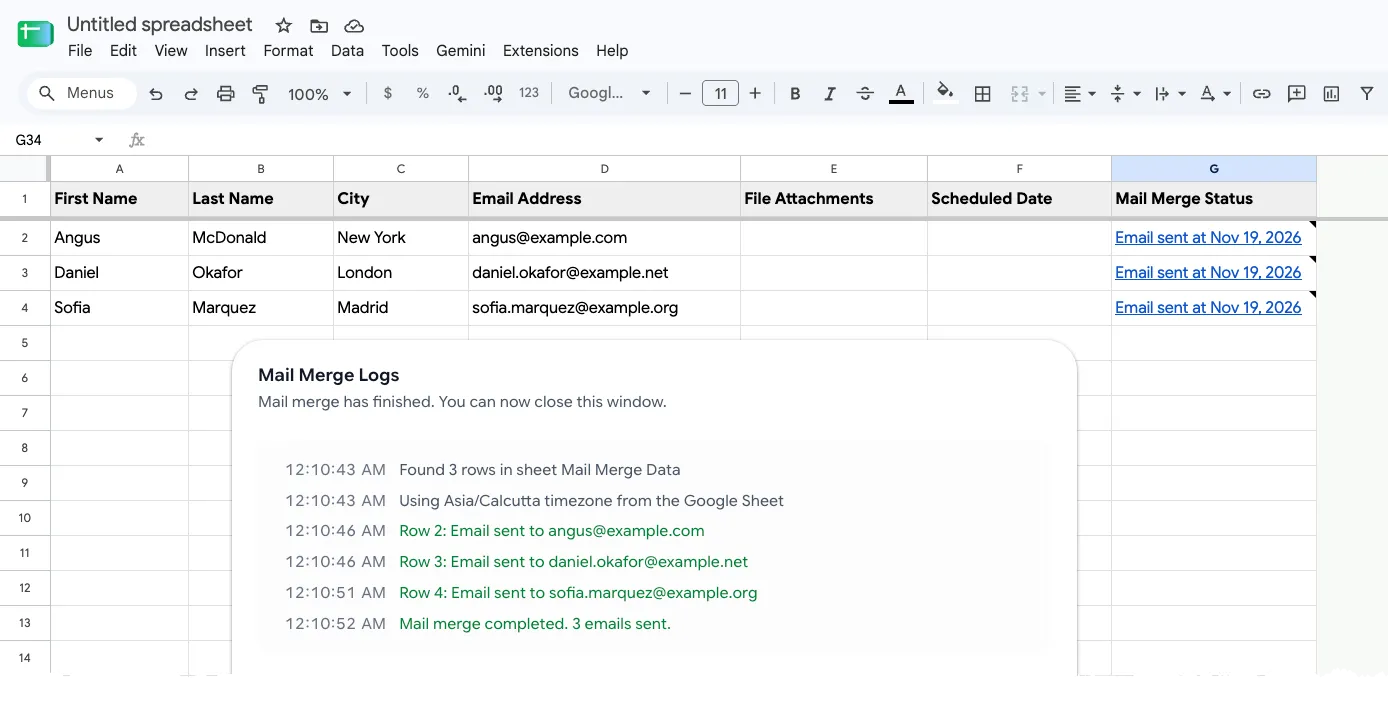
The log shows each row as it is sent.
Back in the Google Sheet, the Mail Merge Status column should say Email sent with a date for each of the three rows. Click a status cell to open the corresponding email in Gmail directly.
You should have three emails in your inbox with these subjects: See you in New York, Angus? See you in London, Daniel? See you in Madrid, Sofia?
Running merge again
Section titled “Running merge again”If you run mail merge on the same Google Sheet again, the rows marked Email sent are automatically skipped. That’s a safety feature to avoid sending the same email to the same recipient multiple times.
To deliberately send merge to one of these recipients again, clear the Mail Merge Status cell for that row, then run the campaign again.
Some other statuses also skip a row. For example, Invalid errors require you to fix the problem and clear the status before retrying. The status column guide explains each value and when to retry.
Use your own Google Sheet
Section titled “Use your own Google Sheet”For your next campaign, put your contacts in a Google Sheet with clear, unique column titles in row 1 and one recipient per row. Add a column for each detail you want to personalize, such as First Name, City, or Company.
Choose that worksheet in Source Worksheet, choose its address column in Send to, and update the template to use its column titles. Send yourself a test again before running the campaign.
Troubleshooting
Section titled “Troubleshooting”- Mail Merge isn’t in the Extensions menu: reload the spreadsheet. If it’s still missing, check that the account in the top-right corner of Sheets is the one you used to install the add-on. On a work or school account, your administrator may need to allow the add-on first.
- The Mail Merge window is blank: your browser may be blocking third-party cookies. Allow them for Google Sheets and reopen the add-on. See blank window.
- The window says “drive.google.com refused to connect”: this happens when several Google accounts are signed in. Open the sheet in an incognito window, signed in only to the account you send from. See connection refused.
- The email shows a blank instead of a name: the merge field doesn’t match any column title in row 1, so check its spelling. Delete the field and insert it again with the (x) picker, and check that Source Worksheet is Mail Merge Data. See merge fields and templates.
- The test email hasn’t arrived: check the address you typed in the test form, then search that inbox for the subject, including Spam. If the email is in your Gmail Sent folder but never arrived, Gmail may have returned a bounce message. See returned emails.
- Fewer than three emails were sent: look at the Mail Merge Status column. Rows that already had a status, rows that are hidden or filtered out, and rows with a Scheduled Date are not sent right away. Clear the status cell to send a row again. The status column guide explains each value. If the log mentions a limit, see daily email quota.
Last reviewed: November 19, 2026.