How to Schedule Emails with Mail Merge and Send Later
Mail Merge includes a built-in email scheduler to help you send campaigns at a later date and time automatically. You can also specify the send time for individual emails in a campaign and they'll be sent as per schedule.
Choose Send Timezone
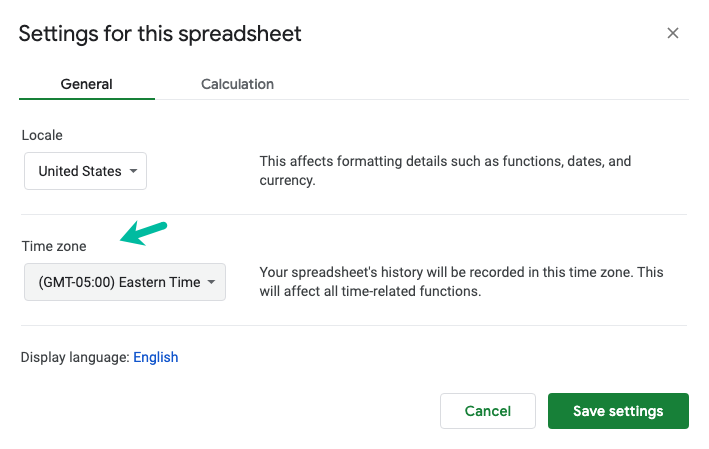
The email scheduler uses the timezone of your Mail Merge sheet to send email. Open the Google Sheet, go to the File Menu and choose Spreadsheet Settings. Select your timezone and save your settings.
Format Date Column
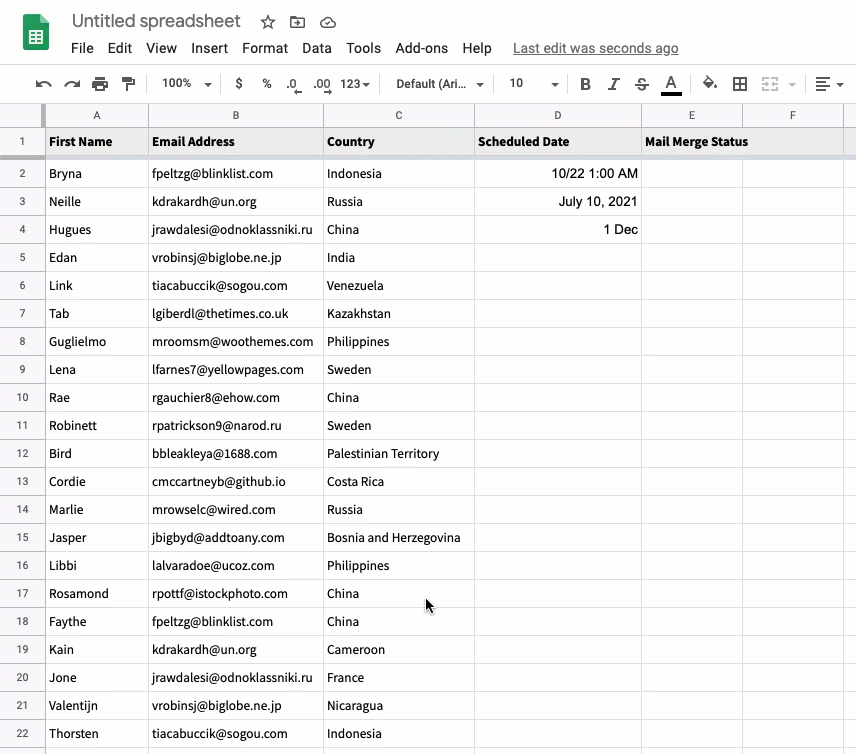
When you configure merge, it adds a Scheduled Date column in the sheet. This column specifies the date and time when the emails should be sent and it should be formatted so it displays both the date and time of schedule.
To change the column format, select the entire column, go to the Format menu, choose Number and then choose Date time.
Once the date time format has been applied to the column, you can enter dates in short format - like Aug 2 3:30 pm and they'll converted into the correct date+time format based on your locale.
Schedule Emails
You can now specify the send date and time in the Scheduled Date column for emails that should be sent later. It is also possible to send some emails immediately when merge is run and others can be scheduled.
When you run merge, the Mail Merge Status column of the scheduled email will be updated to reflect the number of hours or days between the current time and the scheduled date.
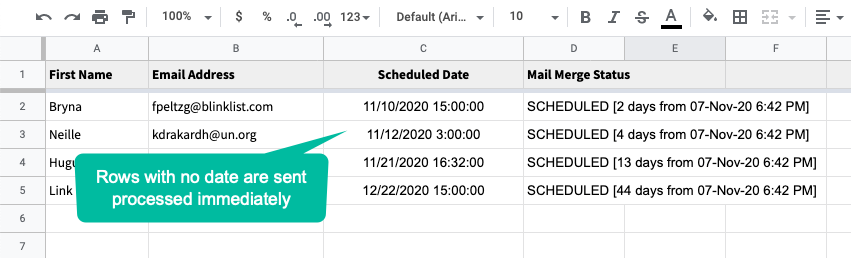
If the schedule date cell is empty for a row, the email recipient in that row is sent the email immediately when merge is run.
Change Send Date and Time
If you would like to update the send time of an email that is already in the schedule queue, just change the date and time for that row in the Scheduled Date column.
When the scheduler job runs next time, it will set the schedule for that row as per the modified time.
Unschedule Emails
There are two ways to unschedule emails:
- Remove the date in the corresponding Scheduled Date column.
- Delete the entire row from the spreadsheet.
If you would like to unschedule all emails, go to the Mail Merge menu, choose Mail Merge Help and select the Cancel Scheduled Emails option.
Things to Know
- The scheduler runs on Google servers and it will work even if your Google Sheet is not open in your browser.
- The email scheduler is not accurate by the minute and the emails may be sent anywhere between +/-30 minutes of the scheduled time.
- The scheduler can send a maximum of 50-100 emails per hour. If you have scheduled, say, 200 emails to be sent at a particular hour, they'll be sent gradually in 2 or 3 batches with a gap of one hour per batch.
Troubleshooting
- If the emails are not sending, please ensure that you have enough email quota left for the day.
- If the scheduler is not running in the background, go to the Mail Merge Help menu and choose the
Restart Scheduleroption. - If the campaigns are not sending, ensure that the Gmail draft you've used as a template exists in Gmail.