Email Notifications for Google Forms - Getting Started Guide
With Google Forms notifications, you can send automatic email notifications to one or more recipients as soon as the respondent submits your Google Form. You can also create multiple email templates and send different emails to different people based on the form answers.
Create Email Notifications
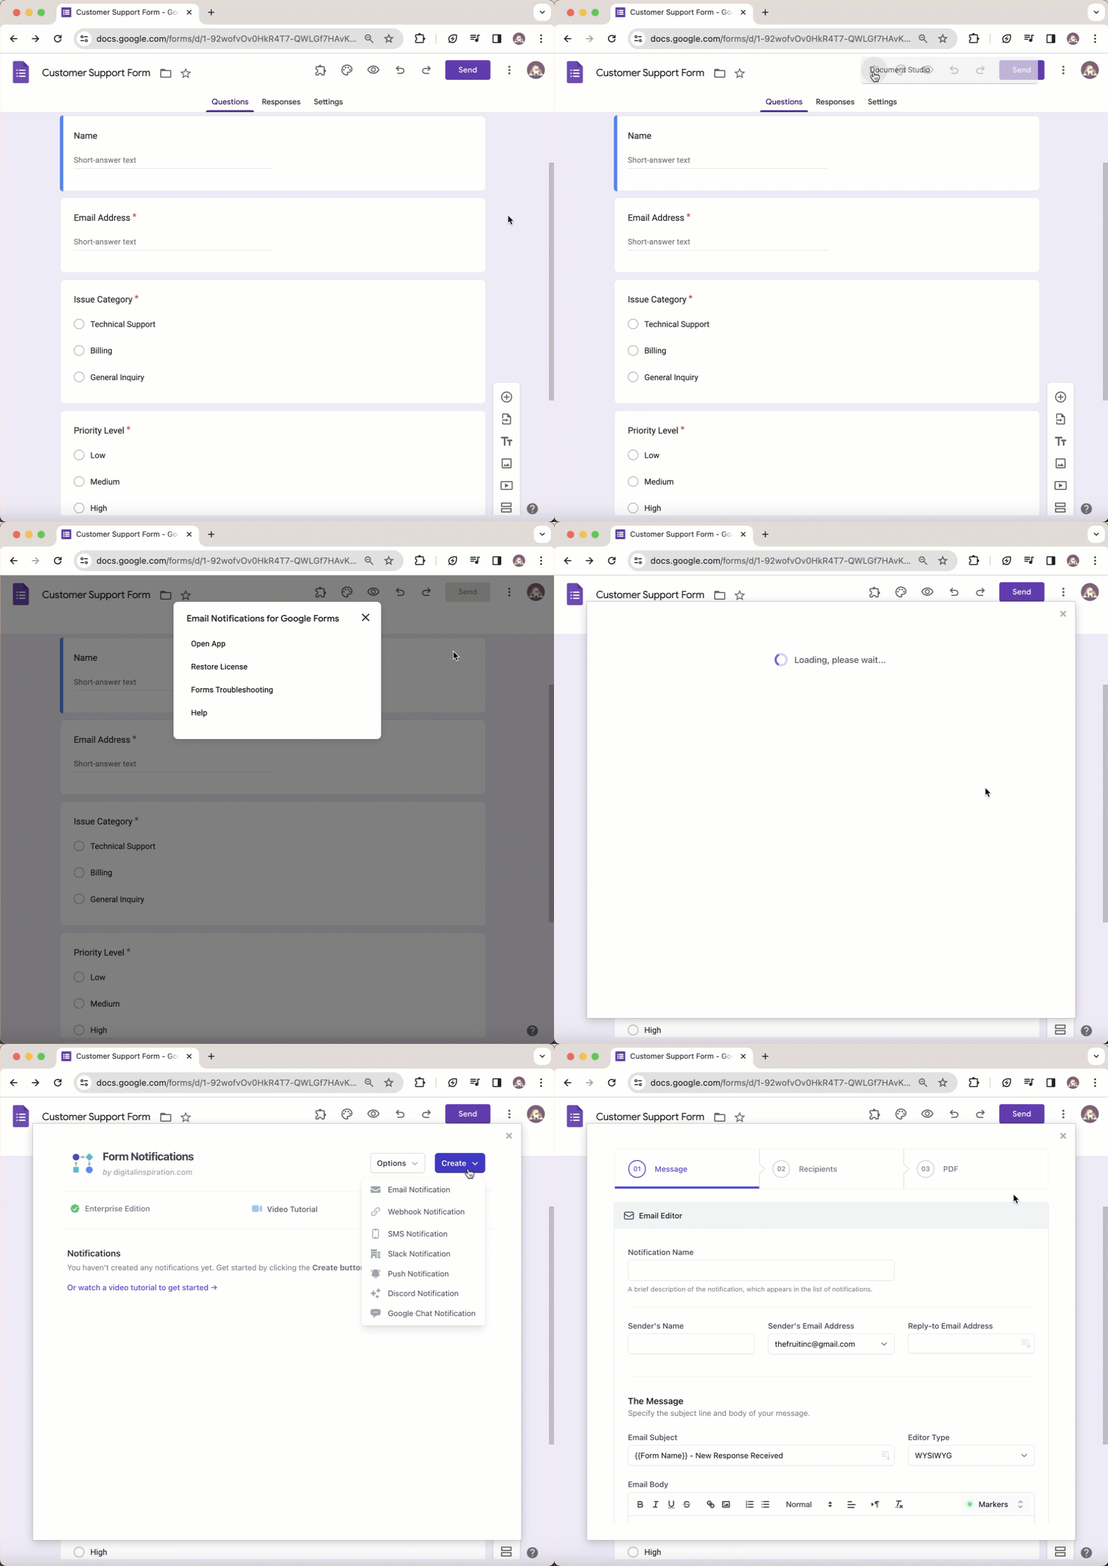
Open your Google Form and launch the Email Notifications add-on. Here we have created a Google form for capturing support requests from customers.
Once the add-on is launched, click on the Create button and select Email Notification from the dropdown list. This will open the step-by-step wizard to set up a workflow to send emails whenever a new form response is received.

Build Email Notification
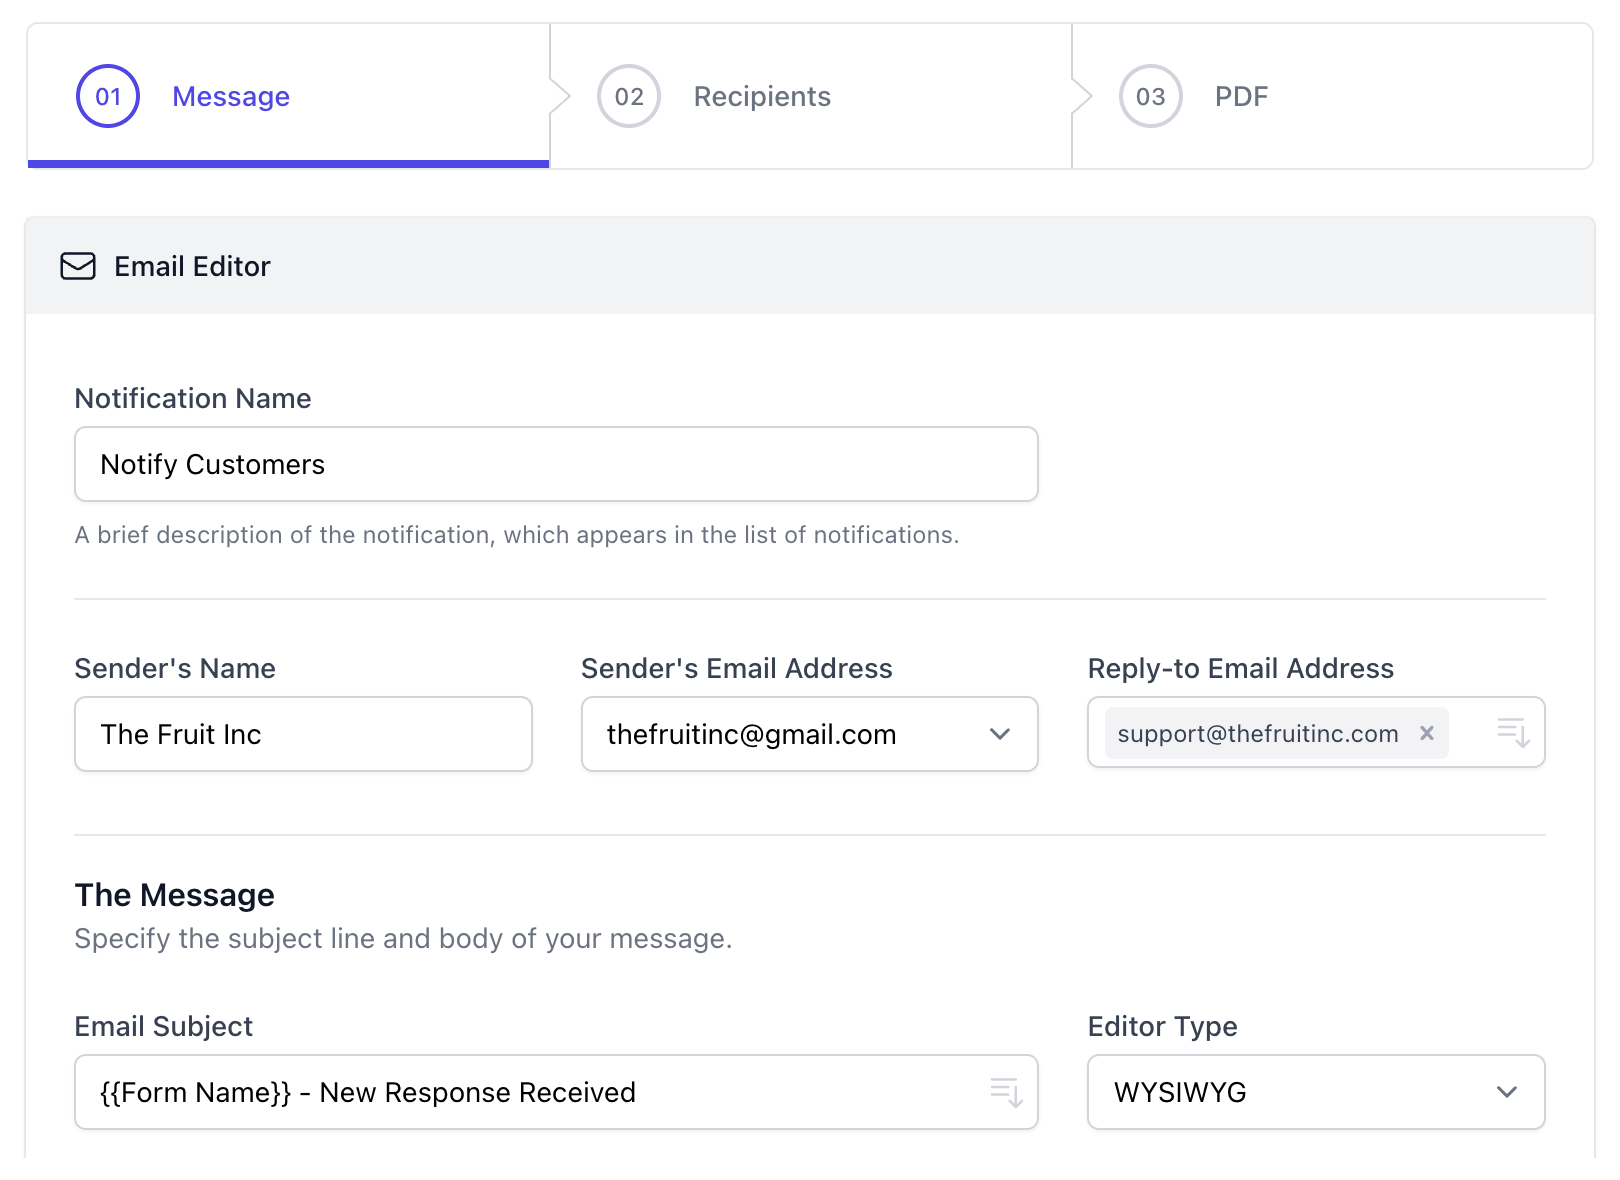
The first step is to frame the message that you want to be sent to the email recipients. The following fields are required to be filled in this step:
1. Notification Name: Give this notification a name, which will be used internally to help identify the workflow, in case you have multiple notifications associated with the same Google Form.
2. Sender’s Name: This is the name that will show in the From field of your outgoing email messages sent through the Google Form.
3. Sender’s Email: You can send email notifications on behalf of any email address that is connected as an alias to your primary Google account.
4. Reply-to Email Address: This is the email address where the email replies will arrive when the recipient chooses to reply, or reply-all, to your email notification.

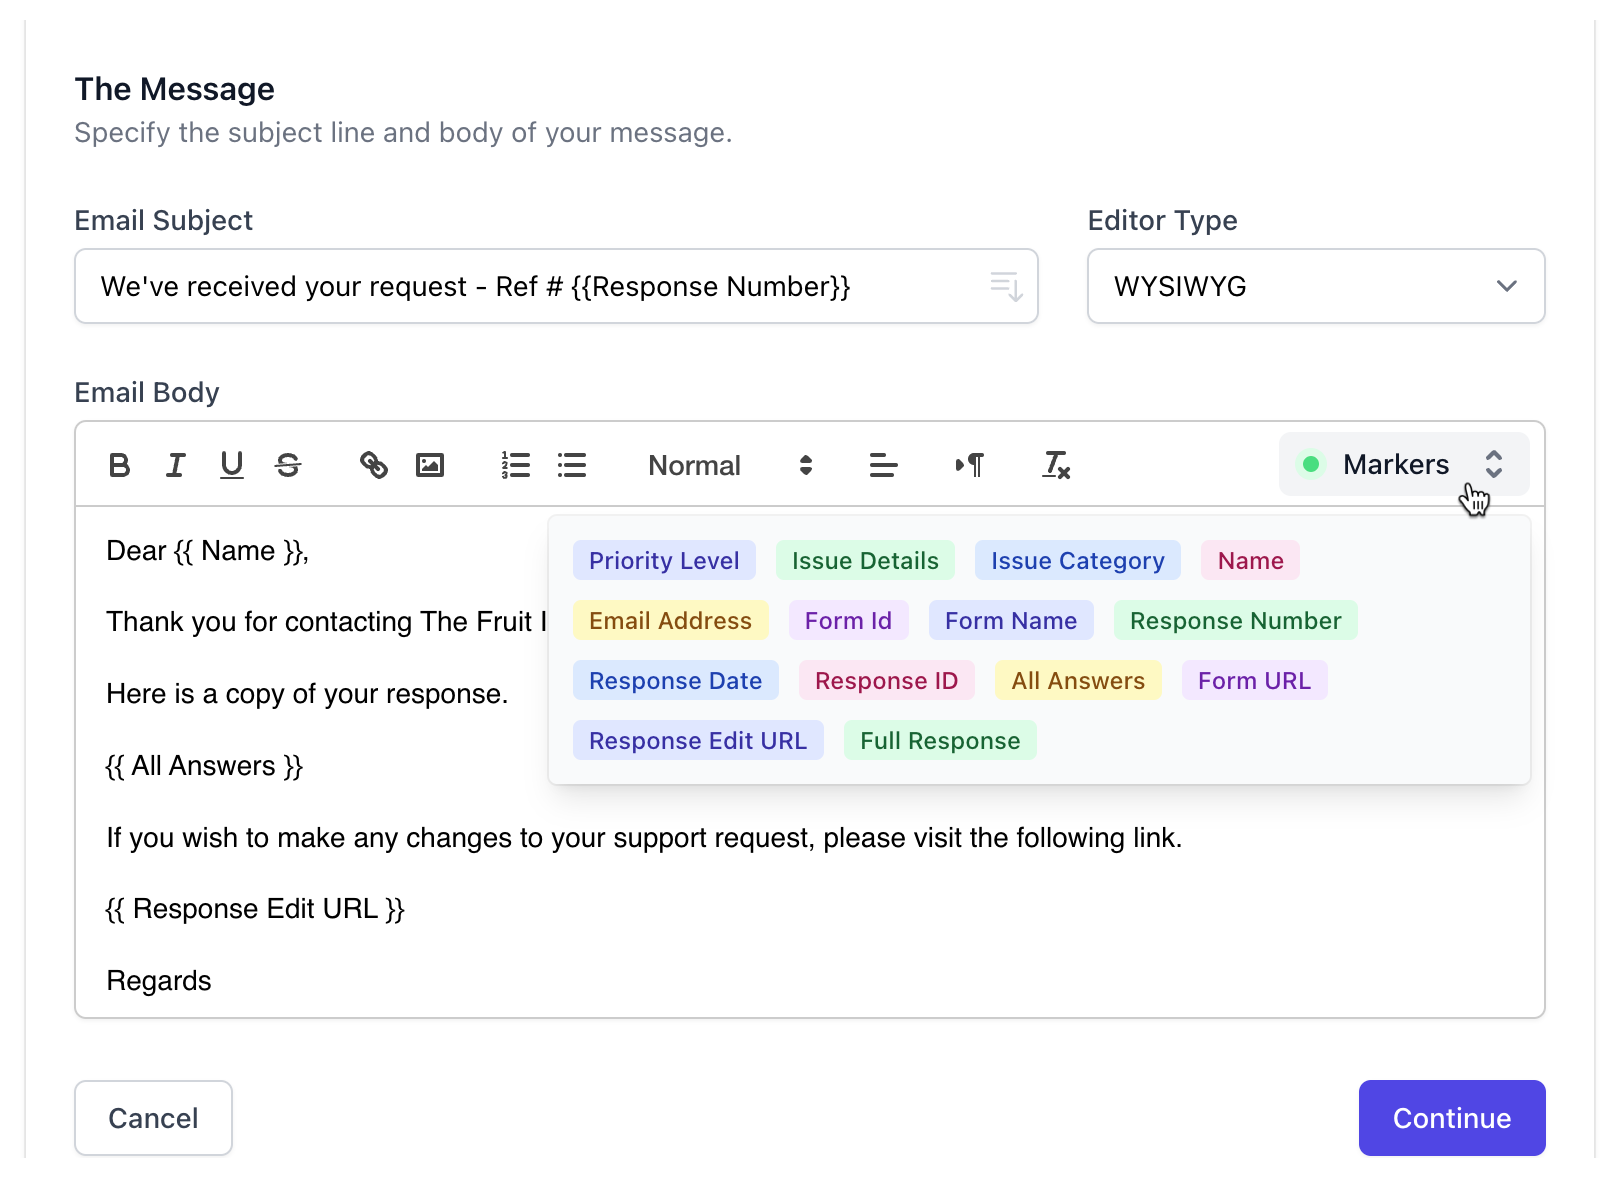
The next step is to specify the email subject line and message body. You may use the default values, or enter everything from scratch. You may use markers from the dropdown list, which will be replaced with actual values as filled by the respondent in the Google form.

The {{All Answers}} is a special marker that will be replaced with a neatly formatted table containing all the answers that the user has entered into the form.
If your Google Form settings allow respondents to edit their responses, you can use the {{Response Edit URL}} marker to include a link in the email body that will allow them to edit their responses.
Now that the email has been framed, the next step is to specify the email recipients.